What is UBC Peer Instruction Tool?
Contents
What is UBC Peer Instruction Tool?#
The Peer Instruction learning system provides learners with in class opportunities to discuss questions and arrive at a deeper understanding of concepts. The UBC Peer Instruction Tool emulates this classroom experience for the learners in an online course.
When utilizing the UBC Peer Instruction Tool to complete an assignment, learners go through the following steps:
Submit an answer: Learners choose an answer and provide a justification in support of their selected response.
Reflect on other learner’s answers: Learners assess the answers and explanations provided by their peers, and subsequently determine whether to alter their own response based on this feedback.
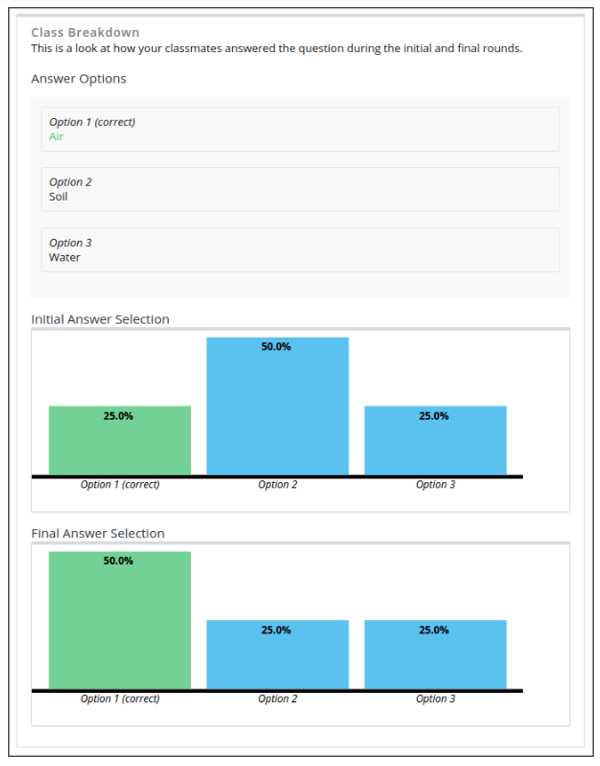
Evaluate results: Learners view the graphical representation of their peers’ answers.
What are the benefits of using UBC Peer Instruction Tool?#
Enables learners to engage in active learning by requiring explanations for their chosen answers.
During the review phase, learners are presented with various perspectives and approaches.
The instructor has the option to include images in a question, expanding the range of possible question formats.
Learners are presented feedback including their own answer, the model instructor answer and class distribution statistics across both stages.
The Instructor is able to see class statistics on demand at any given time in process.
How to implement UBC Peer Instruction Tool?#
- Step 1:
Design the assignment prior to utilizing the UBC Peer Instruction Tool in Studio. Prepare the assignment question and its answer choices in the same way that you would for classroom students. The question and the answer choices can include text, images, or both. For more information on this step, please refer to this article.
Note
You might consider including a text component before the Peer Instruction component to describe the workflow that learners will experience in this assessment type. You might also consider including a content-specific discussion component after the Peer Instruction component to give learners an opportunity to continue the conversation.
- Step 2:
Enable the UBC Peer Instruction Tool in Studio. Remember, you can access Studio through the link in your ECC account or by going to studio.edunext.co and signing in with your email and password.
- Step 3:
Open the course where you will add the the UBC Peer Instruction Tool.
- Step 4:
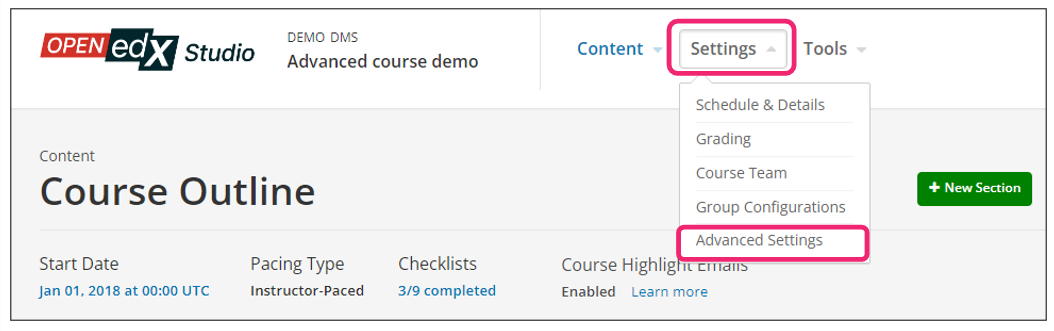
Click on the Settings tab and select the Advanced Settings option.
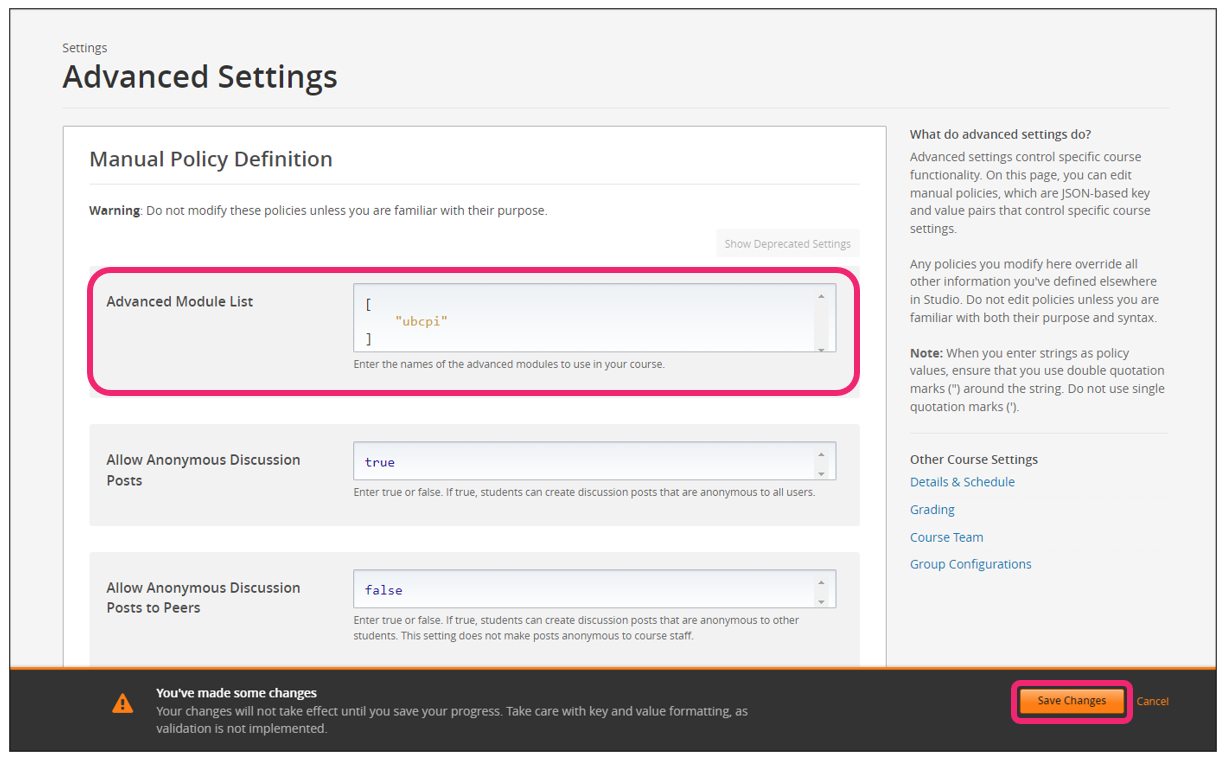
- Step 5:
In the section Advanced Module List, add
ubcpibetween the square brackets.[ "ubcpi" ]
Note
Add the XBlock command with an indented space without any space before or after quotation marks, as shown in the example above, to avoid execution errors.
- Step 6:
At the bottom of the screen, click on Save Changes.
- Step 7:
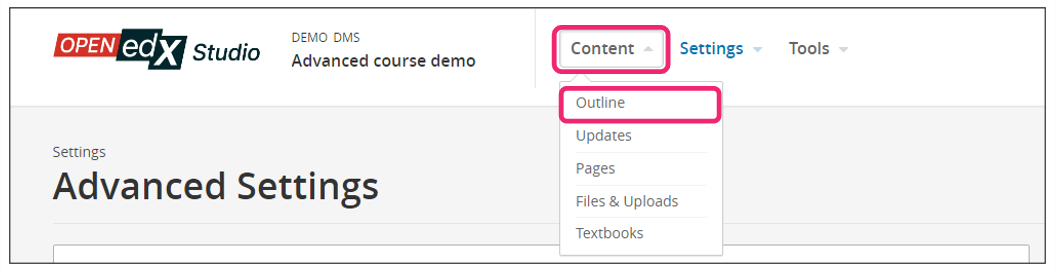
After this, the XBlock should be available, so click the Content tab and select the Outline option to get back to the course content.
- Step 8:
Under Outline, go to the section, then the subsection, and finally to the unit or page where you want to add the UBC Peer Instruction Tool.
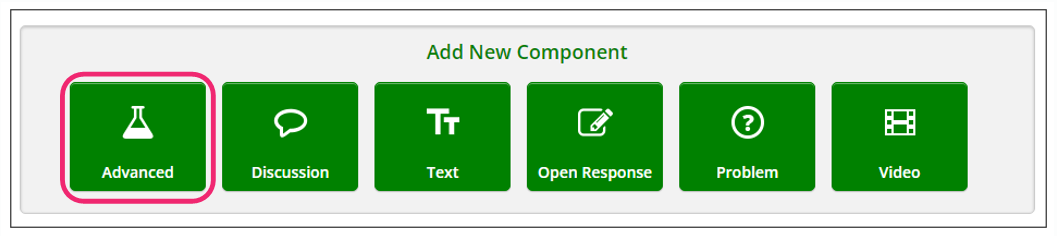
- Step 9:
Once you are there, click Advanced Component in the Add New Component bar.
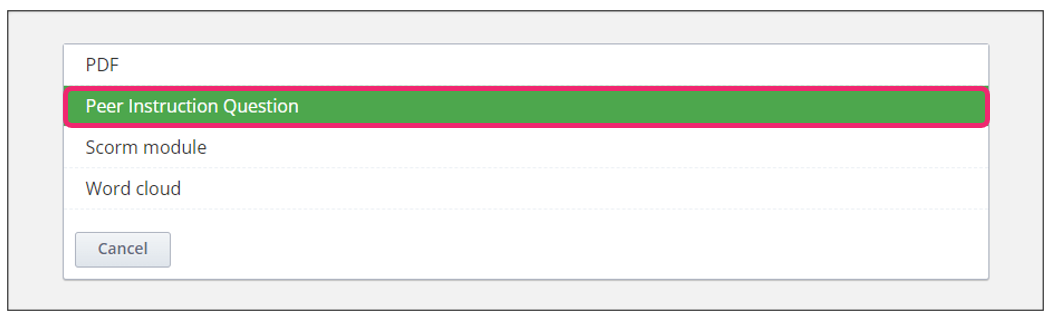
- Step 10:
You will see a list of all the advanced components added to your course. Click on Peer Instruction Question. The system will add the component immediately to the unit.
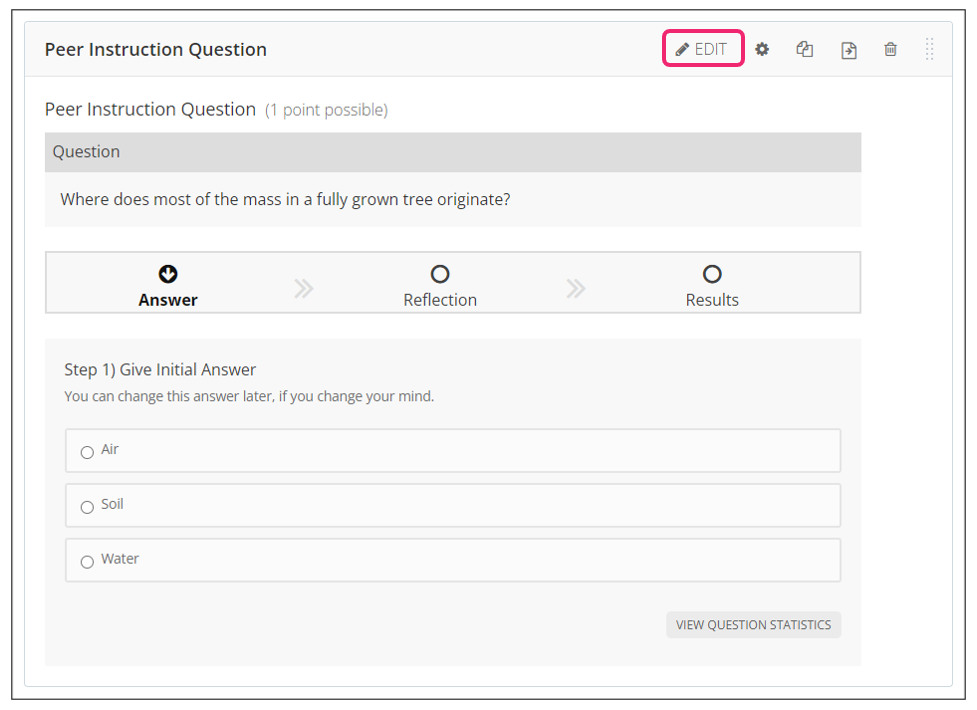
- Step 11:
Click the Edit button on the upper right corner of the new component to edit the component details.
- Step 12:
The editor window is going to open. Here you will find several options to set up the UBC Peer Instruction Tool as needed and add the assignment details. Please visit the official edX documenation for more details on this step.
Note
If the question or an answer choice in an assignment includes an image, you must upload the image file on the Files & Uploads page. The Studio URL for the image can then be added to the question or answer choice in the Peer Instruction component.
- Step 13:
Finish the configuration of the component and click on the Save button.
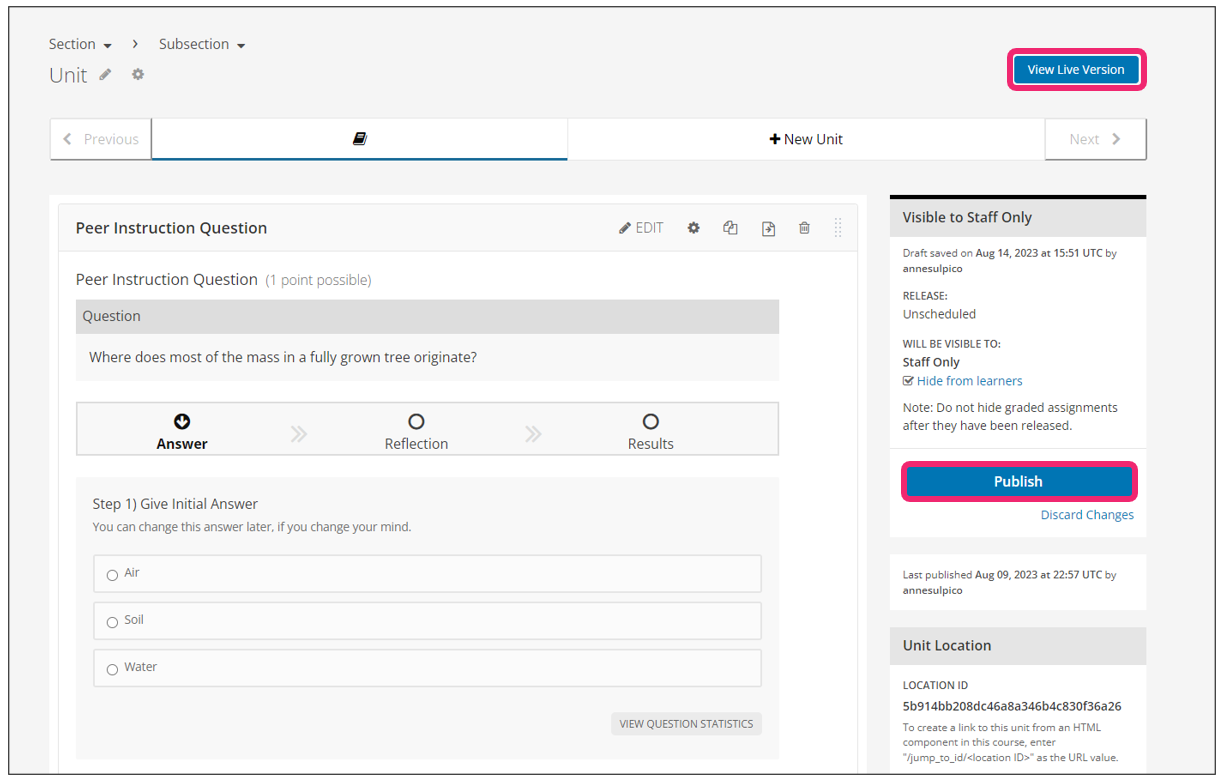
- Step 14:
Publish the unit and check how your new component looks on its final version by clicking the View Live Version button.
- Step 15:
Review a histogram of learner responses. Please see visual example below. For more information, please see this document.