How to Configure the New Simple E-commerce Solution Service to Sell Open edX Courses with Stripe
Contents
How to Configure the New Simple E-commerce Solution Service to Sell Open edX Courses with Stripe#
This document guides you on how to configure the new simple e-commerce solution service to process payments remotely in Open edX courses with Stripe.
Prerequisite
During the configuration of the Stripe process, you will be asked to enter a Webhook URL. You will need to request the webhook URL from the Edunext support team. We recommend that you gather this information before initiating the process to create the Product in your Stripe dashboard account, as this will accelerate the process.
Configure Stripe to Activate Simple E-commerce Solution Service#
Note
Please note that the instructions in this section should only be done for each course that you want to configure Stripe button payment.
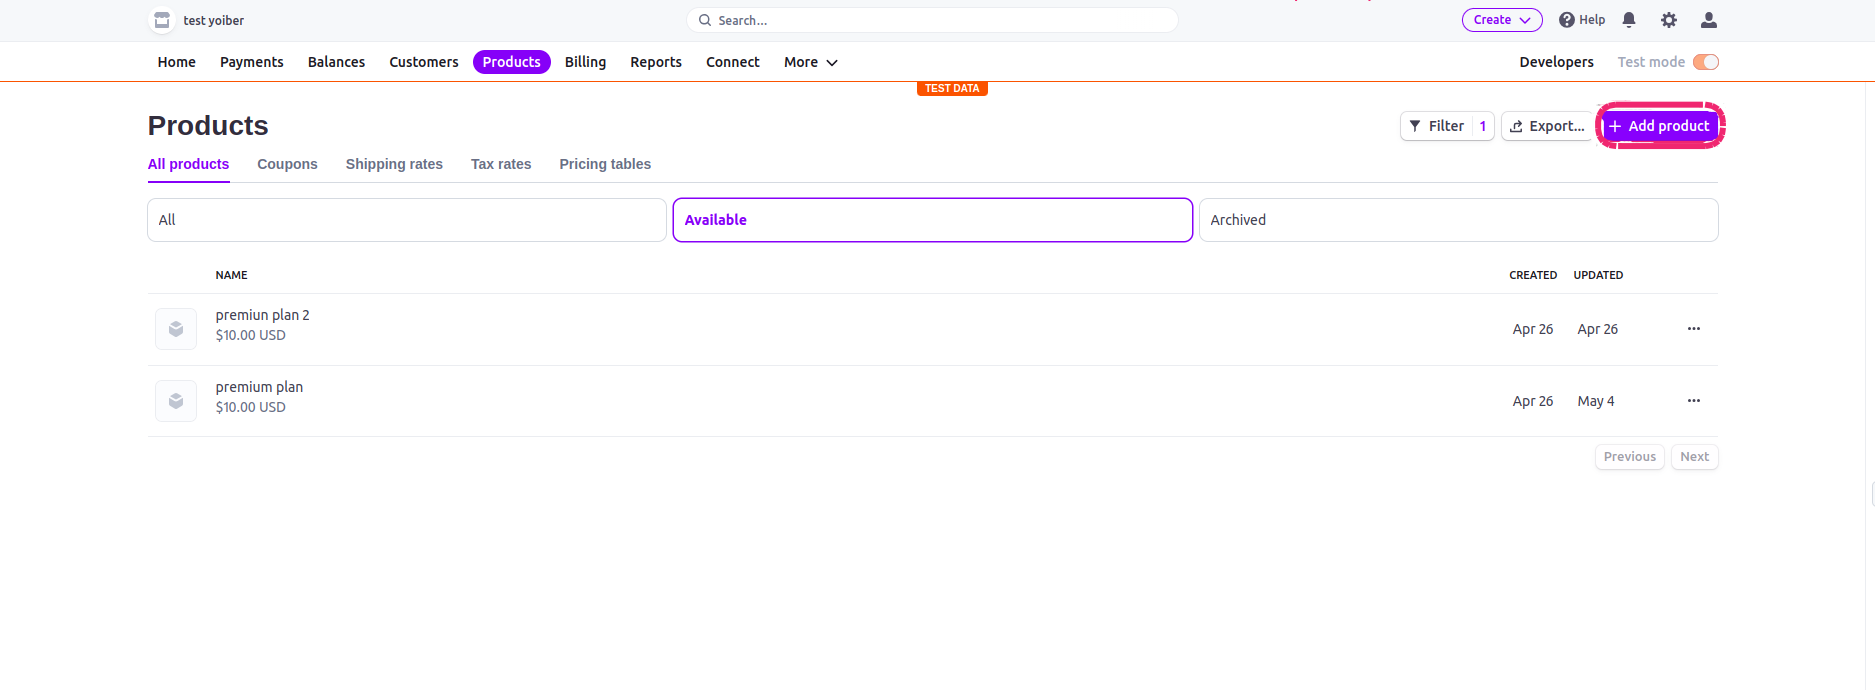
Step 1:
To get started, go to https://dashboard.stripe.com/test/products and log in using your Stripe service credentials. Then click on the button Add Product.

Note
To use applications and credentials in Live mode, you must to activate your Stripe account.
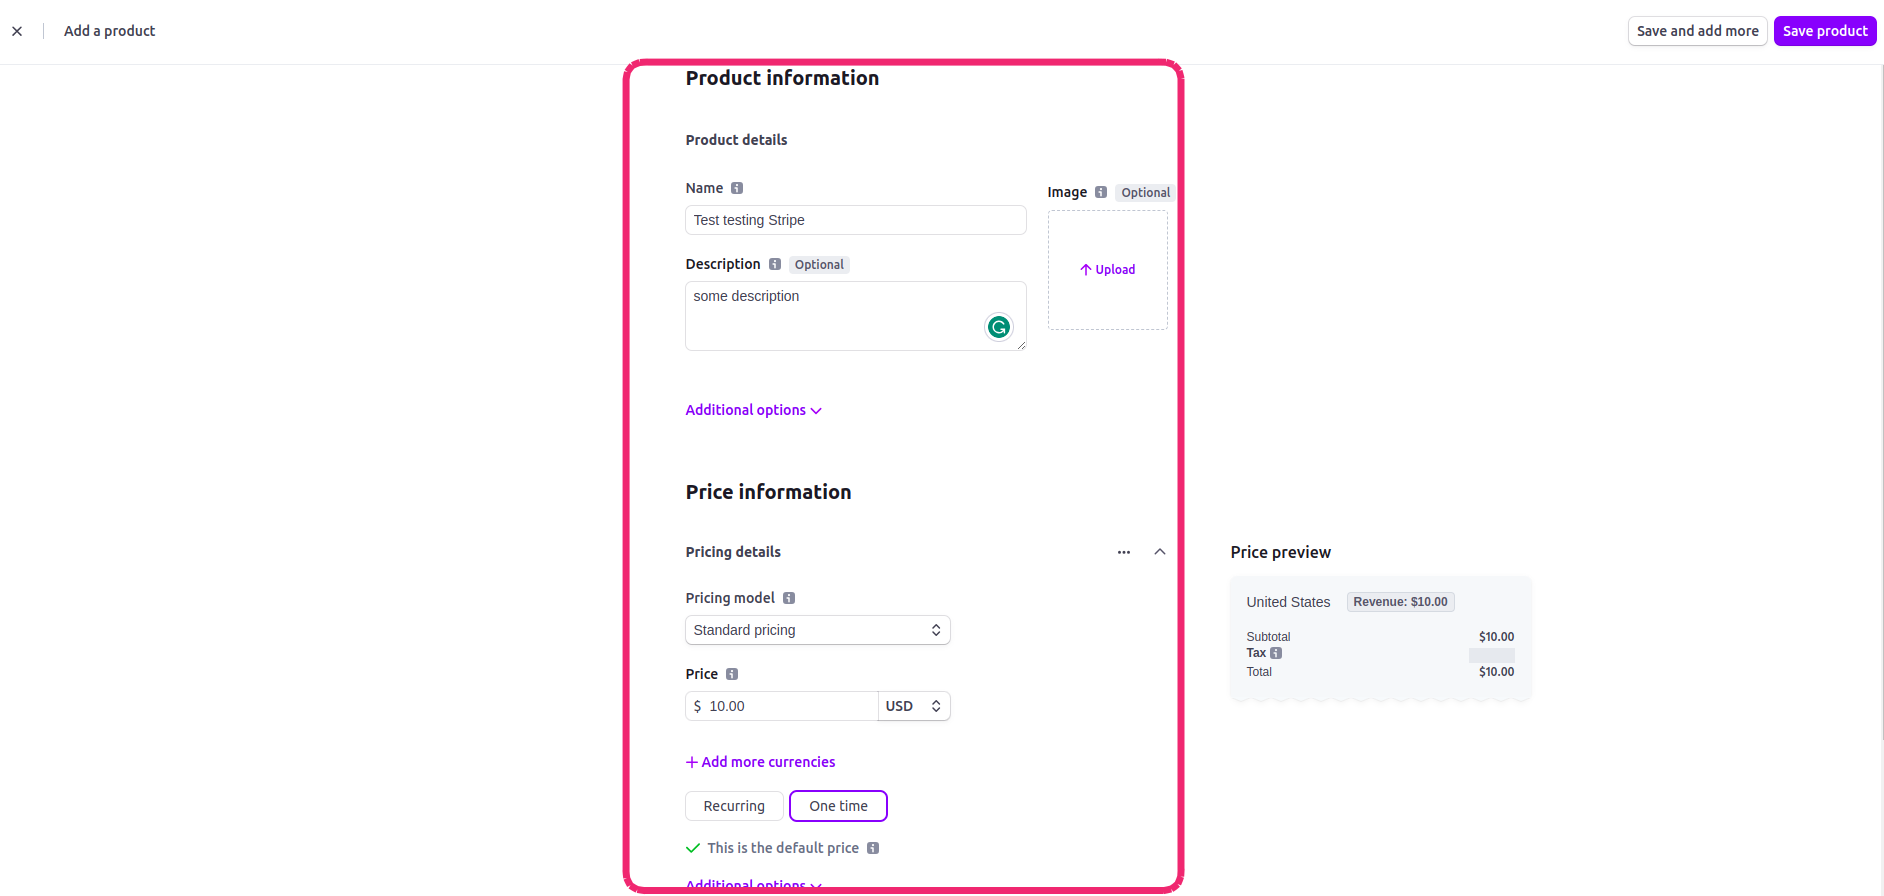
Step 2:
You will need to choose a name for your product, some description (It’s not mandatory), pricing Model choose Standard Pricing, then choose a value price for your course, in this case, we have selected 10 dollars. Finally select the option One time if your course should only be charged one time, otherwise if it is a recurring charge choose the option Recurring. Once you finish the configurations, click on Save product
Note
This the basic configuration to create this product and you could explore the other options. Keep in mind that you can choose other types of currencies.
Step 3:
You will see the details of the product recently created.

Scroll down to the Pricing options.

Then click on Create Payment link.

Step 4:
Once the Create Payment link was clicked, you will see the option to edit this button.
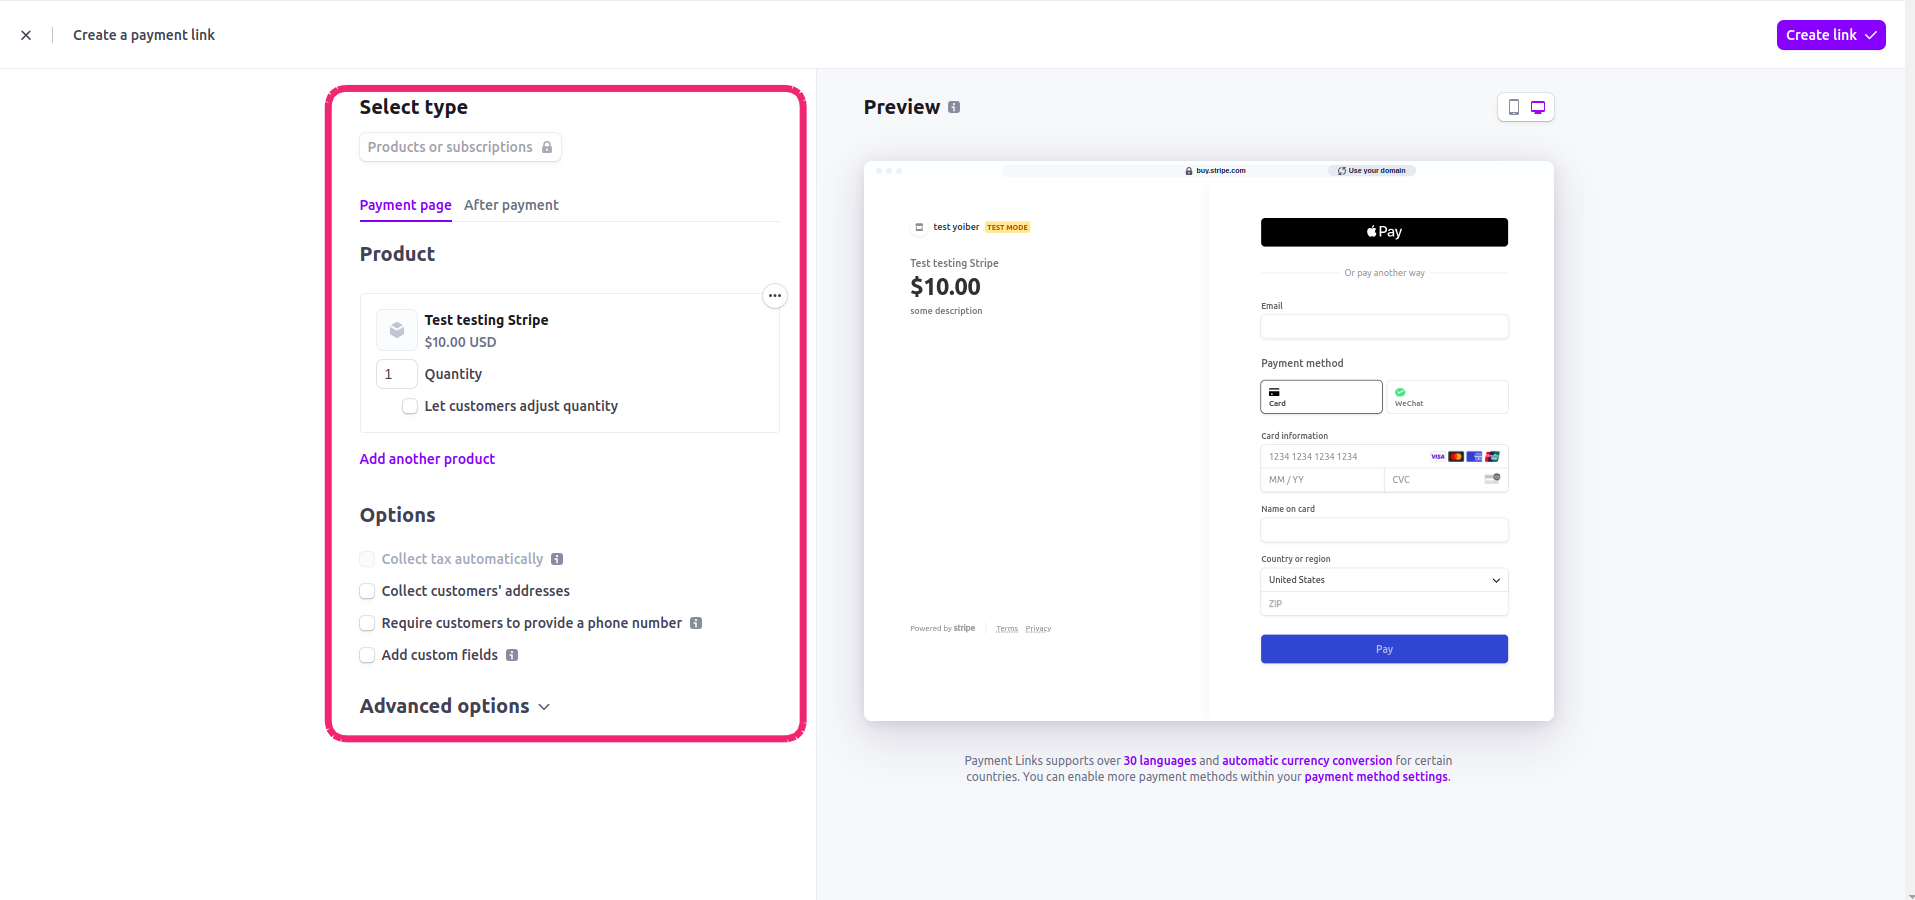
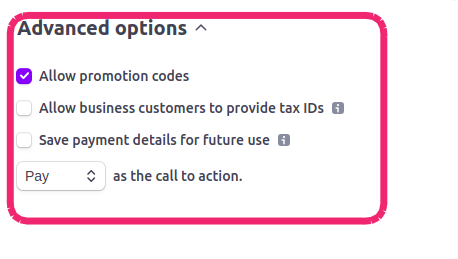
If you want to use promotion codes for this course click on Advanced Options, then check Allow promotion codes
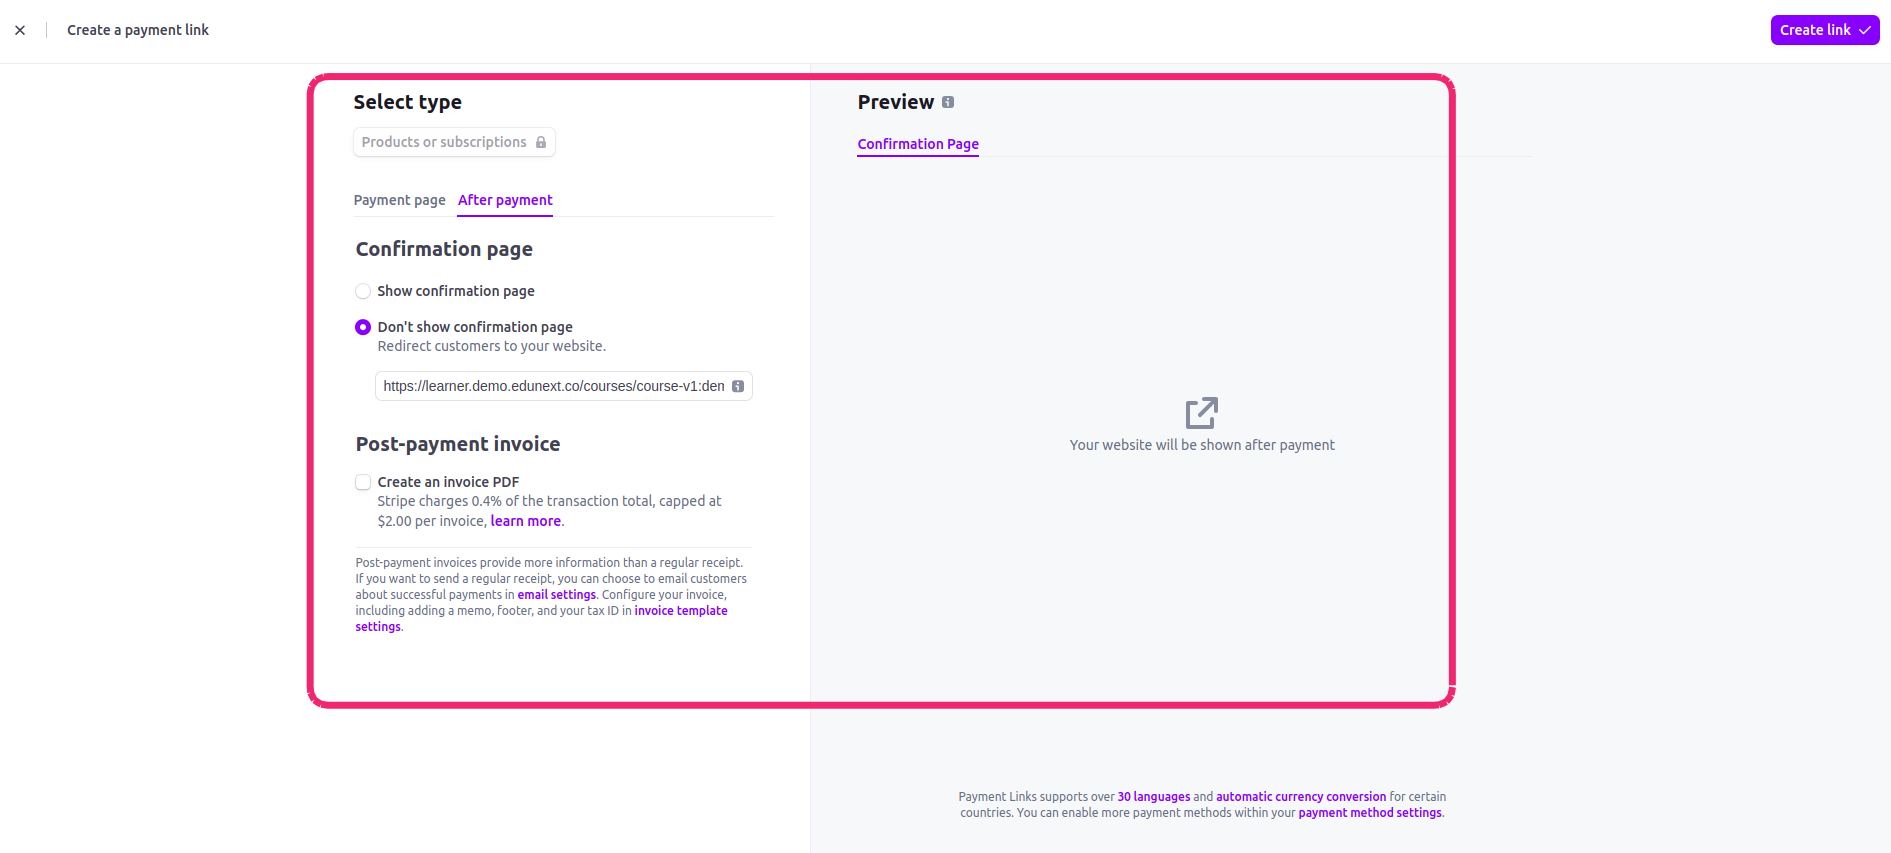
Step 5:
Click on After payment.
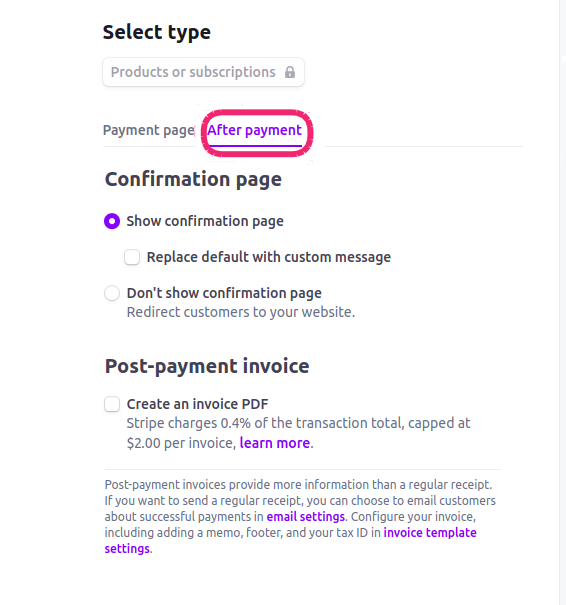
Step 6:
Then click on Don’t show confirmation page to redirect the client to the About Page course when the payment is confirmed.
Step 7:
In the field paste the URL of the About Page of the course that will use Stripe button. Look at the image of example.
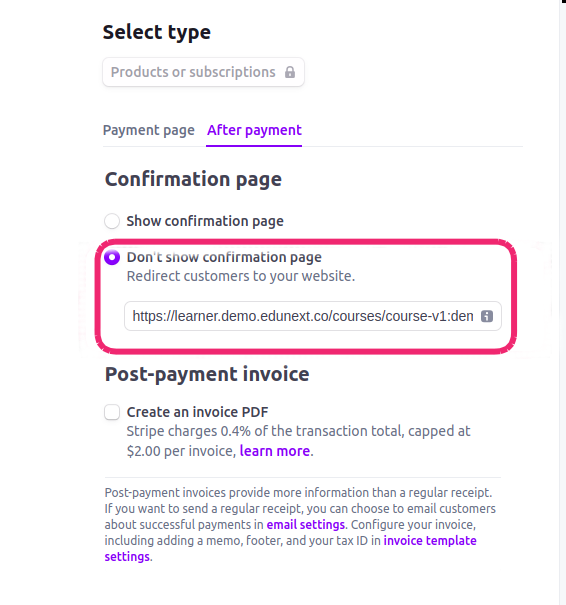
And finally click on Create link
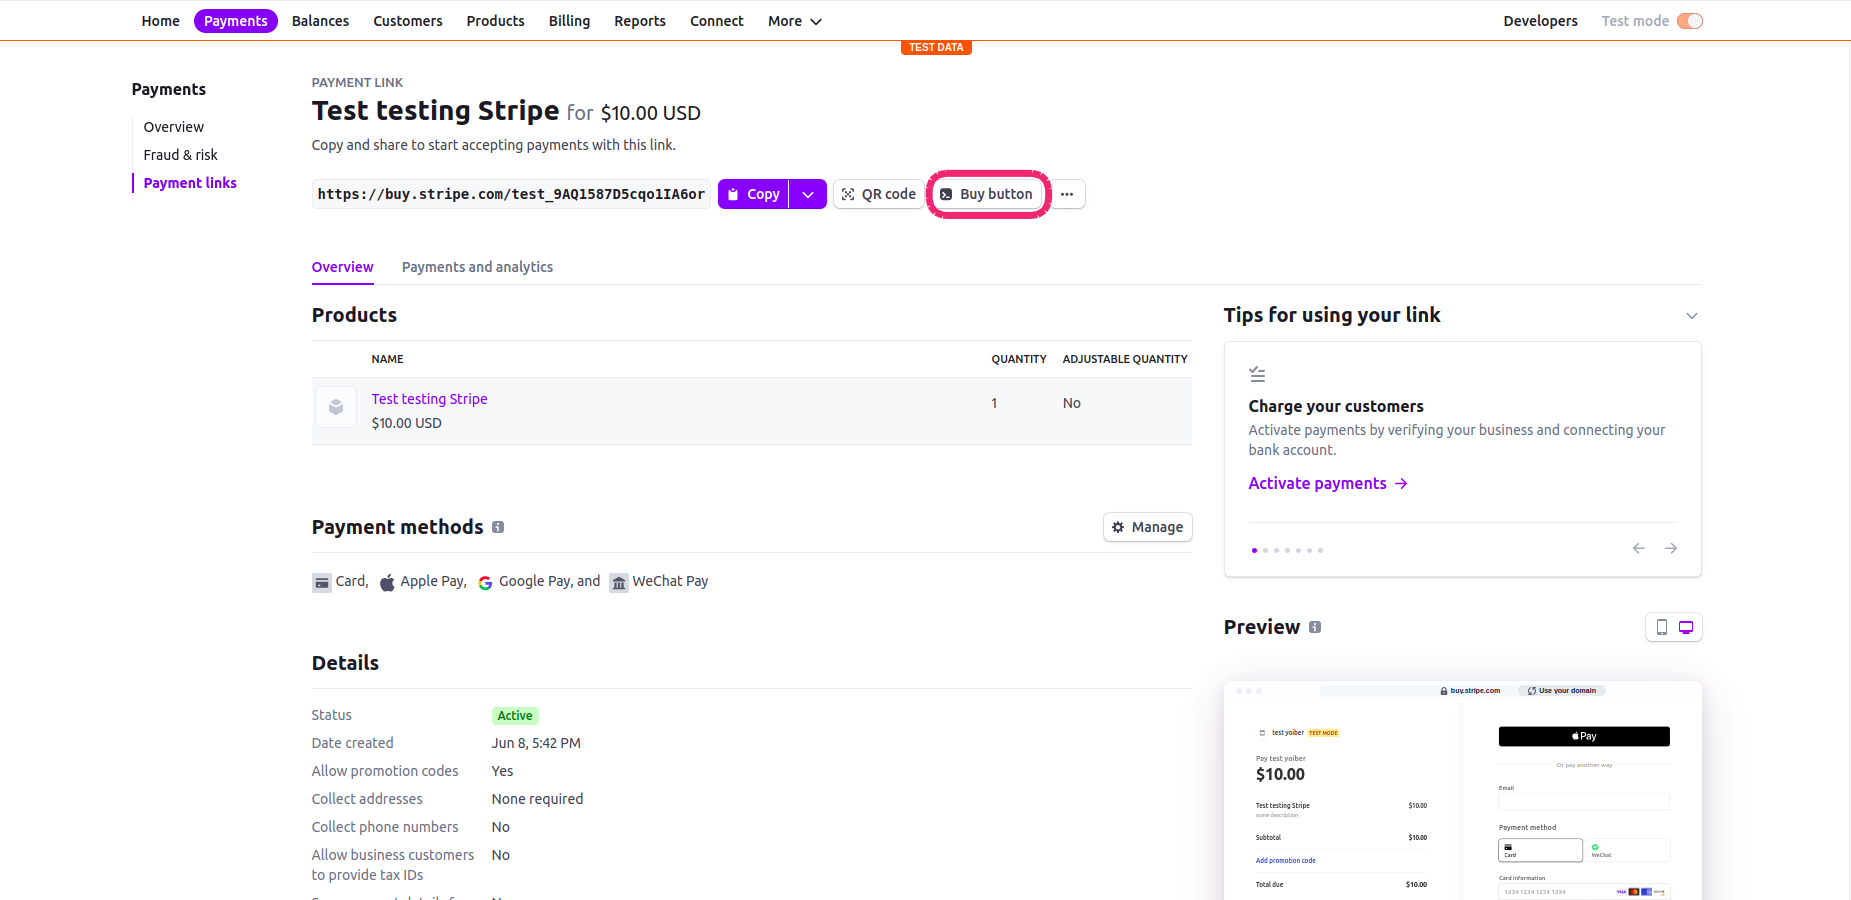
Step 8:
Once the payment was created, you will see this window with their options.

Step 9:
Click on +Buy button.
Step 10:
You will see these options, go to CONFIGURE choose Button, choose your language. If you want to change the text of the button, check Change button text, and if you want to change the styles of the button, check Change styling options.
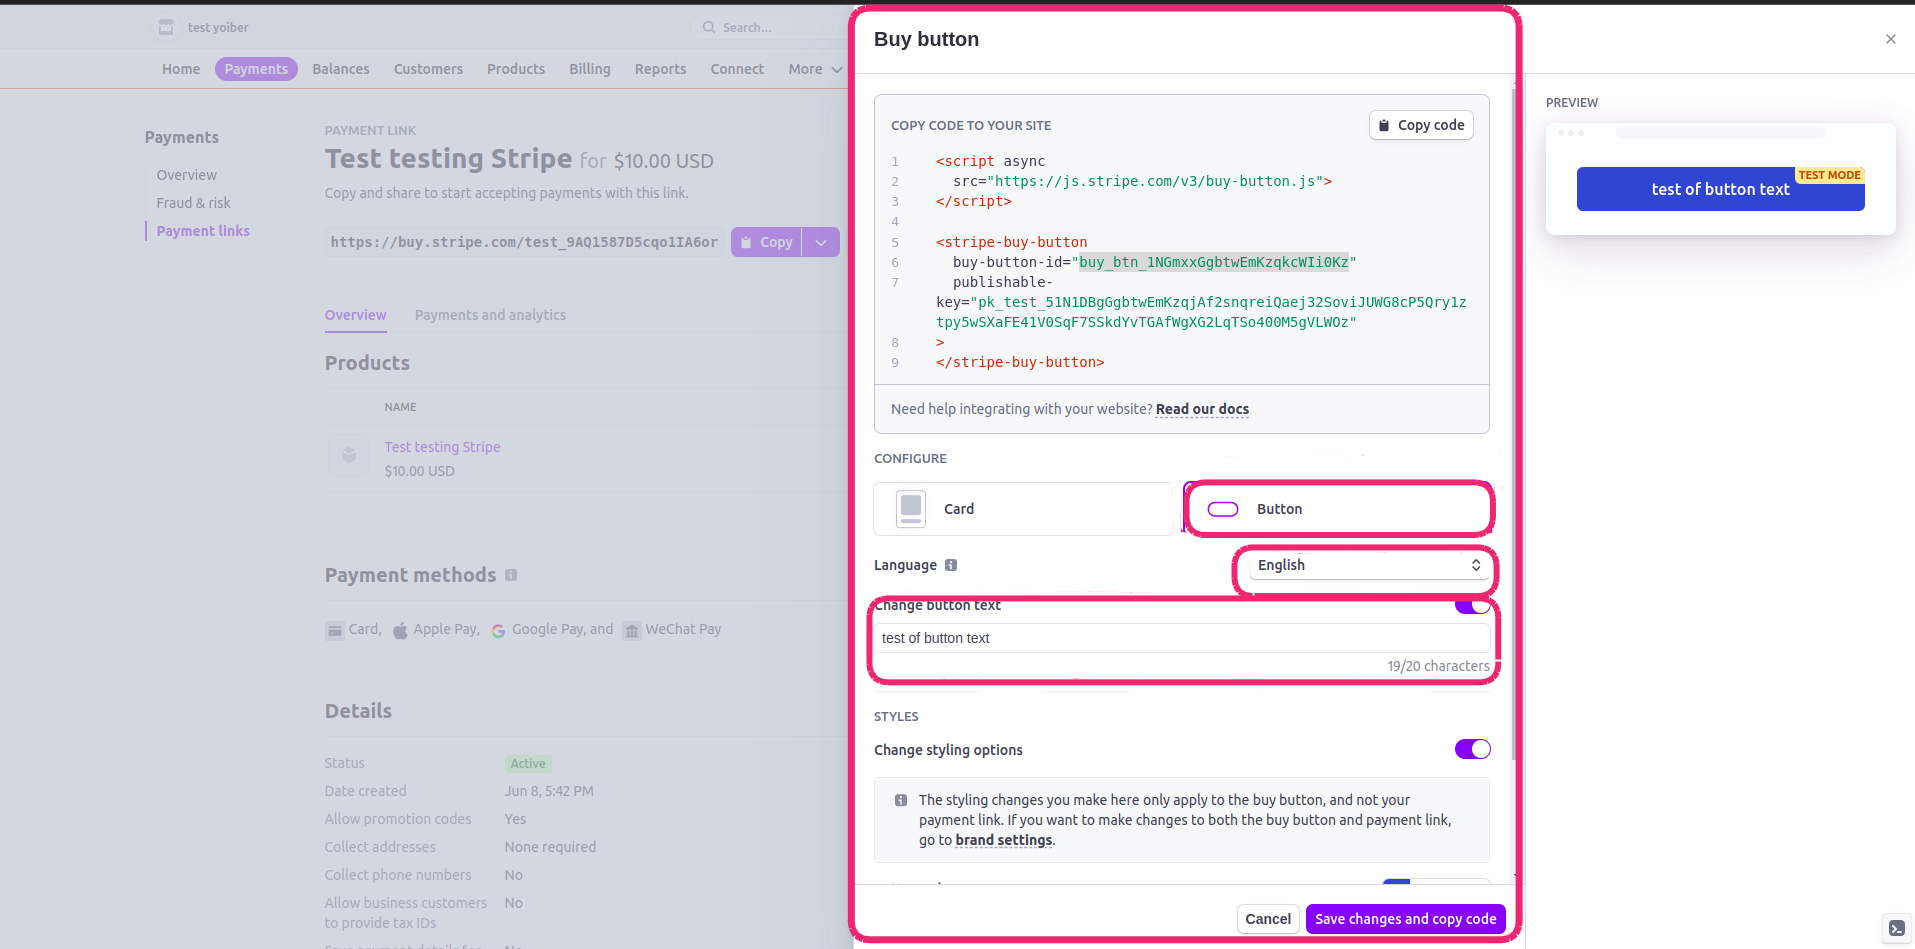
Step 11:
Click on Save changes and copy code, then you will get a code like this.
<stripe-buy-button
  buy-button-id="buy_btn_1NGmxxGgbtwEmKzqkcWIi0Kz"
  publishable-key="pk_test_51N1DBgGgbtwEmKzqjAf2snqreiQaej32SoviJUWG8cP5Qry1ztpy5wSXaFE41V0SqF7SSkdYvTGAfWgXG2LqTSo400M5gVLWOz"
>
</stripe-buy-button>
Step 12:
Copy the buy button id in this case buy_btn_1NGmxxGgbtwEmKzqkcWIi0Kz and copy
the publishable key in this case pk_test_51N1DBgGgbtwEmKzqjAf2snqreiQaej32SoviJUWG8cP5Qry1ztpy5wSXaFE41V0SqF7SSkdYvTGAfWgXG2LqTSo400M5gVLWOz
you will need this info in the next steps.
Configure Payment button on the course#
Step 13:
Next, go to your STUDIO account and select the course where you want to add the payment method. Within the course, go to the header menu, select the Settings dropdown, then choose Schedule & Details. Scroll down until you reach the Course Overview section.
course overview section#
Step 14:
In the Course Overview section, you will see several lines of code. In the last line of code, copy and paste the following code.
<script src="https://edunextpublic.s3.us-west-2.amazonaws.com/edxsites/clisite/e-commerce-stripe_v1.js" currency_code="your_currency_code" buy-button-id="your_buy_button_id" publishable-key="your_publishable_key"></script>
Step 15:
To proceed, you need to add the following details to your code:
Your buy button ID, which can be found in the product you created on Stripe (Step #12). Add the buy button ID in quotes after the buy-button-id variable.
Your Publishable Key, which can be found in the product you created on Stripe (Step #12). Add the buy Publishable Key in quotes after the publishable-key variable.
Once you add these details, your code will be ready to go.
Note
This button works together with the paypal button, note that you can leave out the information for the Stripe button and just leave the Paypal button, also note that the price of the variable course_price is only for the Paypal configurations.
<script src="https://edunextpublic.s3.us-west-2.amazonaws.com/edxsites/clisite/e-commerce_v1.js" client_id="your_client_id" currency_code="EUR" course_price="10" buy-button-id="your_buy_button_id" publishable-key="your_publishable_key"></script>
enter details to your code in this section#
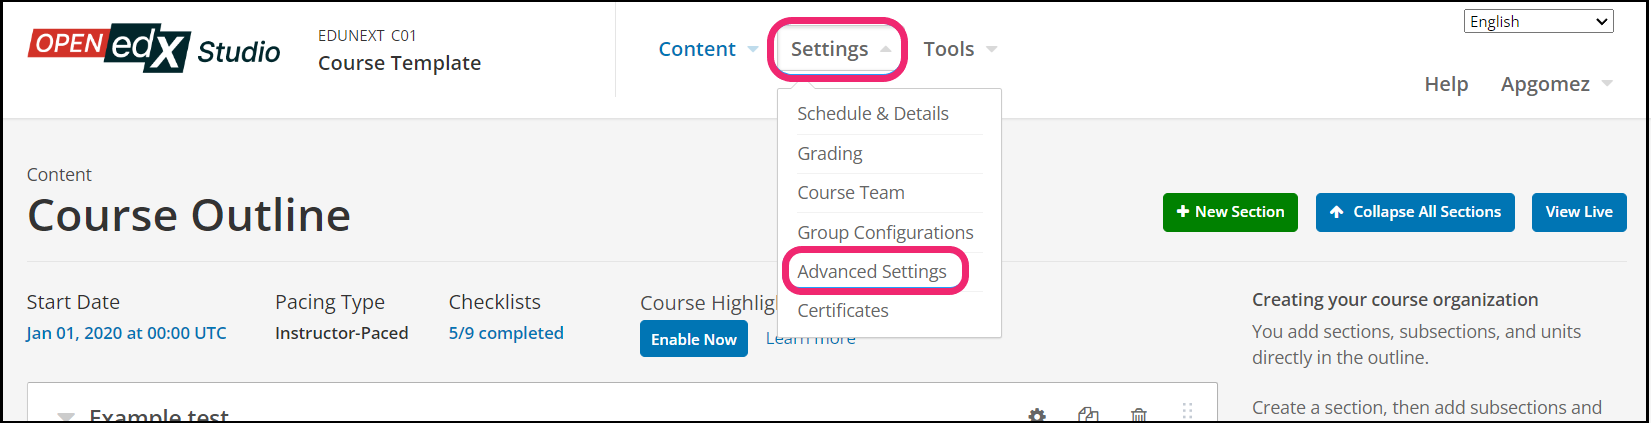
To complete the configuration, click on the Settings tab and select the Advanced Settings option.
Go to the Invitation Only section and enable it by setting it to true.

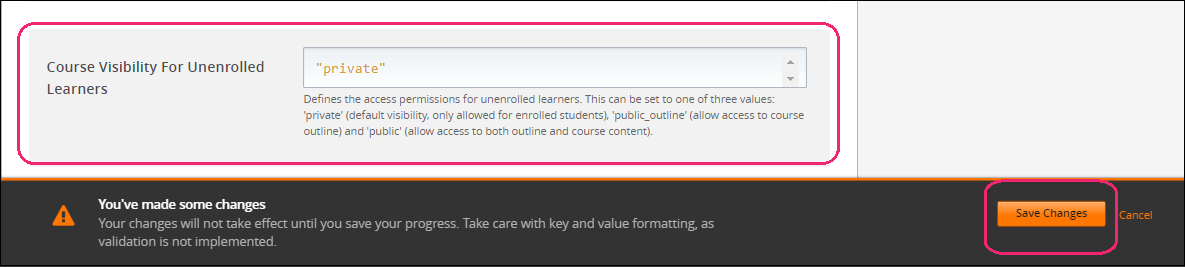
Navigate to the Course Visibility for Unenrolled Students section and set it to private. Save the changes after making these adjustments.
Configure the metadata#
Note
This steps of configurations is very important and necessary to the students enrollments works correctly.
Step 16:
Once the button is configured, scroll down until Metadata option.

Step 17:
Click on Edit metadata.

Step 18:
There are two fields, in the first field called key you could copy and paste this course_id and the value you should paste the course key of the course you setting up. Look at the example image below, the click on save.

Setting up Webhook#
Step 19:
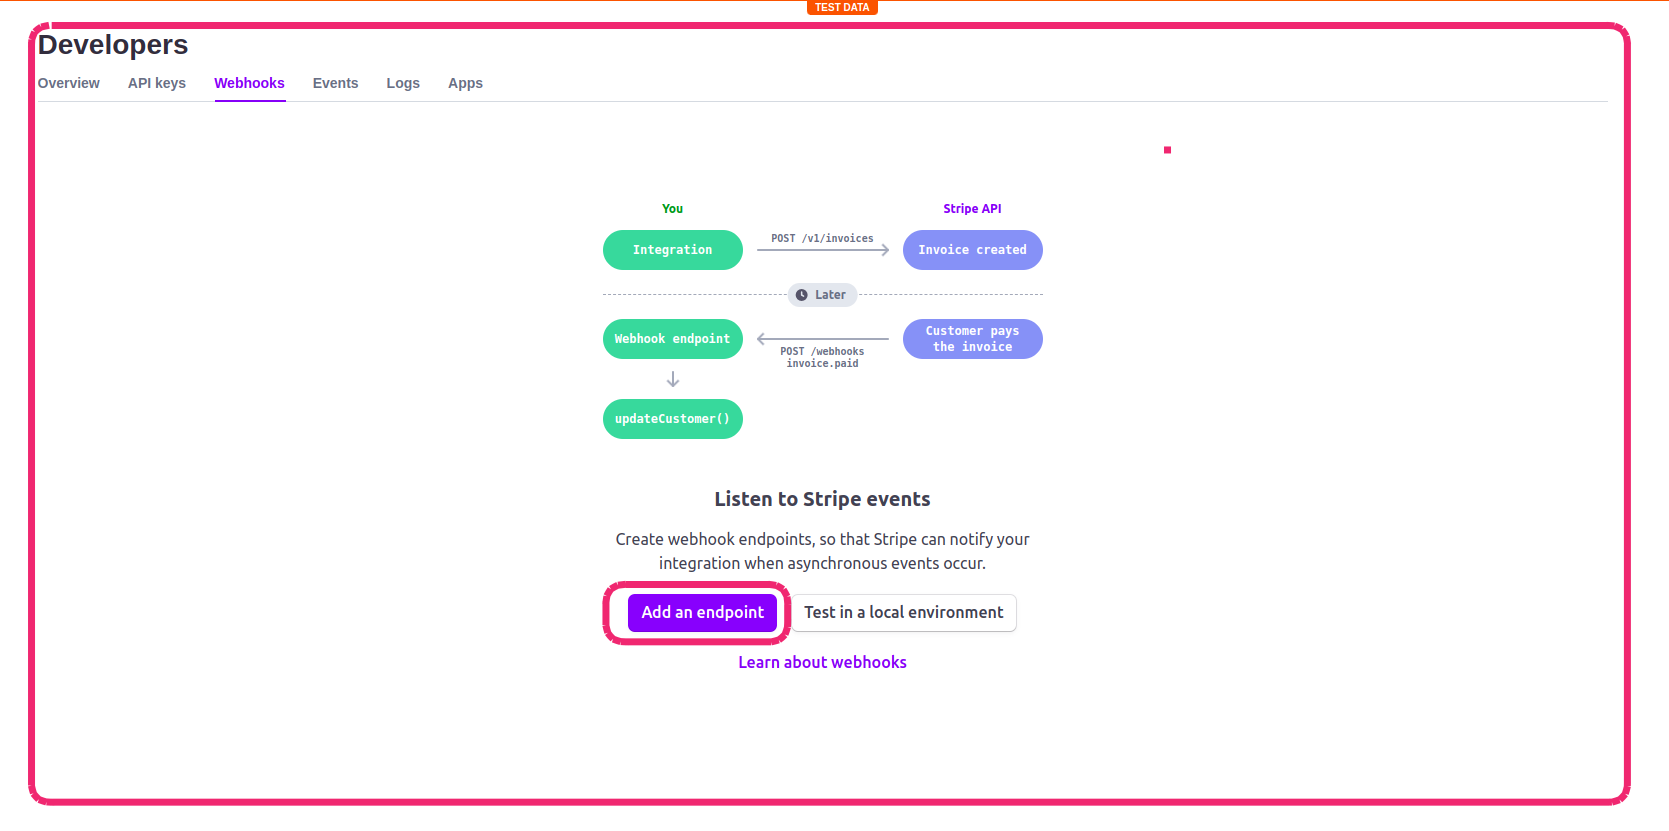
To configure the Webhook go to https://dashboard.stripe.com/test/webhooks, then click on Add an endpoint.
Step 20:
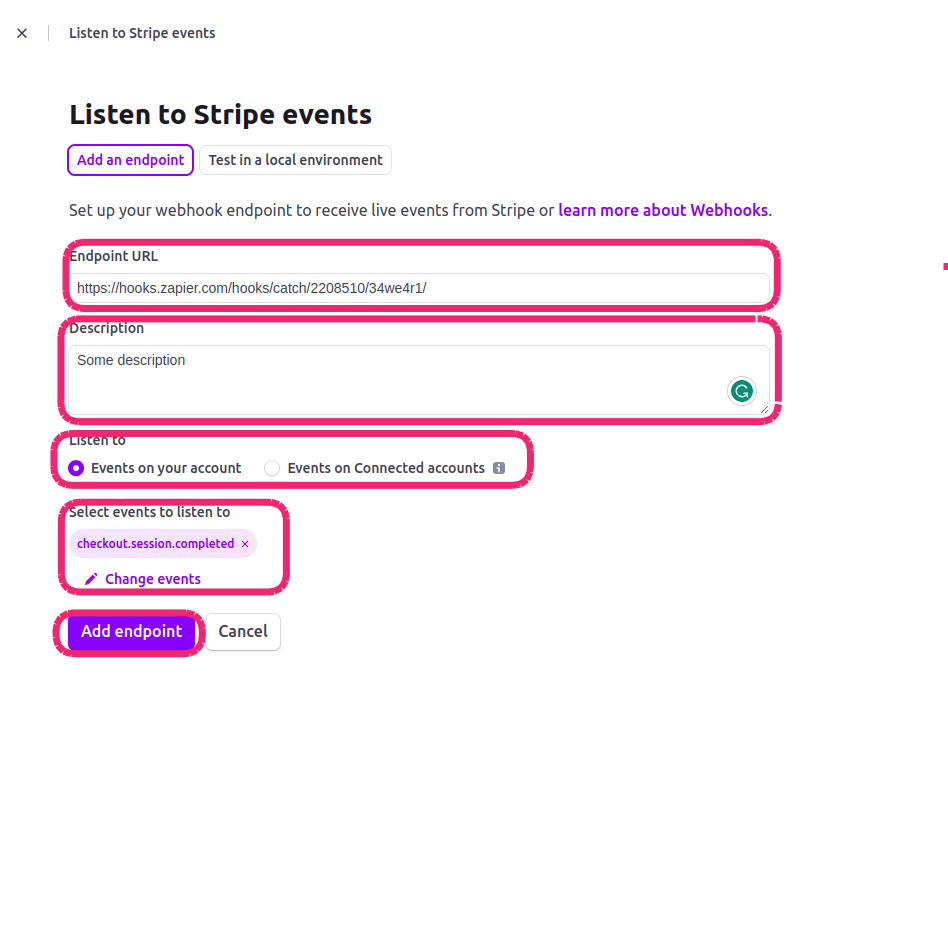
At this point you will see the widow like the image below, edit this data in Endpoint URL paste the webhook URL sent by our support team, in Description edit this field if you want is not mandatory, choose in Listen to the option Events on your account and finally in Select events to listen to choose the event called checkout.session.completed then click on Add endpoint.
Congratulations! You now have Simple E-commerce with Stripe set up in your course. If you encounter any problems, please do not hesitate to contact us.