Configure the Website Integration
Contents
Configure the Website Integration#
The website integration add-on allows integrating your open edX LMS site with an external CMS site. The same way edX.org operates its site.
Open edX is a powerful platform for operating your online courses, but it may not meet your flexibility requirements in terms of content management capabilities. Usually, our customers want to build engaging and customized pages for their home, course catalog, and course description pages. This type of customization can be achieved in an external CMS system like WordPress where customers can build the aforementioned pages according to their needs. The Open edX platform will be used only to operate the courses.
eduNEXT, as a pioneer and active member of the Open edX community, has created tools to allow these types of integrations. We developed a WordPress plugin to simplify the configuration and extend the possibilities of your online learning site.
Integration Requisites
It is required to have your LMS site in a domain of your own.
Create and/or establish the CMS site where you will control all the marketing content.
Your WP site must share the same domain extension that your LMS site.
E.g. The LMS site is courses.yourdomain.com; the WP site is yourdomain.com.
About the Website Integration Add-on#
This section provides general information on how the website integrations add-on works using session cookie domain and web site URL mapping.
Session Cookie Domain#
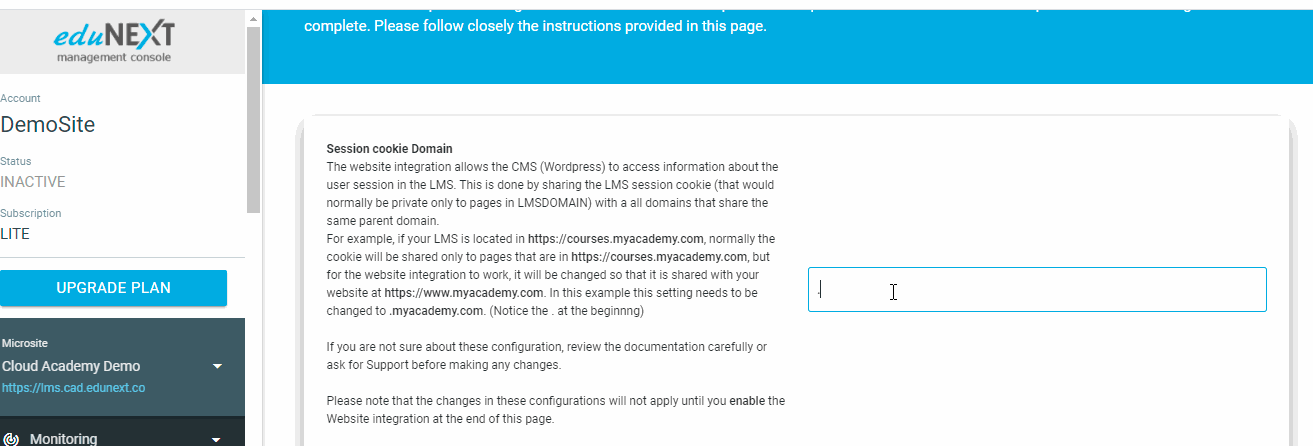
The website integration enables the CMS —WordPress— to access information about the user session on the LMS site. The process is done by sharing the LMS session cookie—normally private only to work on pages in the LMSDOMAIN—with all subdomains that share the same parent domain.
Let’s see an example:
Your LMS site is https://courses.myacademy.com.
Your WordPress site is https://www.myacademy.com.
If your LMS is located in https://courses.myacademy.com, usually the user session cookie will be shared only to pages that are in https://courses.myacademy.com.For the website integration to work, the cookie configuration will change so that it is shared with your website at https://www.myacademy.com.
For this example above, the value to input in the field is .myacademy.com. (Notice the. at the beginning).
session cookie domain#
Web Site URL Mapping#
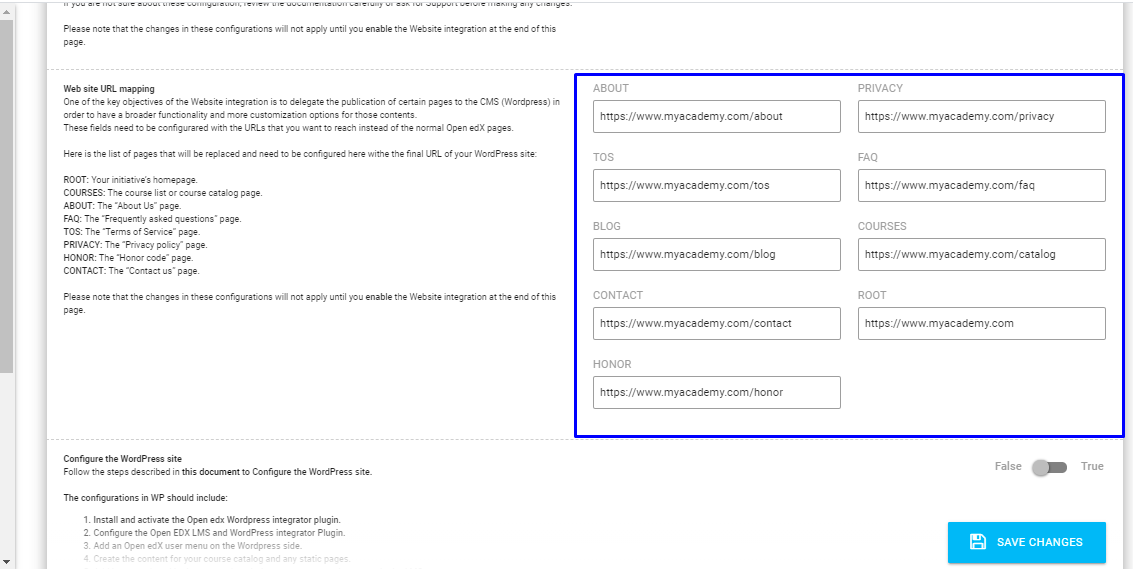
One of the key objectives of the Website integration is to delegate the publication of certain pages to the CMS (WordPress) in order to have a broader functionality and more customization options for those contents.
These fields need to be configured with the URLs that you want to reach instead of the normal Open edX pages. Here is the list of pages that will be replaced and need to be configured here with the final URL of your WordPress site:
ROOT: Your initiative’s homepage.
COURSES: The course list or course catalog page.
ABOUT: The “About Us” page.
FAQ: The “Frequently asked questions” page.
TOS: The “Terms of Service” page.
PRIVACY: The “Privacy policy” page.
HONOR: The “Honor code” page.
CONTACT: The “Contact us” page.
Web site URL mapping#
Configure the WordPress Integrator Plugin#
In the following instructions, you will find all the relevant information to configure the Open edX LMS site as well as the WordPress site to have the integration work.
Install and Activate the Website Integrator Plugin in WordPress
Create the Content for Your Course Catalog and Any Static Pages
Add Buttons Placed on the Course Description Pages to Go to the Course on the LMS site
Install and Activate the Website Integration Plugin in ECC#
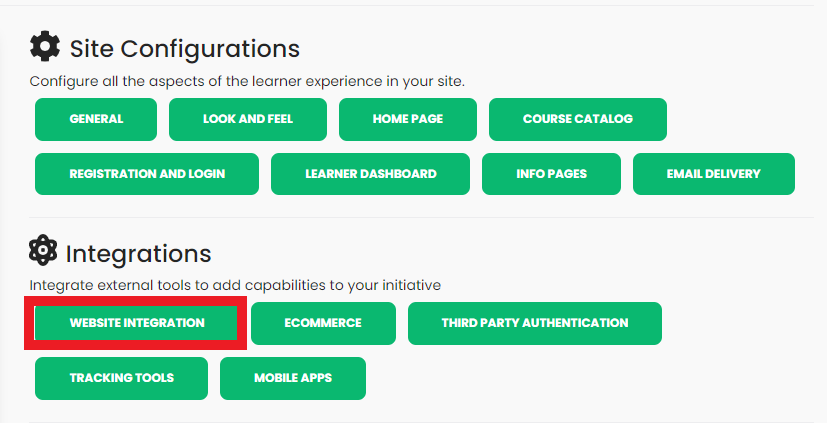
In the Edunext Control Center, go to My Sites > Integrations, and select Website integration, to download the wordpress integration plugin.
Website Integration button in ECC dashbard#
Install and Activate the Website Integrator Plugin in WordPress#
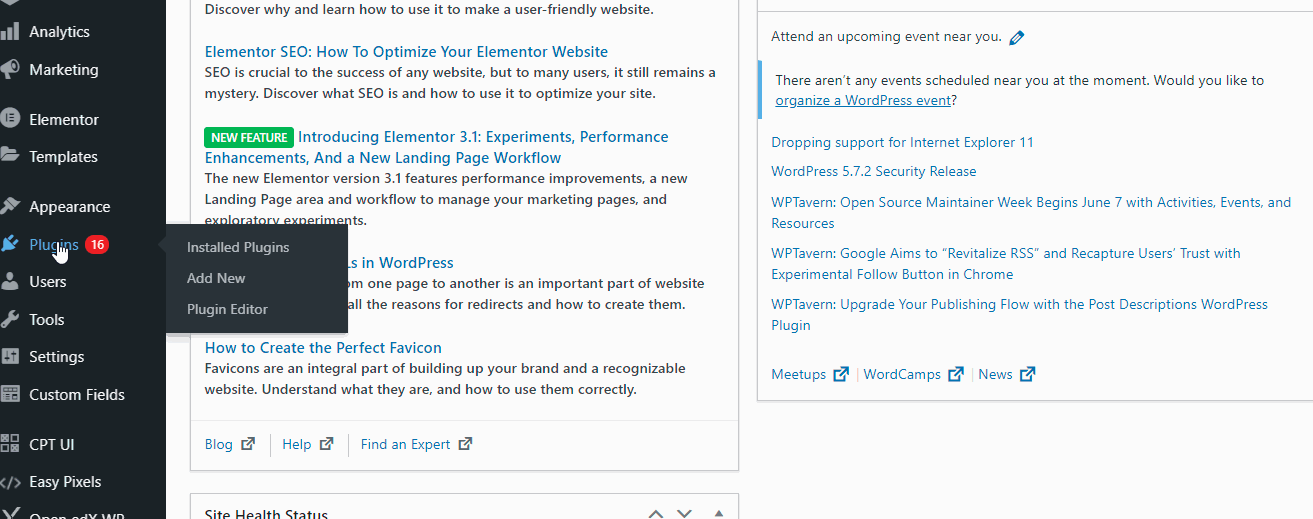
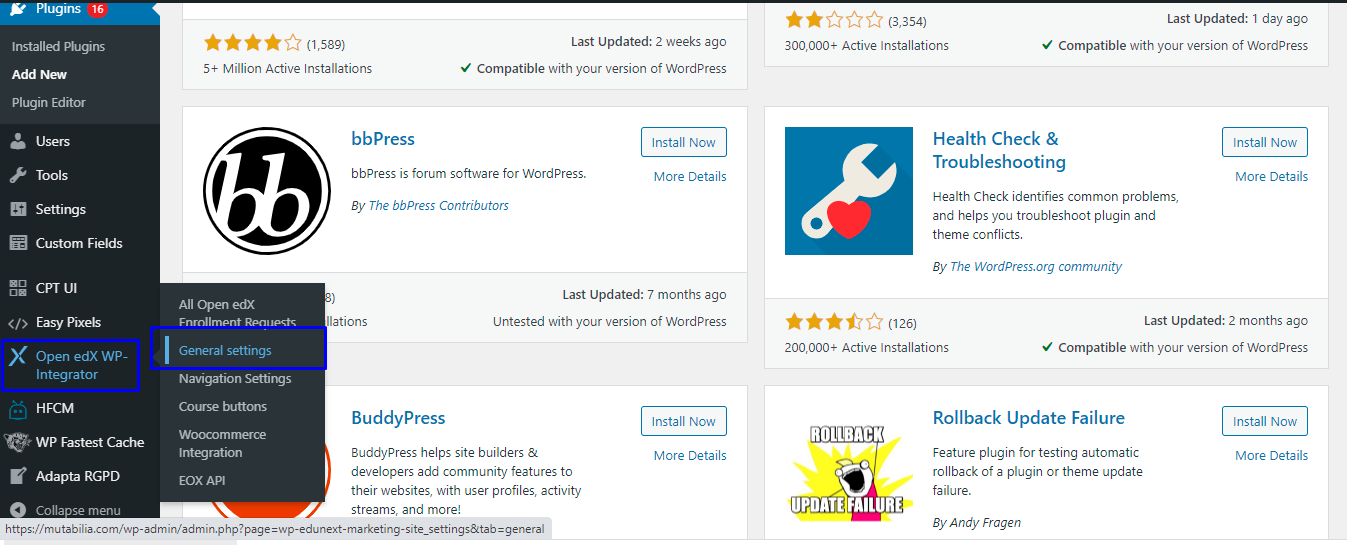
Go to the plugins section on the left panel in your WordPress site and select Add New.
On the Add Plugins page, select Upload Plugin.
Choose the compressed file from your computer, select Install Now.
On the Plugins page, verify the installation and Activate the plugin.
Configure the Open edX LMS and WordPress Integrator Plugin#
Select on the left-panel Settings, the Open EDX WordPress Integrator plugin.
Set the URL of your Open edX site. In this field, you should place the LMS domain or subdomain. For example https://yourlmsdomain.com
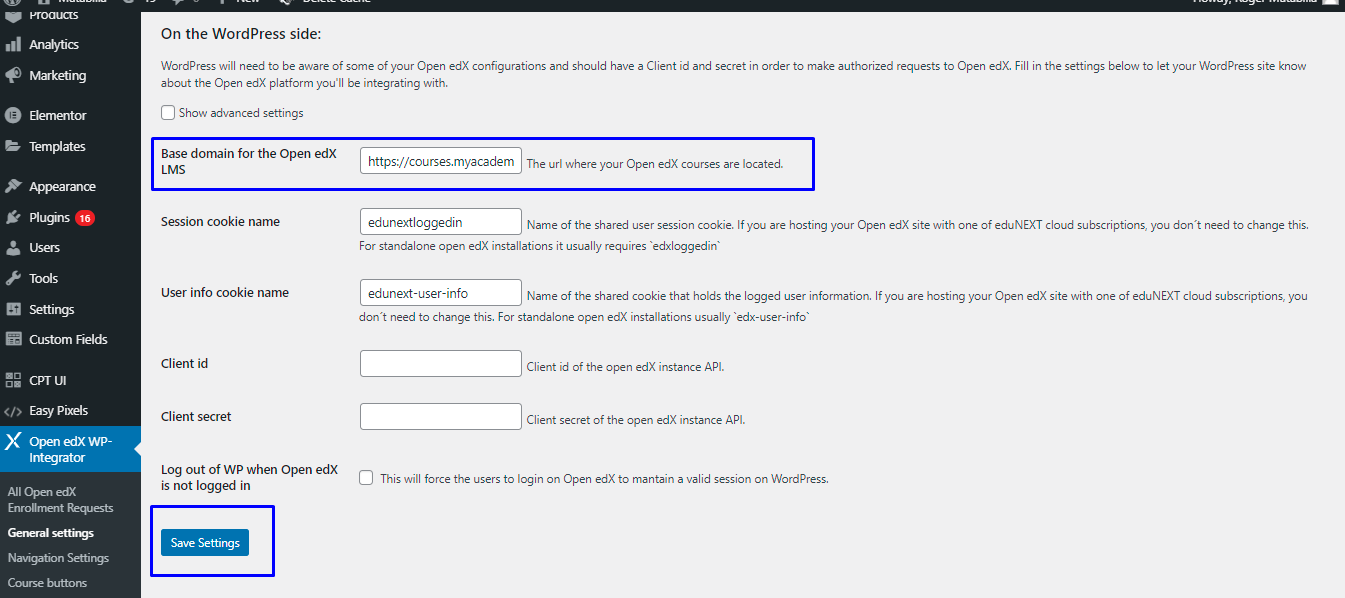
Please keep the following properties unchanged.
Name of the shared cookie that signals an open session.
Name of the shared cookie that holds the user information.
Client id.
Client secret.
Login location (advanced).
Registration location (advanced).
Dashboard location (advanced).
Add an Open edX User Menu on the Wordpress Site#
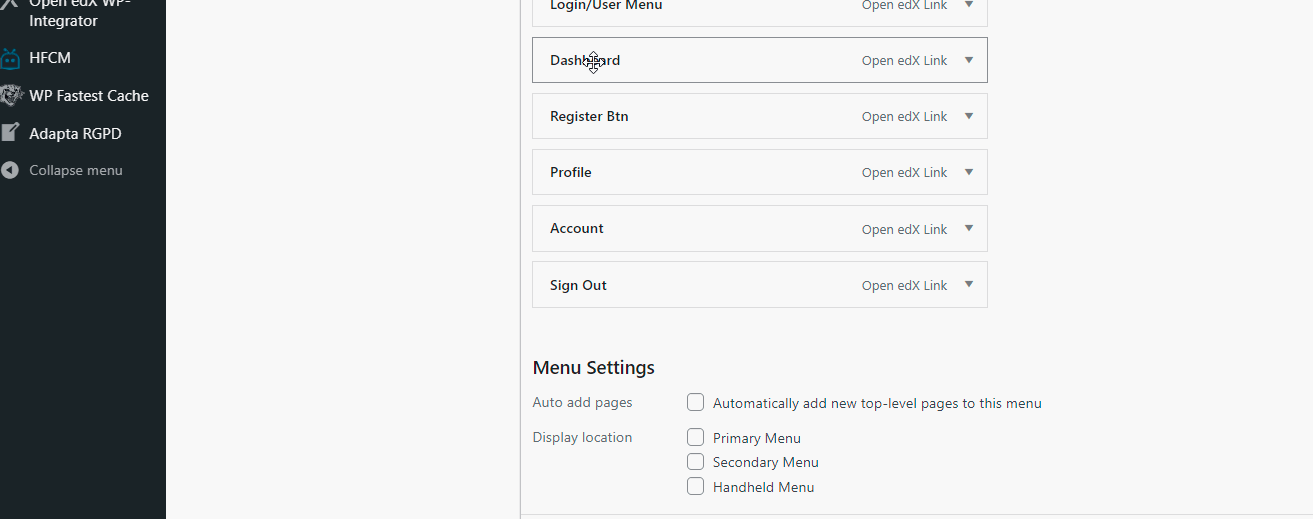
We will now configure the login, register, and user menu on the WordPress main page. Select Appearance > Menus.
Locate the main menu of your WordPress site.
Locate Open edX WP integrator menu on the left panel, and add the following buttons:
Login/user menu.
Register Btn.
Dashboard.
Profile.
Account.
Sign out.
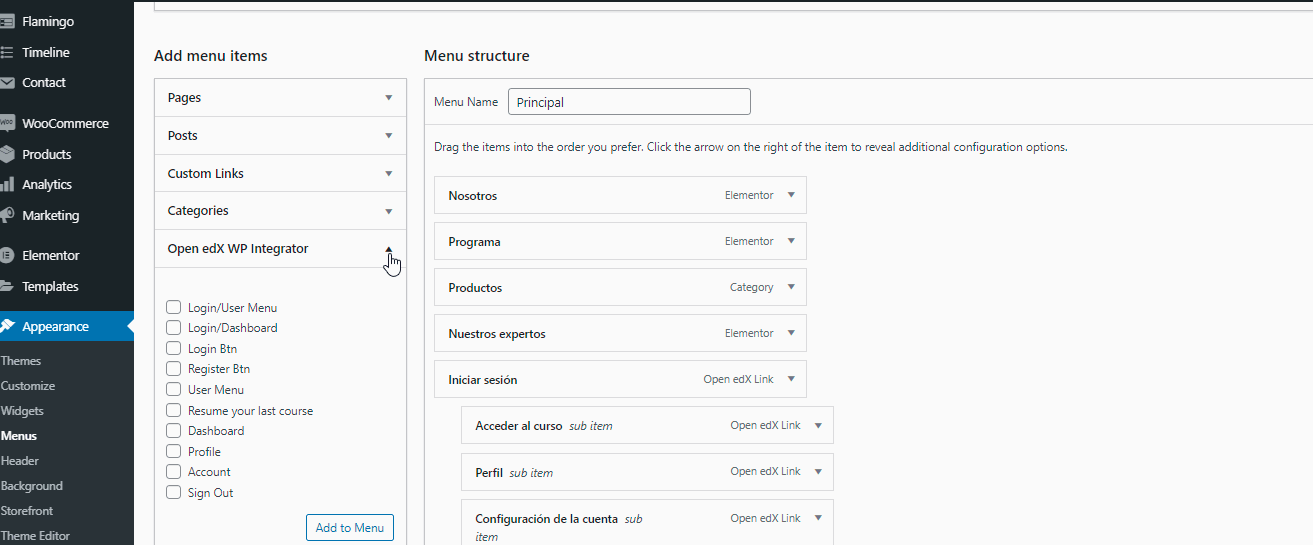
Place the buttons dashboard, profile, Account, Sign out inside the Login/User menu button as it is shown on the image.
Select save.#
Change the labels in the buttons according to your needs. These texts will be displayed as titles for those buttons on the WP page.
A functional example, after the configuration so far, will look like the image below.
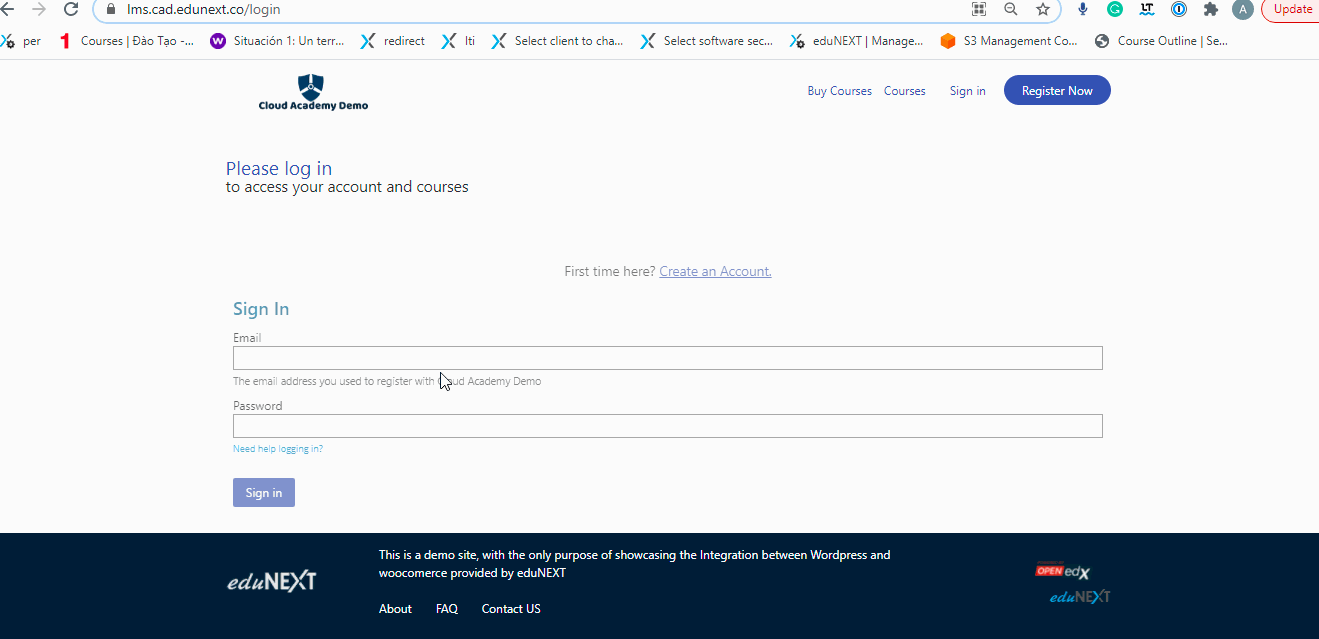
You can visit the WordPress integration demo by Edunext >to expore the integration. Make sure you have an account created on the LMS to access the site.
Create the Content for Your Course Catalog and Any Static Pages#
For this step, you have all the flexibility of WordPress at your disposal which was the main reason to have the integration in the first place. Our suggestion is for you to create at the very least:
The contents of your homepage
Additionally, you may want to create :
A course catalog page
A course description page for each of your courses
Optionally, you may also want to create pages for (some of) the following auxiliary pages:
The “About Us” page
The “Frequently Asked Questions” page
The “Terms of Service” page
The “Privacy policy” page
The “Honor code” page
The “Contact us” page