What is an Annoto XBlock?
Contents
What is an Annoto XBlock?#
Annoto XBlock is an open-source, in-video collaboration solution that turns static, 1-way video content into an active and interactive group experience. With Annoto, learners can lean forward and become participants and not just passive and lonely viewers, causing all users to be actively involved and return to the video content, sharing more ideas and creating more meaningful content.
What are the benefits of using an Annoto XBlock?#
Active Learning Empowered: Annoto XBlock empowers users to become active participants rather than passive viewers. By enabling collaboration, discussions, and content sharing within videos
Improved Retention: Annoto XBlock’s interactive features create memorable learning experiences, ensuring that students retain and apply the knowledge they gain.
Data-Driven Insights: Annoto XBlock doesn’t stop at engagement; it provides comprehensive analytics and insights into user behavior. Educators can track students’ progress, identify areas of difficulty, and tailor their teaching strategies accordingly for improved outcomes.
How to implement an Annoto XBlock?#
Note
Please be reminded that to utilize this XBlock, you should have an existing subscription with Annoto. If you have not subscribed yet, you can access to the following link: Request a Demo
- Step 1:
Go to Studio. Remember, you can access it through the link in your ECC account or by going to studio.edunext.co and signing in with your email and password.
- Step 2:
Open the course where you will add the Annoto XBlock.
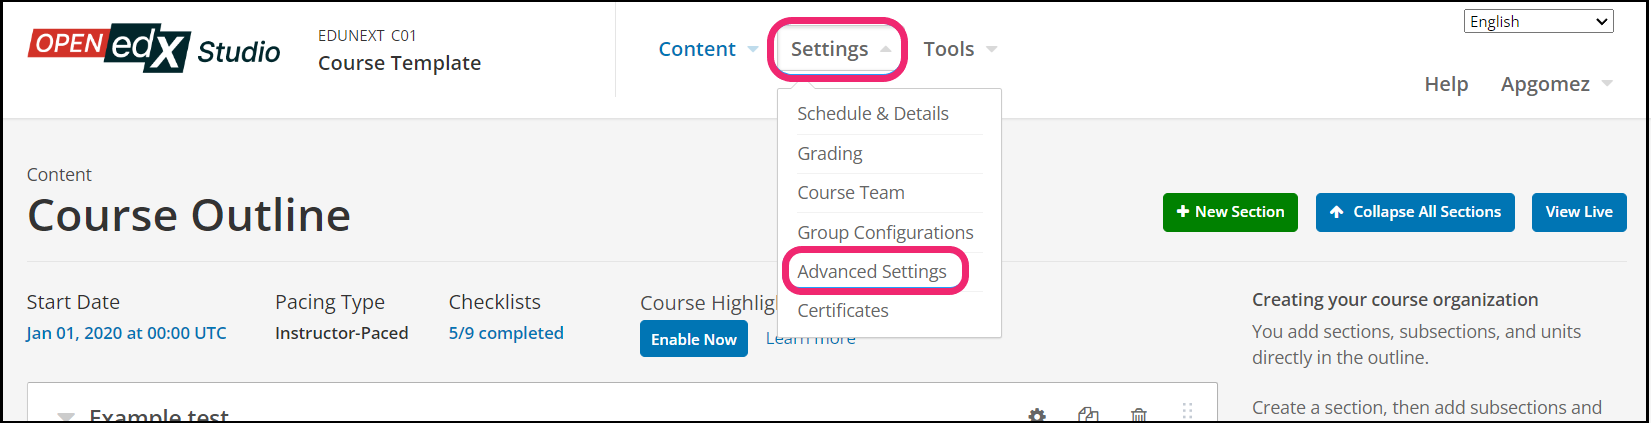
- Step 3:
Click on the Settings tab and select the Advanced Settings option.
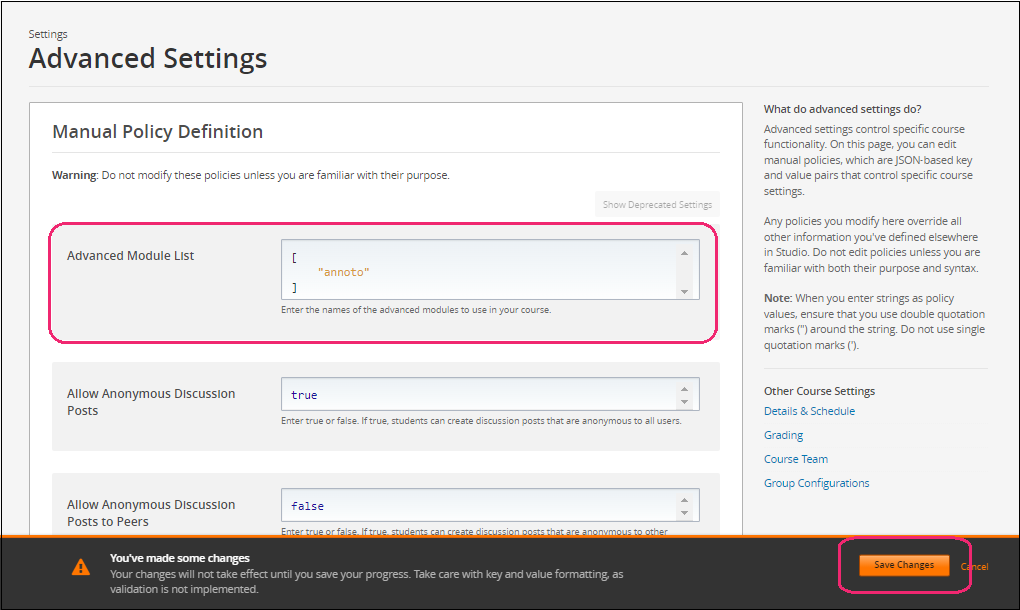
- Step 4:
In the section Advanced Module List, add
annotobetween the square brackets.[ "annoto ]
Note
Add the XBlock command with an indented space and without any space before or after quotation marks, as shown in the example above, to avoid execution errors.
- Step 5:
After you have added the annoto XBlock in the Advanced Module List, you must scroll down on the same Advanced Settings page and locate the section labeled LTI Passports. Here, you will need to insert the value “annoto-auth:<annoto_client_id>:<annoto_client_secret>”.
For example:
[
  "annoto-auth:<annoto_client_id>:<annoto_client_secret>"
]
Note
These ClientID and shared secret are provided by Annoto, If you do not have this information, please contact them at: support@annoto.net. You can follow this example:
[
  "annoto-auth:eyJhbGciOiJIUzI1NiJ9.Mjc0NGJhODEtMWQ2OC00YWJkLTg4MGQtODc2MzM1MWRkYTg5.o_OLJJwbkvUhYumiFWf6TQXSvShVZRuzi2UbijAPMkc:72d6299b5a0d66106f824594a7943303540b15b8b859596d7af2a3ab4f89140a"
]
- Step 6:
At the button on the screen, click on Save Changes.
- Step 7:
After this, the XBlock should be available, so click the Content tab and select the Outline option to get back to the course content.

- Step 8:
Under Outline, go to the section, then the subsection, and finally to the unit or page where you want to add the LTI component.
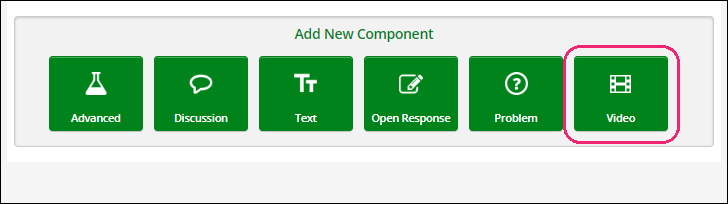
- Step 9:
Once you are there, click Video in the Add New Component bar to add the video you selected for this course.
- Step 10:
Then move on to the Advanced Component in the Add New Component bar.
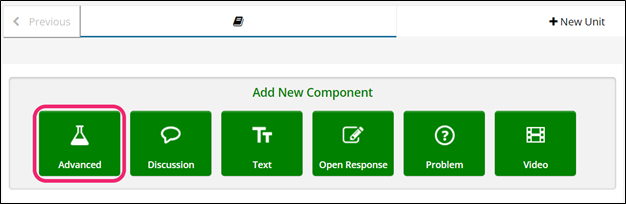
- Step 11:
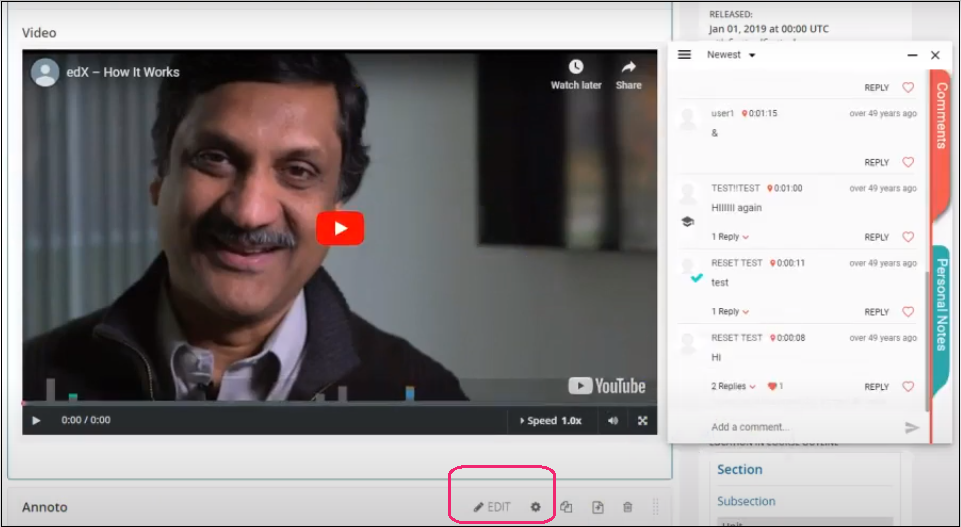
You will see a list of all the advanced components added to your course. Click on Annoto. The system will add the component immediately to your video.

- Step 12:
Click the Edit button on the right corner of the new Annoto component to add the content details.
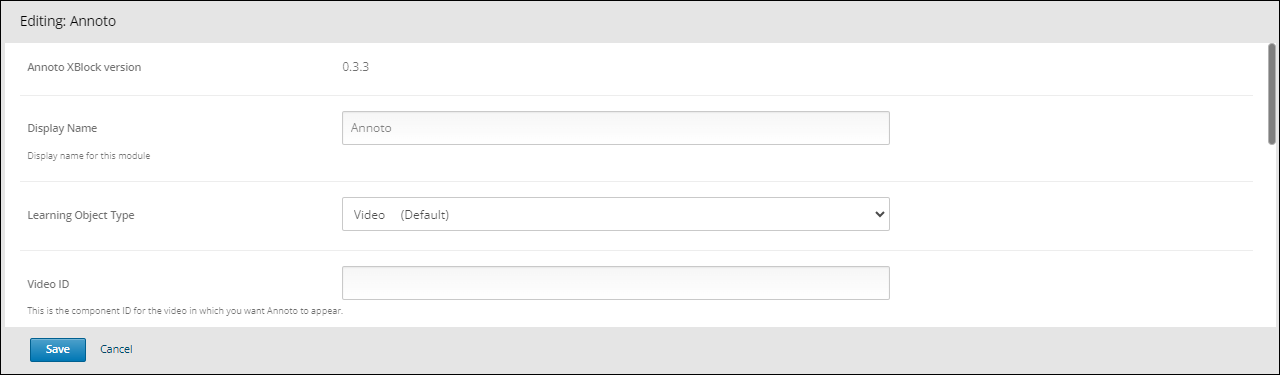
- Step 13:
The editor window is going to open. Here you will find several options to set up the XBlock as needed. The principal options that you must edit are:
Annoto XBlock version: Specifies the version of the Annoto XBlock.
Display Name: Enter a display name for this module.
Learning Object Type: Allows users to select between two options: “video” (which is the default) or “page.”
Video ID: Represents the unique identifier for the video where you want Annoto to be displayed.
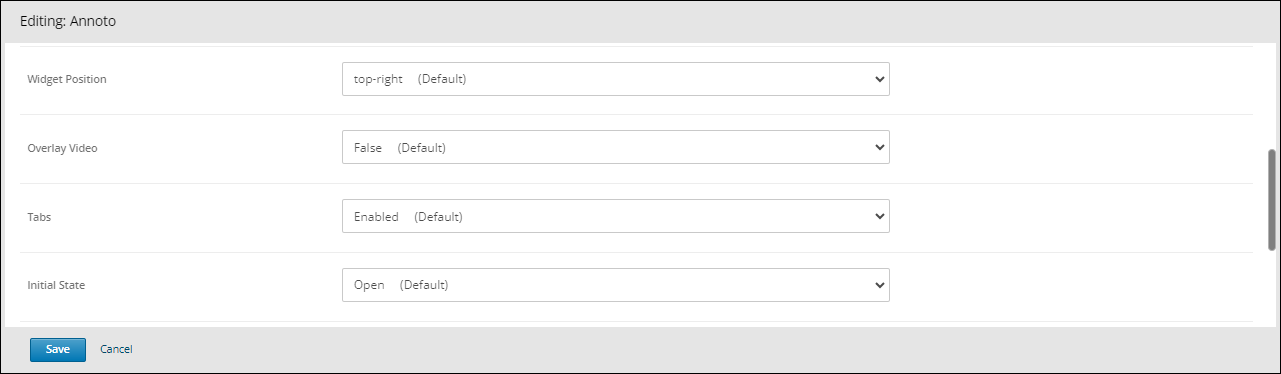
Widget Position: Allows users to select where they want the Annoto icon widget to appear.
Overlay Video: Enables users to make a choice between “true” or “false.”
Tabs: Provides users with the choice to enable either “hidden” or “auto” tabs.
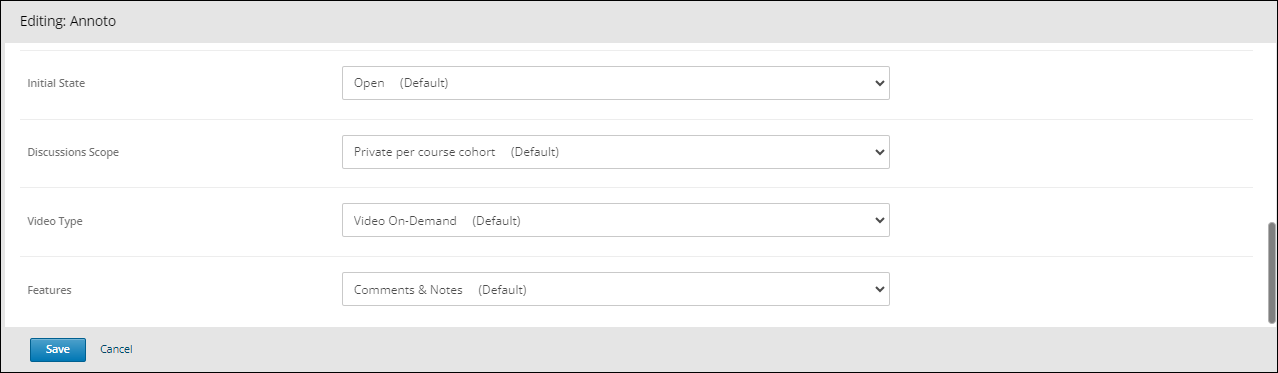
Initial State: Provides the choice of “open”, “auto”, or “closed.”
Discussions Scope: Provides the choice of “private per course cohort”, “private per course”, or “site wide.”
Video Type: Provides the choice of “video on-demand or “live streaming”.
Features: Enables users to make a choice between “comments and notes”, “comments”, “private notes”, or “only analytics.”
- Step 13:
Finish the configuration of the component and click on the Save button.
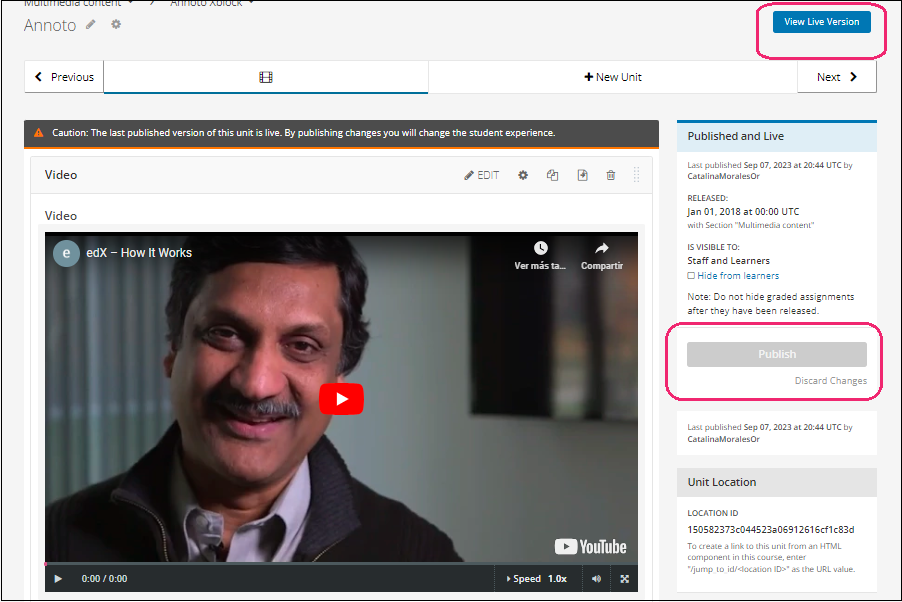
- Step 14:
Publish the unit and check how your new component looks on its final version by clicking the View Live Version button.
- See it in action!
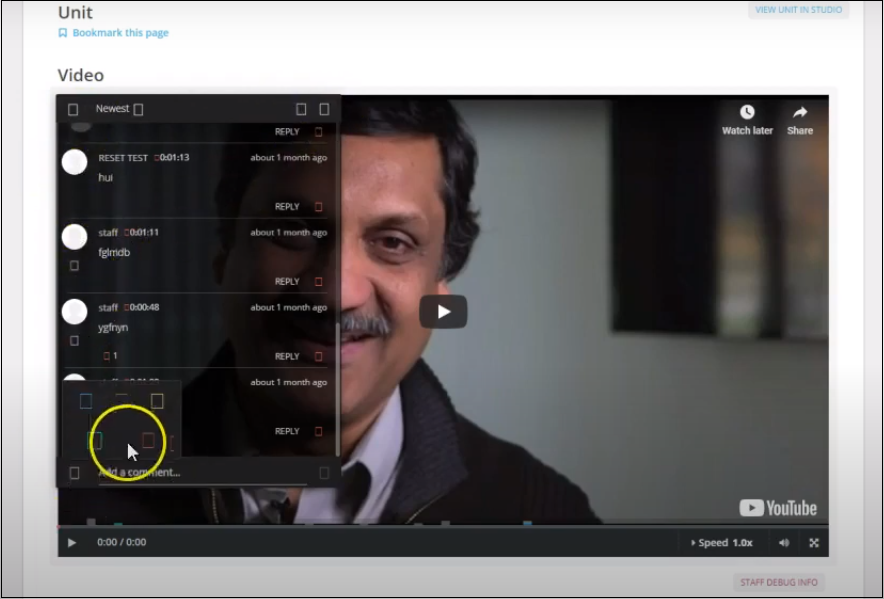
You may also visit the next tutorial How to add Annoto to OpenEdx where you can find an examples of the use of the Annoto XBlock.