What are Randomized Content Blocks?
Contents
What are Randomized Content Blocks?#
Content libraries are banks of course material that course creators can employ to generate randomized content blocks. These blocks dynamically draw a specific number of random assets from the library. In this way you can ensure that tests and quizzes offer distinct questions to each student, providing individualized learning experiences.
What are the benefits of using Randomized Content Blocks?#
Engagement and Interest: Randomized assignments can add an element of surprise and variety to the learning experience.
Personalization: Allows students to practice and engage with a diverse range of content, catering to their individual needs and learning preferences.
Adaptability: Randomized content blocks enable adaptive learning approaches.
How to implement Randomized Content Blocks?#
- Step 1:
Go to Studio. Remember, you can access it through the link in your ECC account or by going to studio.edunext.co and signing in with your email and password.
- Step 2:
Select New Library.

- Step 3:
Enter the required information for your new library, then select Create.
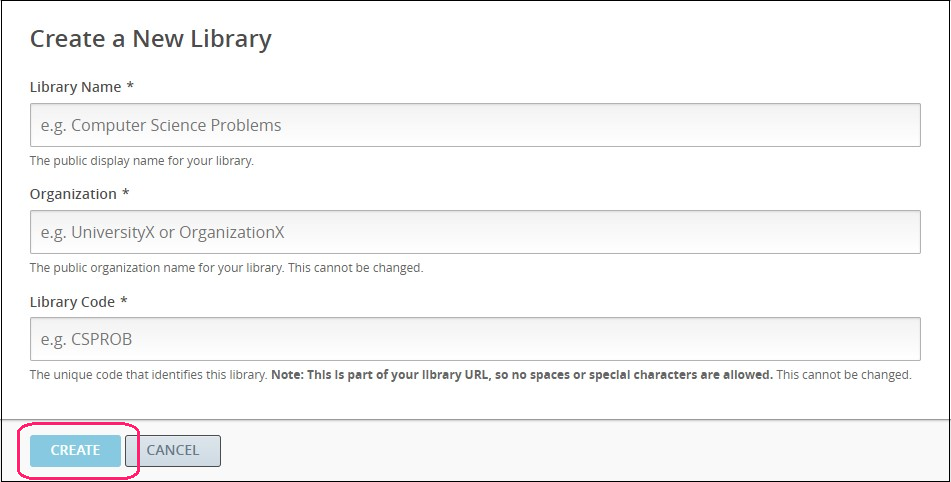
Library Name: Enter the public display name for your library. Choose a meaningful name that will help you and other course team members to identify the library. For example, “Level 200 Math Problems”. When you add a randomized content block to a course unit, you use the library name to specify this library as a source for the randomized assignment.
Organization: Enter the identifier for your university. For example, enter HarvardX or MITx. Do not include spaces or special characters.
Library Code: Enter an identifier for your library that is unique within your organization. This code becomes part of the URL for your library, so do not include spaces or special characters in the code.
Note
This is similar to when you’re creating a course, some information cannot be changed later, and the Library Code will be part of the library URL, so it must contain no spaces or special characters.
- Step 4:
Once the library is already created you will see the options to add content to the library. Choose your preferred option.
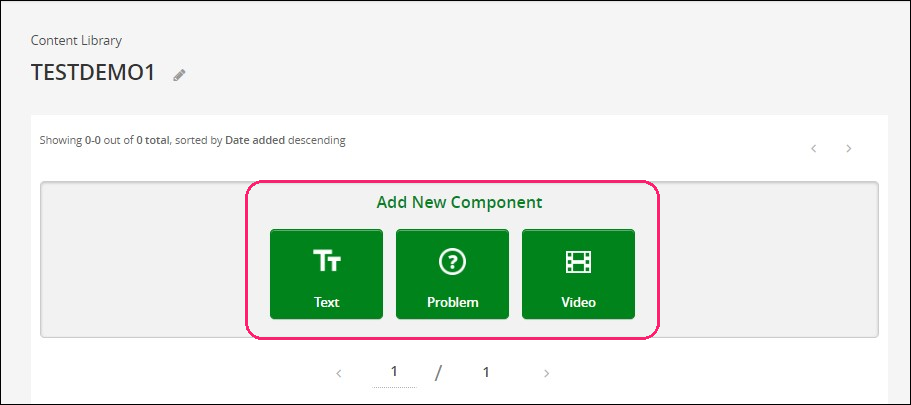
Note
Adding content to a library is a similar process to what you would normally use to add content to a course. With libraries, however, you are limited to 3 types of components: HTML, Problem, & Video. Other than that, the process is the same.
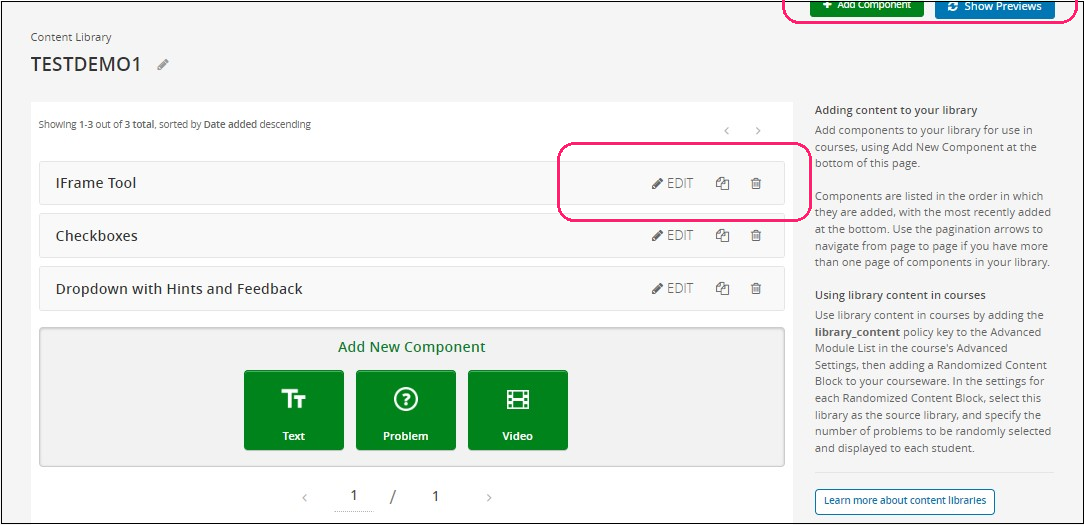
- Step 5:
After adding content, you can edit it. Content Libraries are very flexible. You can change components, duplicate, delete, and even import/export entire libraries.
See also
This is also documented in detail in the Open edX official Documentation Here.
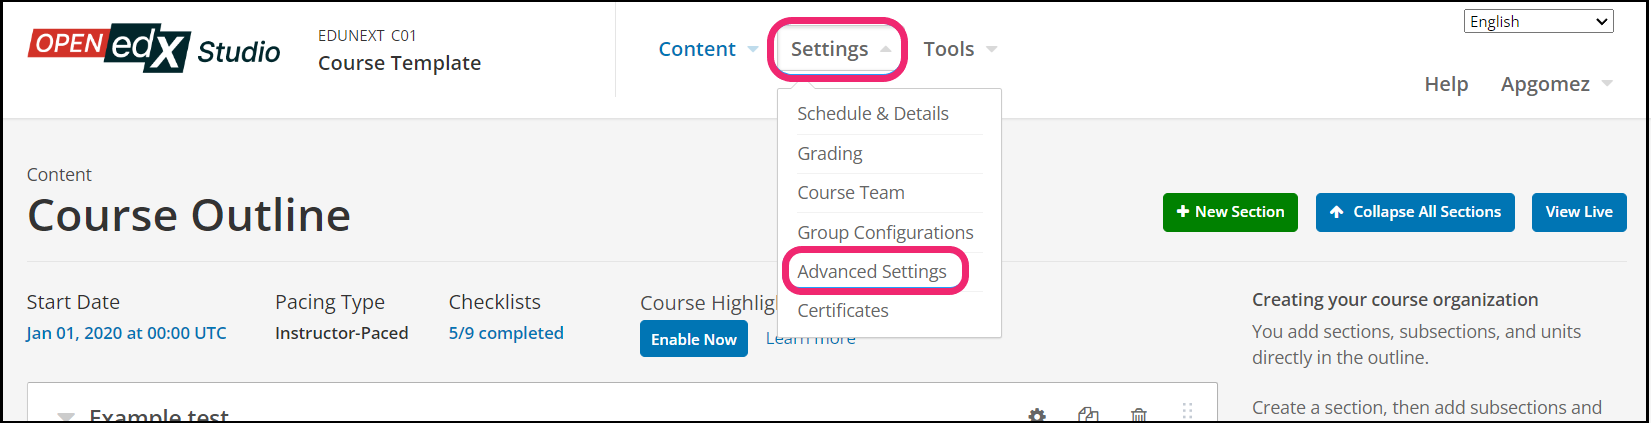
- Step 6:
In order to enable the content library in you course, go back to your course settings in Studio and click on the Advanced Settings button.
- Step 7:
In the section Advanced Module List, add
library_contentbetween the square brackets.[ "library_content" ]
Note
Add the XBlock command with an indented space and without any space before or after quotation marks, as shown in the example above, to avoid execution errors.

- Step 8:
At the button on the screen, click on Save Changes.

- Step 9:
To add content to your desired unit, simply navigate back to the course outline and locate the specific unit.
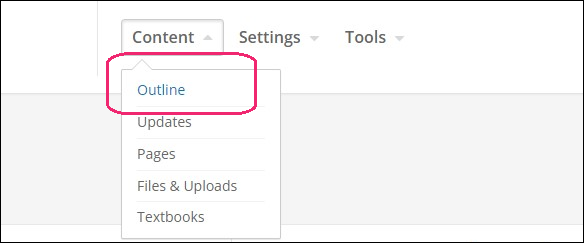
- Step 10:
Click the Advanced Component button and select Randomized Content Block.
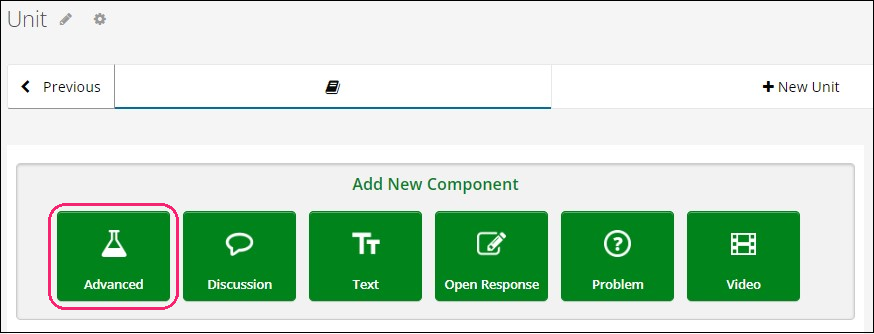

- Step 11:
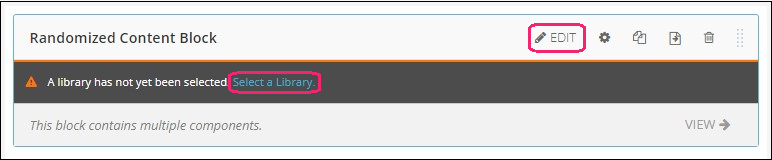
Select the library you want to add to the block and adjust your parameters. If your randomized content block has no library attached to it, you will be shown a message regarding it. Click Select a Library or Edit to set the library you would like to associate with the block.
- Step 12:
Once you have selected the library button or edit, you must edit the Randomized Content Block, then Save.
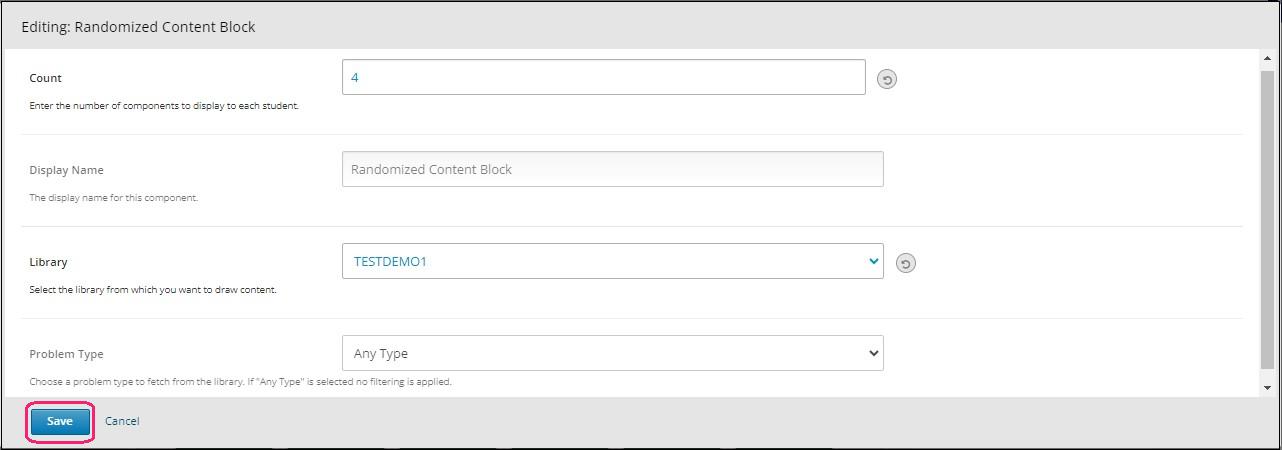
Count: Choose the number of components to display.
Display name: Randomized content block.
Library: Choose the library you created.
Problem type: Choose your preferred problem type.
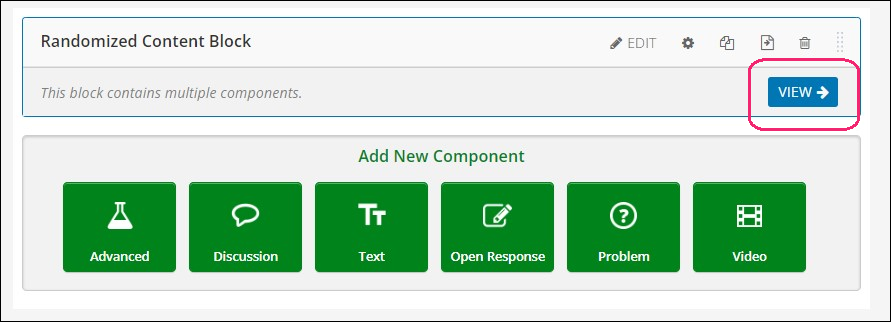
- Step 13:
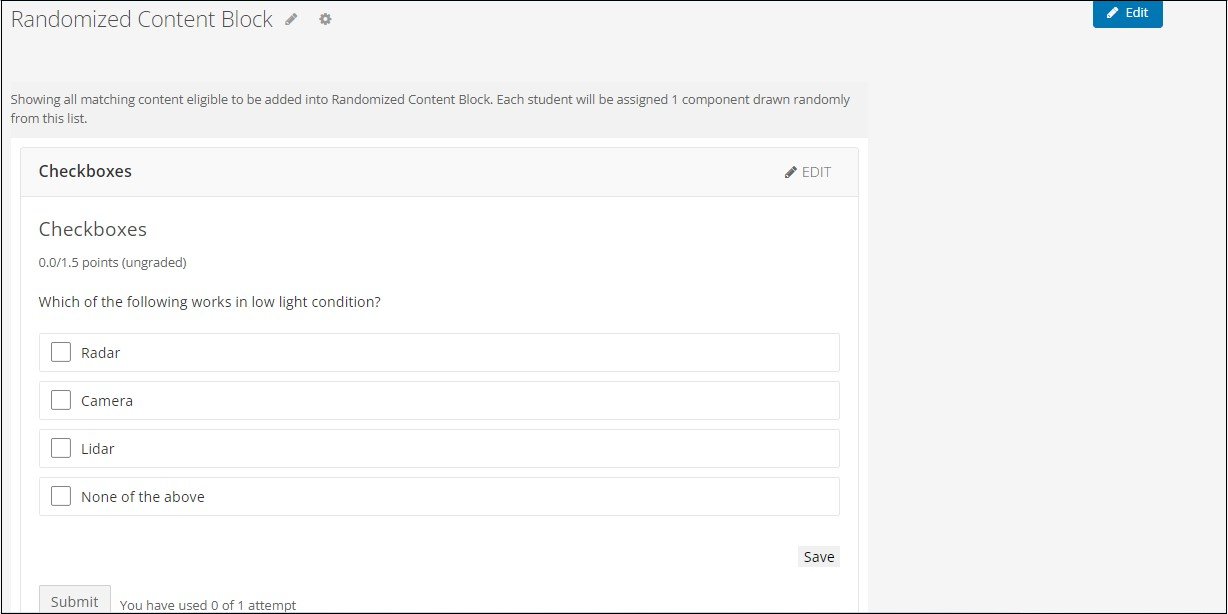
Click on VIEW to see how the final result would appear.
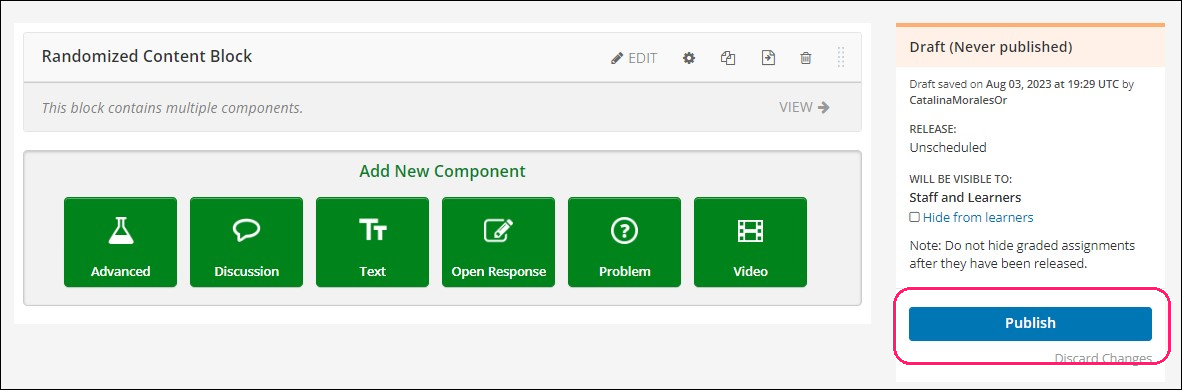
- Step 14:
Finally, return to where the randomized content is and publish it.
See also
This is also documented in detail in the Open edX official Documentation Here.