What is an Active Table XBlock?
Contents
What is an Active Table XBlock?#
The Active Table XBlock is an educational tool and instructional component used within digital learning environments, such as online courses and learning management systems. It serves as a dynamic and interactive way to present and assess information, providing students with opportunities to actively engage with course content.
This tool allows educators to create tables with specific cells that students must complete or interact with as part of their learning experience. These tables are defined using a syntax similar to Python, where instructors can specify the content of the table, including column headers and various types of cells.
What are the benefits of using an Active Table XBlock?#
Immediate Feedback: Students receive instant feedback on their answers, promoting self-assessment and learning from mistakes.
Diverse Question Types: Utilize both numeric and text cells to accommodate a wide range of question types and subjects.
Flexibility: Adapt the Active Table XBlock to various course topics and levels, making it a versatile addition to your teaching toolbox.
How to implement an Active Table XBlock?#
Given your understanding of what an Active Table XBlock is and its benefits, it is important to note that the Active Table offers a tabular problem type that challenges students to complete specific cells within a table. The table structure is defined using a Python-like syntax, although within a strict subset of Python. Here is a brief overview of how to create table definitions:
Start with a list of lists, where all inner lists have the same lengths.
The first line contains column headers, which must be string literals.
Subsequent lines represent the table body, where cells can be string literals, numbers, or response cell declarations.
There are two types of response cells you can use within the table:
Numeric Cell:
Specify this type with the following format:
Numeric(answer=<correct_answer>, tolerance=<tolerance in percent>,
      min_significant_digits=<number>, max_significant_digits=<number>)
This cell type expects a numeric answer, and you can optionally define tolerance levels as well as restrictions on the number of significant digits.
Text Cell:
Specify this type with the following format:
Text(answer='<correct answer>')
This cell type expects a string answer.
Here is an example of a table definition:
[
  ['Event', 'Year'],
  ['French Revolution', Numeric(answer=1789)],
  ['Krakatoa volcano explosion', Numeric(answer=1883)],
  ["Proof of Fermat's last theorem", Numeric(answer=1994)],
]
Once you have decided which cell type implement in your Active Table, you must:
- Step 1:
Go to Studio. Remember, you can access it through the link in your ECC account or by going to studio.edunext.co and signing in with your email and password.
- Step 2:
Open the course where you will add the Active Table XBlock.
- Step 3:
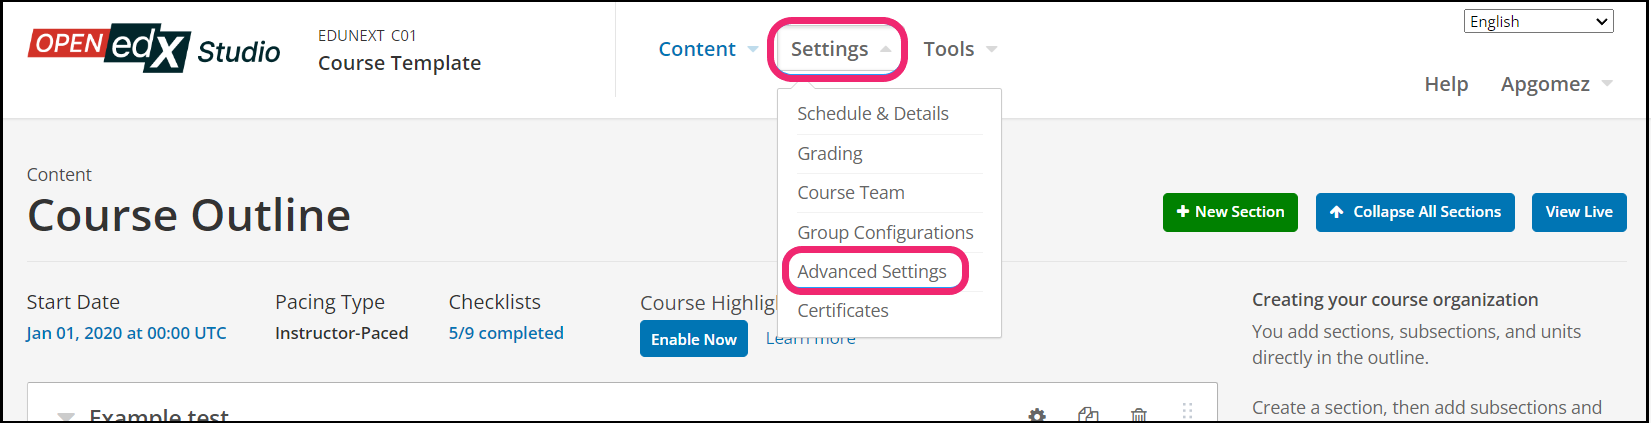
Click on the Settings tab and select the Advanced Settings option.
- Step 4:
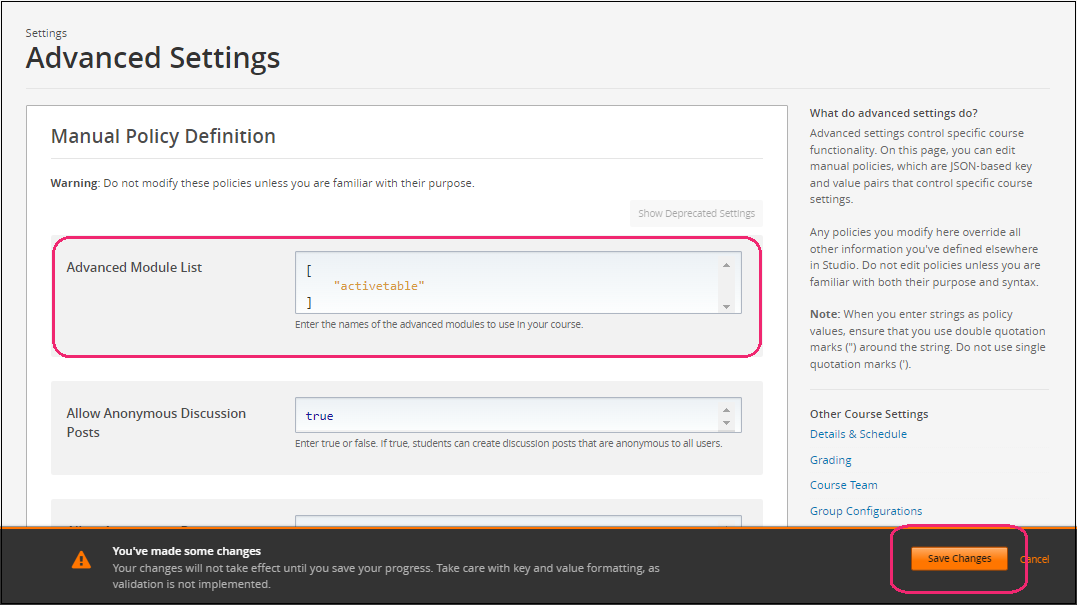
In the section Advanced Module List, add
activetablebetween the square brackets.[ "activetable" ]
Note
Add the XBlock command with an indented space and without any space before or after quotation marks, as shown in the example above, to avoid execution errors.
- Step 5:
At the button on the screen, click on Save Changes.
- Step 6:
After this, the XBlock should be available, so click the Content tab and select the Outline option to get back to the course content.

- Step 7:
Under Outline, go to the section, then the subsection, and finally to the unit or page where you want to add the Active Table XBlock.
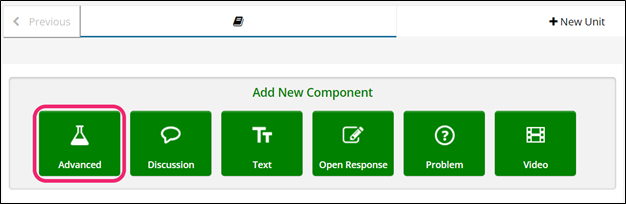
- Step 8:
Once you are there, click Advanced Component in the Add New Component bar.
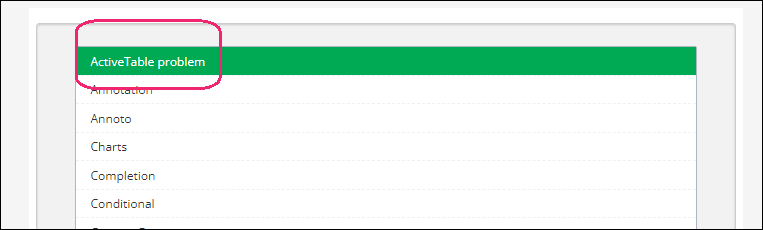
- Step 9:
You will see a list of all the advanced components added to your course. Click on ActiveTable problem. The system will add the component immediately to the unit.
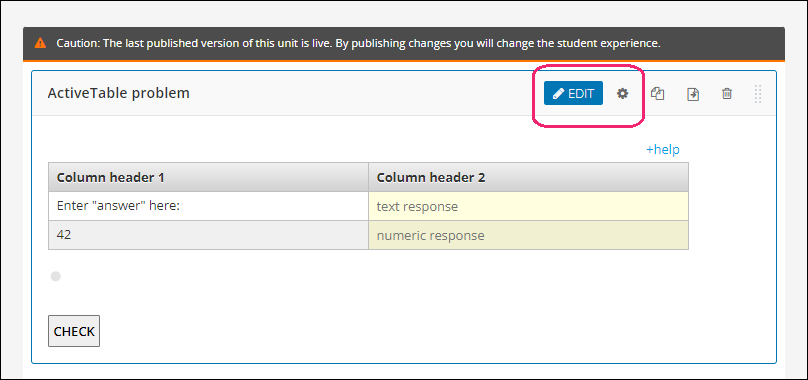
- Step 10:
Click the Edit button on the upper right corner of the new component to add the content details.
- Step 11:
The editor window is going to open. Here you will find several options to set up the XBlock as needed. The principal options that you have to edit are:
Display Name: This is the component name that the students will see while they interact with it. The component name is ActiveTable problem by default, but you should edit as you want.
Table definition: The definition of the table in Python-like syntax. Note that changing the table definition of a live problem will invalidate all student answers.

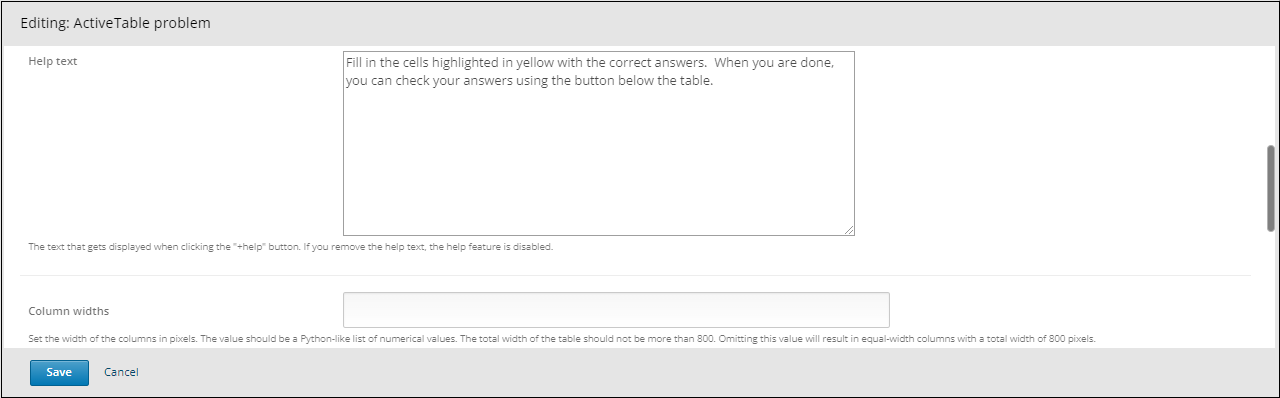
Help text: The text that gets displayed when clicking the “+help” button. If you remove the help text, the help feature is disabled.
Column widths: Set the width of the columns in pixels. The value should be a Python-like list of numerical values. The total width of the table should not be more than 800. Omitting this value will result in equal-width columns with a total width of 800 pixels.
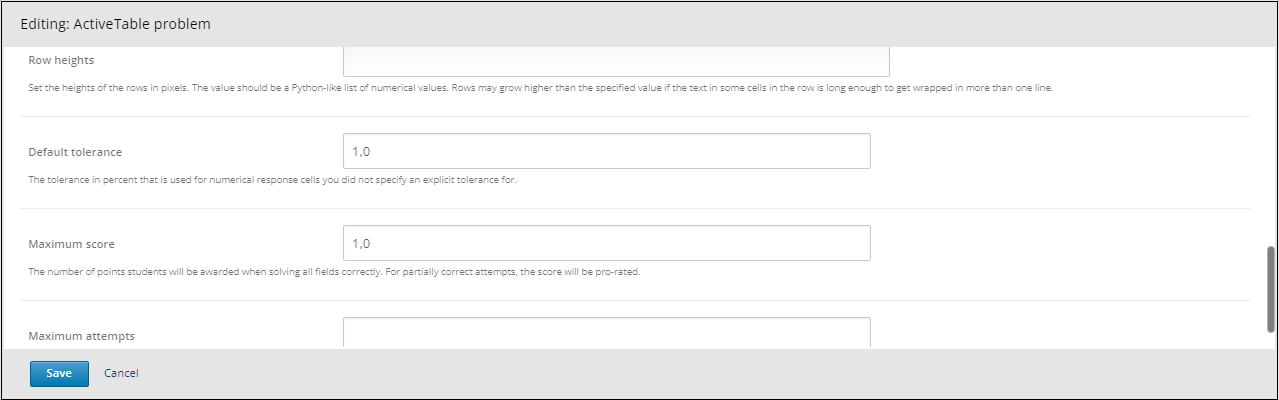
Row heights: Set the heights of the rows in pixels. The value should be a Python-like list of numerical values. Rows may grow higher than the specified value if the text in some cells in the row is long enough to get wrapped in more than one line.
Default tolerance: The tolerance in percent that is used for numerical response cells you did not specify an explicit tolerance for.
Maximum score: The number of points students will be awarded when solving all fields correctly. For partially correct attempts, the score will be pro-rated.
Maximum attempts: Defines the number of times a student can try to answer this problem. If the value is not set, infinite attempts are allowed.
- Step 13:
Finish the configuration of the component and click on the Save button.
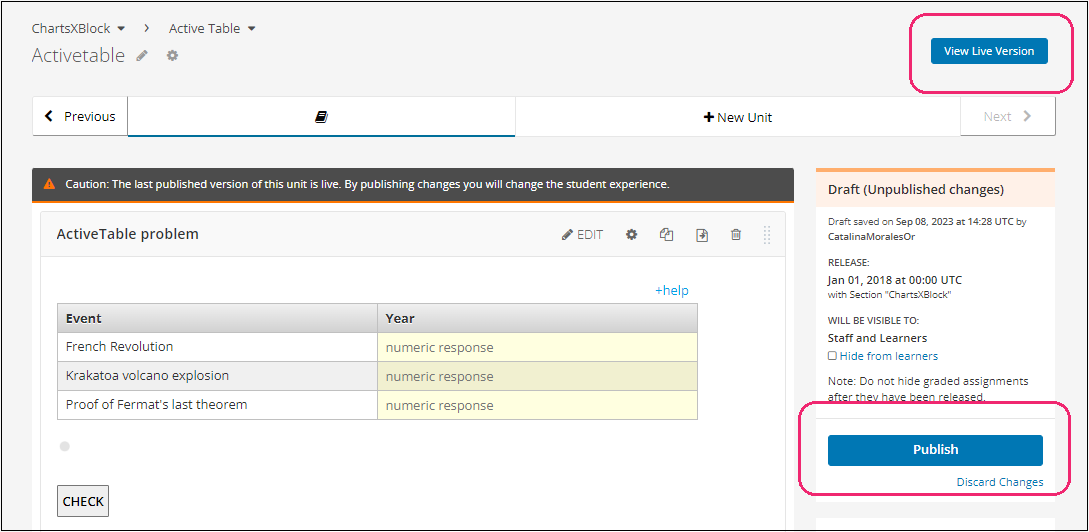
- Step 14:
Publish the unit and check how your new component looks on its final version by clicking the View Live Version button.
You may also visit our demo site where you can find various examples of the use of the Active Table XBlock.