What is a Webhook XBlock?
Contents
What is a Webhook XBlock?#
Webhook XBlock is an advanced component in Open edX developed by eduNEXT. This XBlock triggers a webhook by sending a payload with basic information about the course and student to a configurable URL.
This XBlock can be set in three modes:
Send the payload every time the user visits the course unit.
Send the payload only the first time the user visits the course unit (default mode).
Allow students to trigger the webhook by clicking a button.
Description of the payload:
payload_name: A string to help identify the course component that is sending the payload.
anonymous_student_id: A string that contains an anonymized identifier of the student.
timestamp: Timestamp for when the student visits the XBlock component.
student_is_active: Boolean that indicates whether the student is active in the platform.
student_email: Email of the student.
student_date_joined: Timestamp for when the student got registered in the platform.
student_username: The student’s username.
Additionally, if the Send course grade option is enabled, three extra fields are added:
passed: Boolean representing whether the course has been passed according to the course’s grading policy.
percent: A float representing the overall grade for the course.
letter_grade: A letter grade as defined in grading policy (e.g. ‘A’ ‘B’ ‘C’) or None.
What are the benefits of using Webhook XBlock?#
Fast and efficient: Webhooks eliminates the need for polling or refreshing to check for new data.
Flexible and customizable: Webhooks offer versatility and personalization by allowing the user to define the events, data, and format that they want to exchange.
Improved automation: You can automate workflows that would otherwise need to be manually addressed with this XBlock.
How to implement Webhook XBlock?#
- Step 1:
Go to Studio. Remember, you can access it through the link in your ECC account or by going to studio.edunext.co and signing in with your email and password.
- Step 2:
Open the course where you will add the Webhook XBlock.
- Step 3:
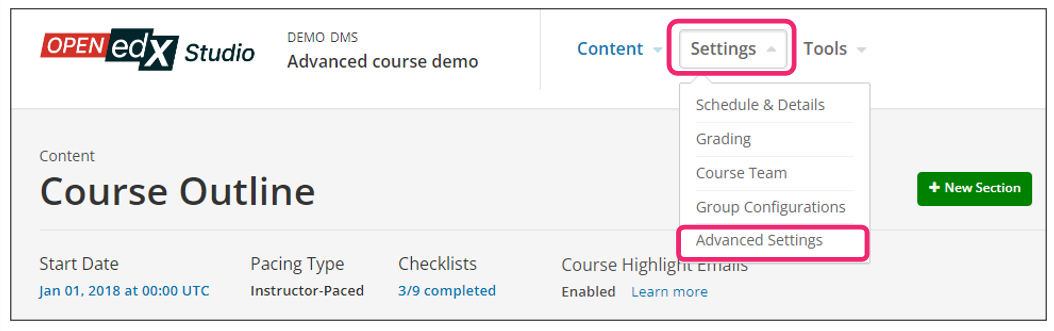
Click on the Settings tab and select the Advanced Settings option.
- Step 4:
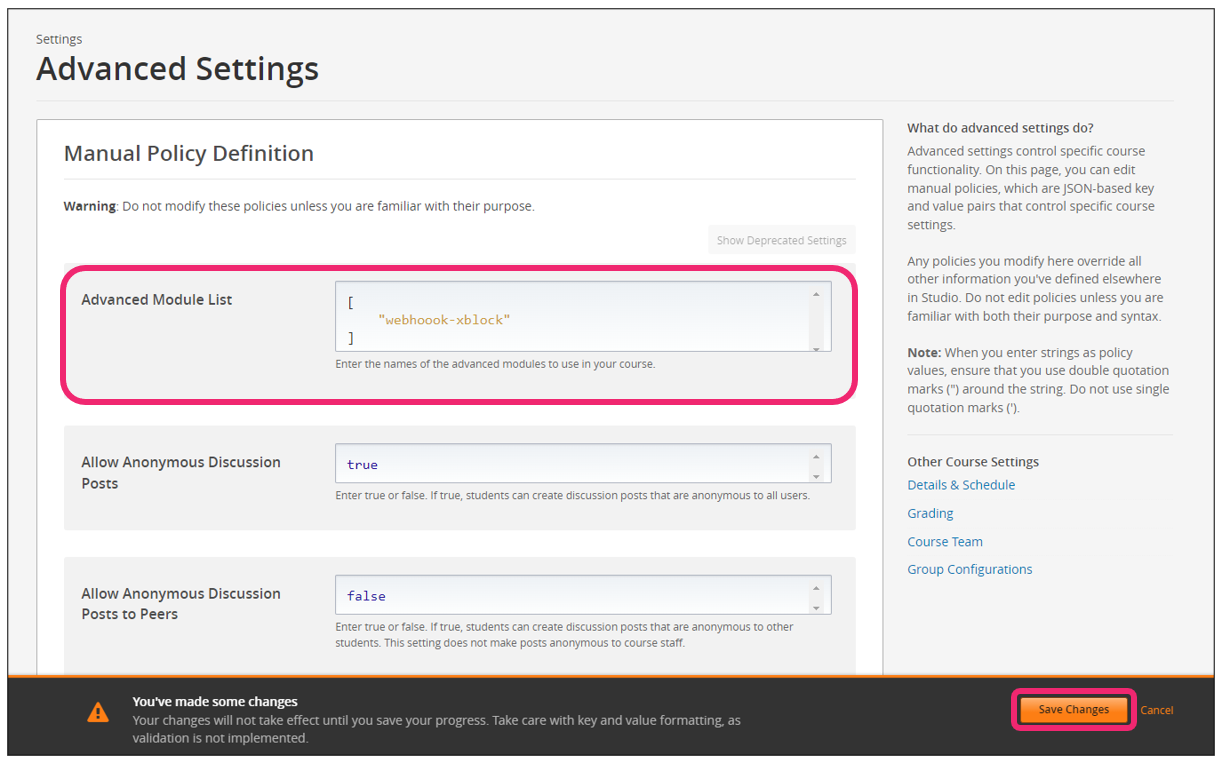
In the section Advanced Module List, add
webhook-xblockbetween the square brackets.[ "webhook-xblock" ]
Note
Add the XBlock command with an indented space and without any space before or after quotation marks, as shown in the example above, to avoid execution errors.
Step 5:
At the bottom of the screen, click on Save Changes.
Step 6:
Once saved, click the Content tab and select the Outline option to return to the course content.

Step 7:
Navigate to the desired unit or page within the course outline where you want to add the Webhook XBlock.
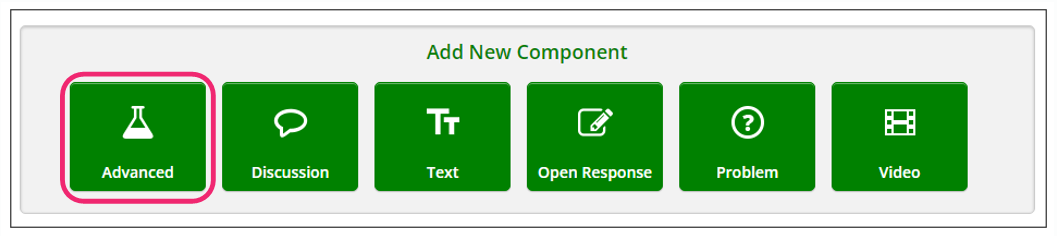
- Step 8:
Once you are there, click Advanced Component in the Add New Component bar.
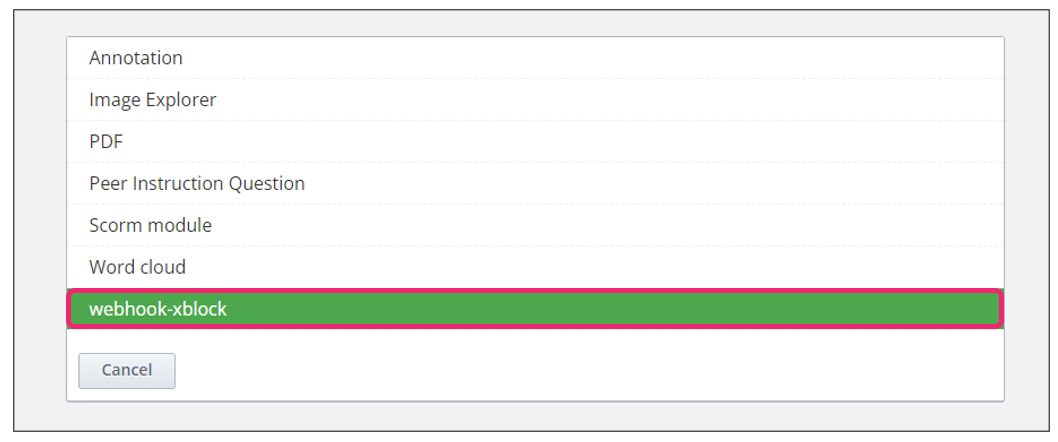
- Step 9:
You will see a list of all the advanced components added to your course. Click on webhook-xblock. The system will add the component immediately to the unit.
- Step 10:
Click the Edit button on the upper right corner of the new component to configure the XBlock.

Step 11:
The editor window is going to open. Here you will find several options to set up the XBlock as needed. The primary options that you have to edit are:
Name: String to help identify the triggered course component that is sending the payload (e.g. course-started-webhook).
URL: URL to send the payload to.
Frequency: Indicate how often should we send the information.
Button text: Button inner text, in case the student is allowed to decide when to send the payload. Please note that the Let the student send the information option must be selected under Frequency for the button to appear with the specified text. Otherwise, the button will not be displayed.
Additional text: Additional text to show in this component to the student in HTML formatting.
Extra Information: Send extra information in the payload.
Send in Async Task: Option to send the payload in an async task.
Note
There are pros and cons of sending the webhook synchronously versus asynchronously. More information below.
Synchronous Webhooks:
- Pros:
Immediate Feedback: The calling service gets an immediate response.
Simpler Flow: Easier to understand and implement since everything happens within a single request-response cycle.
Guaranteed Order: Events are processed in the order they are received, which can be crucial for some applications.
- Cons:
Blocking: The calling service has to wait for a response, which can slow down the overall process and impact user experience.
Timeouts: The service being called risks timeouts if it takes too long to process.
Asynchronous Webhooks:
- Pros:
Non-Blocking: The calling service can continue processing other tasks without waiting for a response.
Handling Long Processes: Better suited for operations that may take a long time to complete.
- Cons:
Complexity: Requires a more complex setup, often involving message queues and additional error-handling logic.
Delayed Feedback: No immediate response, so you might need additional mechanisms to confirm delivery or processing status.
Order Not Guaranteed: Unless additional logic is implemented, the order of processing can’t be guaranteed.
Send Course Grade: If you enable this option, the payload description will include three extra fields for sending the student’s course grade: passed, percent, letter_grade.
- Step 12:
Finish the configuration of the component and click on the Save button.
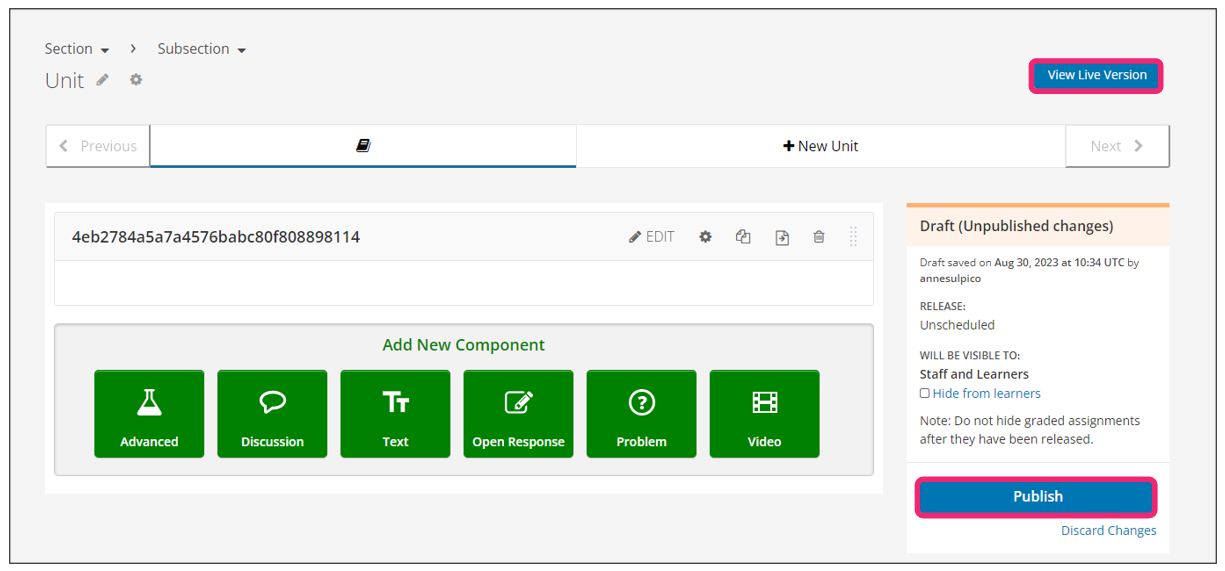
- Step 13:
Publish the unit and see how your new component works on its final version by clicking the View Live Version button.
See also
For more information about the Webhook XBlock by eduNEXT, please visit this repository.
You may also visit our demo site where you can find an example of the use of the Webhook XBlock.