What is Survey XBlock?
Contents
What is Survey XBlock?#
This XBlock allows course creators to add a survey component in a course to collect learner feedbacks and responses. Survey XBlock can be used to configure multiple questions and multiple possible answers. The set of answers is used for each question in the survey.
What are the benefits of using Survey XBlock?#
Survey XBlock allows these possible use cases:
Enable course teams to create simple or complex surveys to engage their learners.
Configure multiple questions and multiple possible answers.
Surveys may have several customizations. As there are multiple questions but the answers are static, questions have the ability to use images, rather than answers.
Surveys may also have a Feedback section.
Questions and Feedback fields may be enhanced with Markdown and HTML.
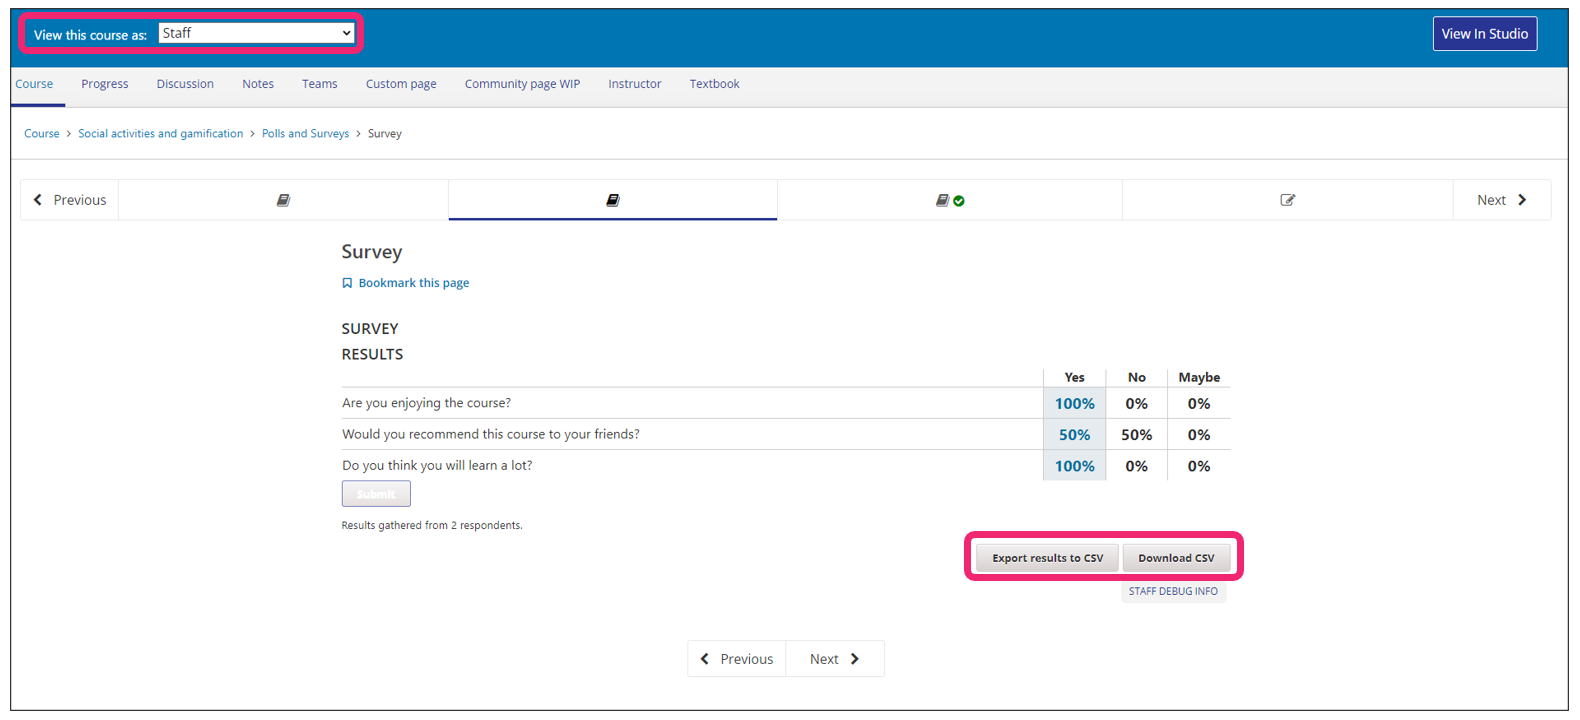
This XBlock allows course team members, who have staff role, to download the survey results in a CSV file. To download the results, click the Export results to CSV first, and then, click Download CSV.
How to implement Survey XBlock?#
- Step 1:
Go to Studio. Remember, you can access it through the link in your ECC account or by going to studio.edunext.co and signing in with your email and password.
- Step 2:
Open the course where you will add the Survey XBlock.
- Step 3:
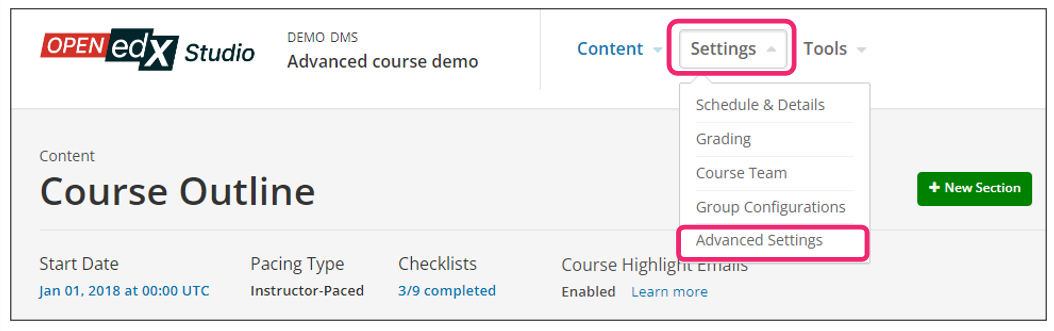
Click on the Settings tab and select the Advanced Settings option.
- Step 4:
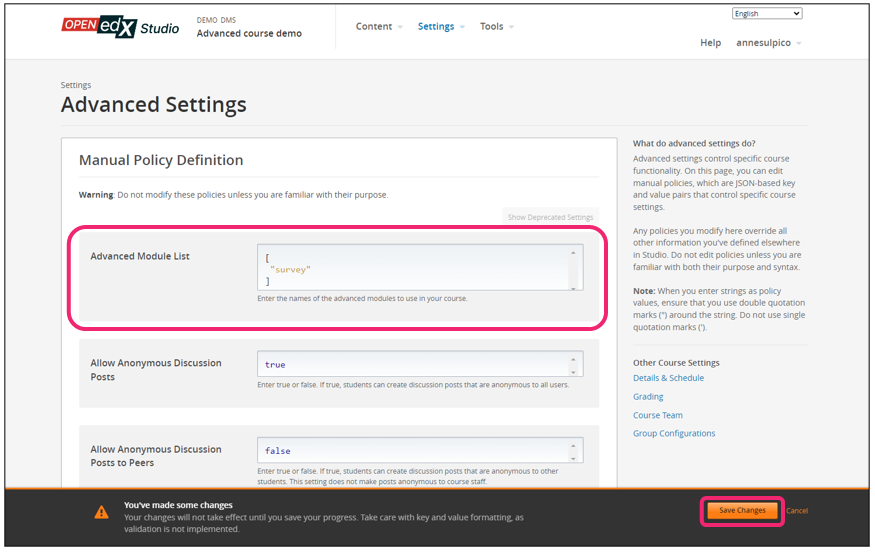
In the section Advanced Module List, add
surveybetween the square brackets.[ "survey" ]
Note
Add the XBlock command with an indented space without any space before or after quotation marks, as shown in the example above, to avoid execution errors.
- Step 5:
At the bottom of the screen, click on Save Changes.
Step 6:
After this, the XBlock should be available, so click the Content tab and select the Outline option to get back to the course content.

- Step 7:
Under Outline, go to the section, then the subsection, and finally to the unit or page where you want to add the Survey XBlock.
- Step 8:
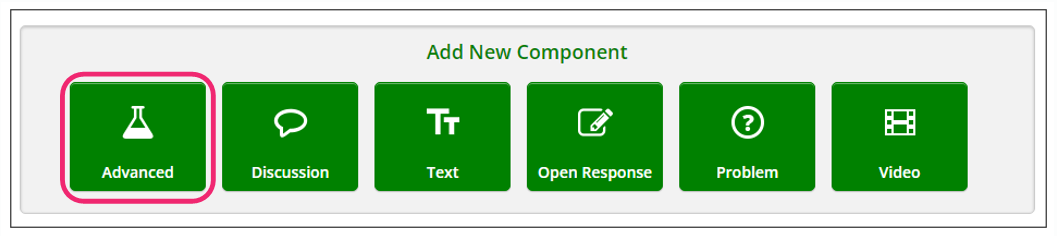
Once you are there, click Advanced Component in the Add New Component bar.
- Step 9:
You will see a list of all the advanced components added to your course. Click on Survey. The system will add the component immediately to the unit.

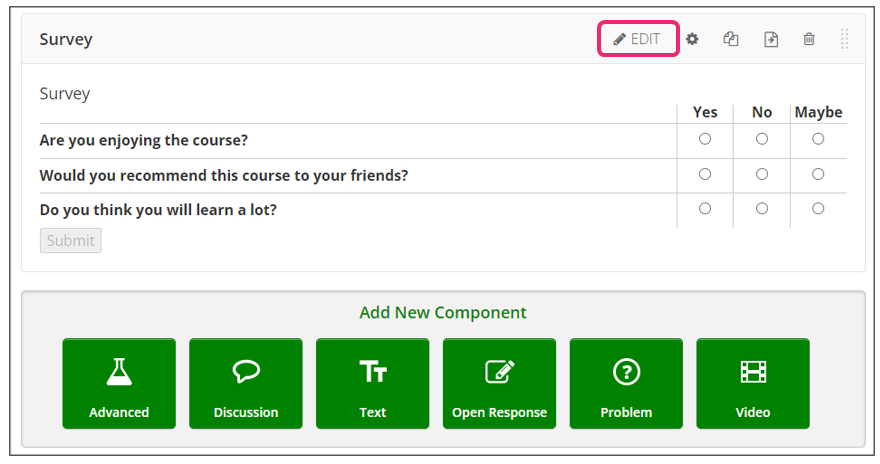
- Step 10:
Click the Edit button on the upper right corner of the new component to add or edit the content details.
- Step 11:
The editor window is going to open. Here you will find several options to set up the Survey XBlock as needed. The principal options that you have to edit are:
Display name: Enter the name for the component here.
Feedback: You can enter text that learners see aftey they submit responses here.
Private Results: Either True or False. To hide survey results from learners, select True. If you leave the default value False, learners see survey results after they submit responses.
Maximum Submissions: This is the maximum number of times a learner may submit a response. To allow learners to submit responses more than once, change the value. Enter 0 to allow unlimited responses.
Note
If you allow learners to submit responses more than once, you should set Private Results to True. Otherwise, learners will be able to change their responses after seeing others’ responses.
- Step 12:
Configure answers for the survey. Each answer is displayed to learners as a column, with a radio button they can select. Each answer is used for each survey question.
In each Answer field, enter the text for the column heading that learners will see.
To add answers, select Add answer at the bottom of the editor. New answers are added at the bottom of the list.
The top answer in the list is displayed to learners as the left-most answer column in the survey, and the bottom answer is displayed in the right-most column. To change the order of answers, select the up and down buttons next to each answer.
To remove an answer, select Delete next to the answer.
- Step 13:
Configure questions for the survey. Each question is displayed to learners in the left-most column.
You must enter either text or an image path, or both, for each question. To enter an image, use the Studio URL for the image.
The survey template contains three questions. To add questions, select Add question at the bottom of the editor. New questions are added at the bottom of the list.
If you use an image, you must enter useful alternative text in the Image alternate text field for visually impaired users.
Questions are displayed to learners as rows in the order you configure them. To change the order of questions, select the up and down buttons next to each question.
To remove a question, select Delete next to the question.
- Step 14:
Finish the configuration of the component and click on the Save button.
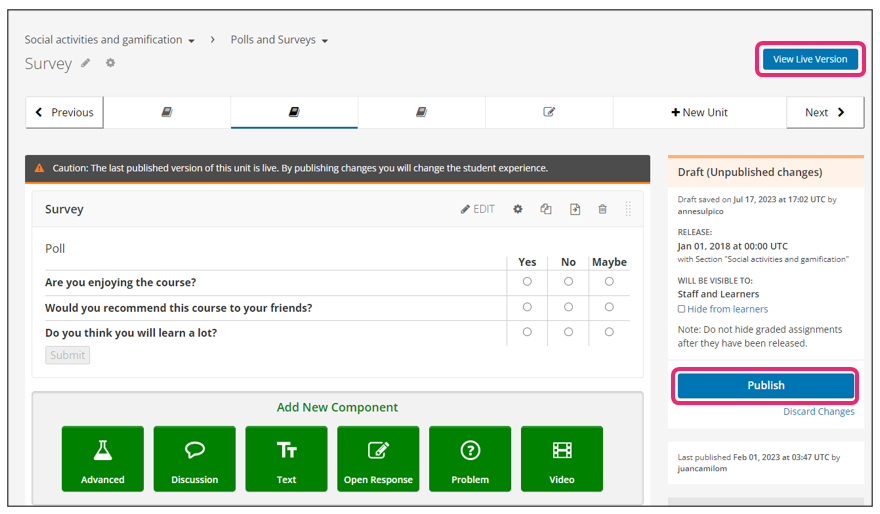
- Step 15:
Publish the unit and check how your new component looks on its final version by clicking the View Live Version button.
You may also visit our demo site where you can find various examples of the use of the Survey XBlock.