How to Configure the New Simple E-commerce Solution Service to Sell Open edX Courses with PayPal
Contents
How to Configure the New Simple E-commerce Solution Service to Sell Open edX Courses with PayPal#
This document guides you on how to configure the new simple e-commerce solution service to process payments remotely in Open edX courses with PayPal.
Prerequisite
During the configuration of PayPal process, you will be asked to enter a Webhook URL. You will need to request the webhook URL from the Edunext support team. We recommend that you gather this information before initiating the process to create the App (API) in your PayPal developer account, as this will accelerate the process. See Step 6 below for more information.
Configure PayPal to Activate Simple E-commerce Solution Service#
Note
Please note that the instructions in this section should only be done once per account. If you have already completed them, please proceed to the next section (Step #7).
To get started, go to https://developer.paypal.com/dashboard/applications/live and log in using your PayPal service credentials. Then select the My Apps & Credentials option, and choose Live and click on the Create App option.
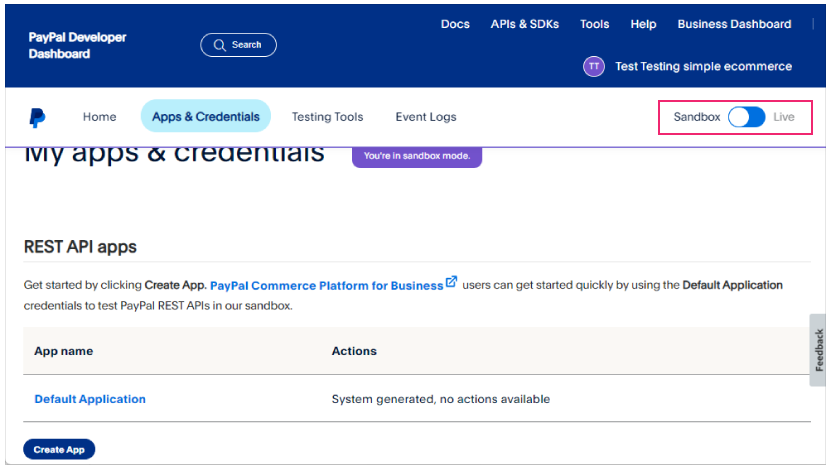
Note
To use applications and credentials in Live mode, you must have a PayPal Business Account.
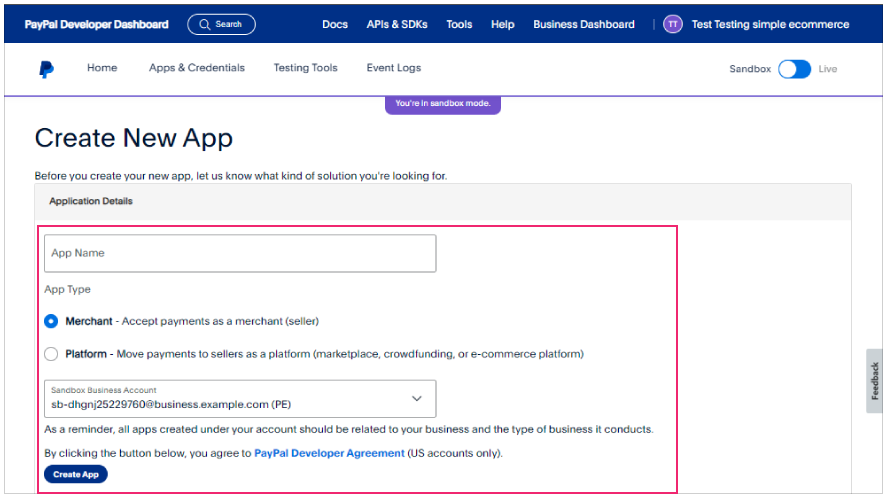
You will need to choose a name for your app and select Merchant for the App Type. Make sure that the associated account in your business account matches your PayPal login email. Once you have filled out all the required information, click Create App.
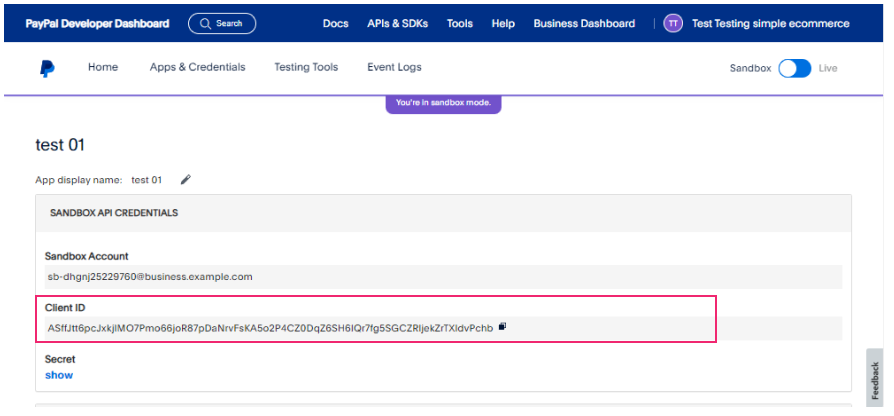
After clicking Create App, a screen will appear with your Client ID. This Client ID will be used in STUDIO. Be sure to keep track of it!
To proceed with the next step, you will need a URL webhook. This will be provided to you by the support team upon request.

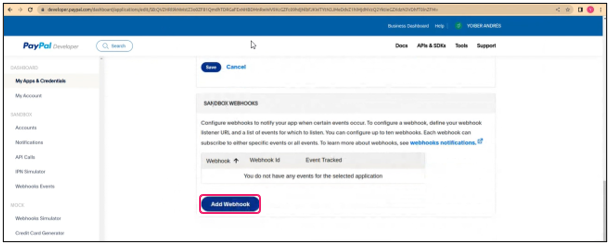
On the PayPal page, scroll down until you find the Webhooks option and click Add Webhook.
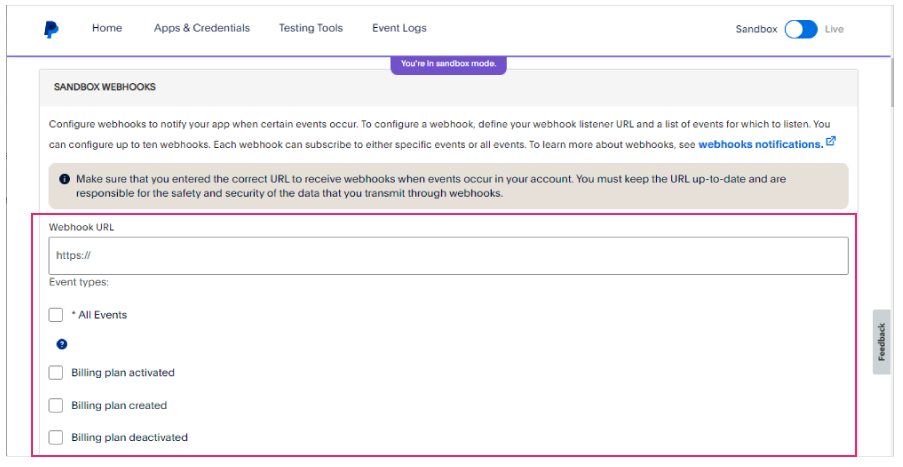
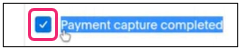
In the Webhook URL field, enter the webhook that was provided to you by the support team. You can find this information in your email or in the tickets section of customer support. In the Event Types section, select Payment capture complete and save your changes.
Next, go to your STUDIO account and select the course where you want to add the payment method. Within the course, go to the header menu, select the Settings dropdown, then choose Schedule & Details. Scroll down until you reach the Course Overview section.
course overview section#
In the Course Overview section, you will see several lines of code. In the last line of code, copy and paste the following code.
<script src="https://edunextpublic.s3.us-west-2.amazonaws.com/edxsites/clisite/e-commerce_v1.js" client_id="Your client_id" currency_code="your_currency_code" ></script>
enter code in this section#
To proceed, you need to add the following details to your code:
Your PayPal client ID, which can be found in the app you created on PayPal (Step #3). Add the client ID in quotes after the client-id variable.
The currency code in quotes (e.g., USD for dollars, EUR for euros) for the currency you will charge for your course after currency_code variable.
Note
Visit the following link to confirm a currency supported by PayPal and choose it correctly Paypal supported currencies.
The price of your course in quotes after course_price variable.
Once you add these details, your code will be ready to go.
Please note that the price of the course cannot be zero, as this will prevent the payment button from working and enrolling learners.
<script src="https://edunextpublic.s3.us-west-2.amazonaws.com/edxsites/clisite/e-commerce_v1.js" client_id="your_client_id" currency_code="EUR" course_price="10"></script>
enter details to your code in this section#
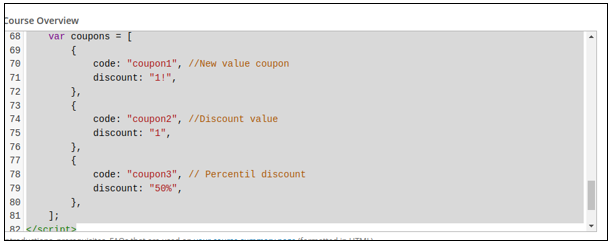
To enable coupons for your course, you can paste the following code below the code your copied in the previous step. After pasting, you can set up discount coupons.
However, be careful not to create coupons with discounts that reduce the price to zero, as this would couse the payment button to stop working.
var course_price = "10";
  var coupons = [
      {
          code: "coupon1", //New value coupon
          discount: "1!",
      },
      {
          code: "coupon2", //Discount value
          discount: "1",
      },
      {
          code: "coupon3", // Percentil discount
          discount: "50%",
      },
  ];
enter coupon code in this section#
Save your changes.
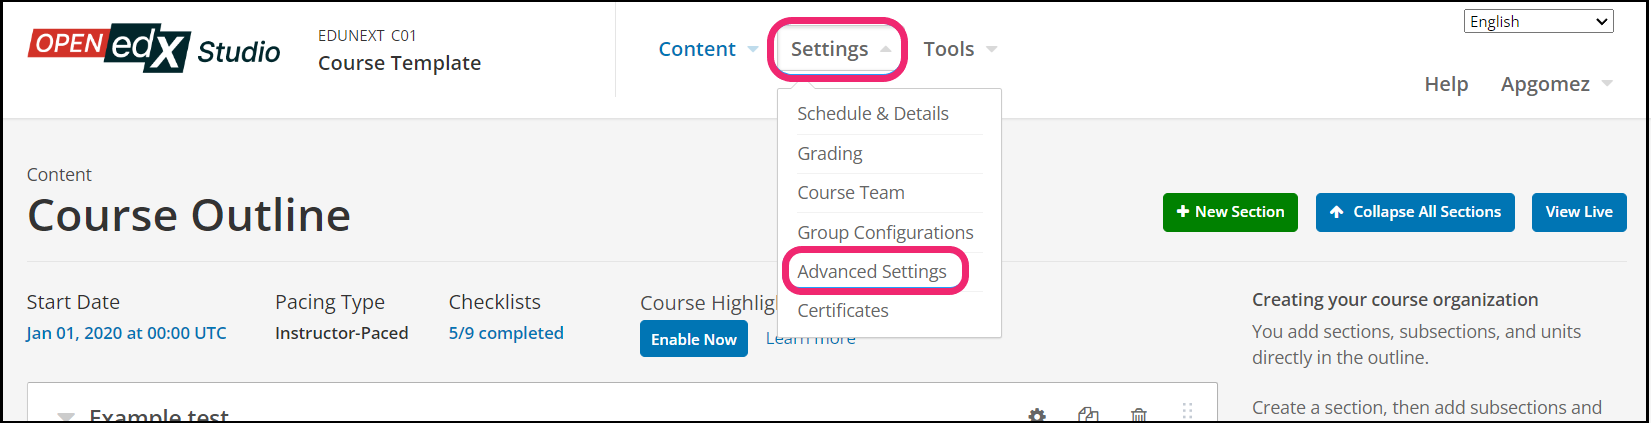
To complete the configuration, click on the Settings tab and select the Advanced Settings option.
Go to the Invitation Only section and enable it by setting it to true.

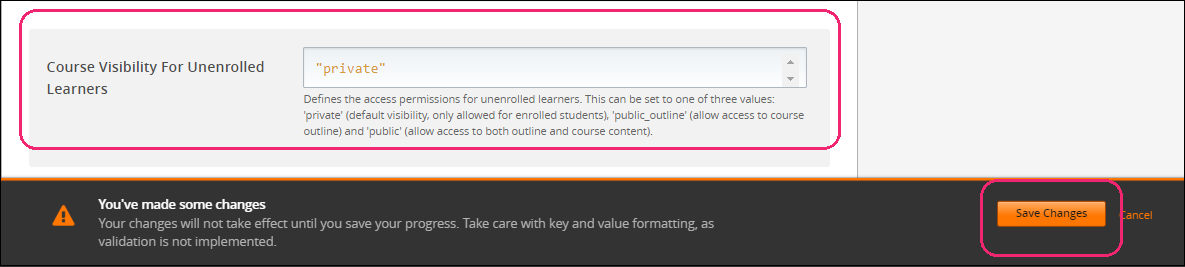
Navigate to the Course Visibility for Unenrolled Students section and set it to private. Save the changes after making these adjustments.
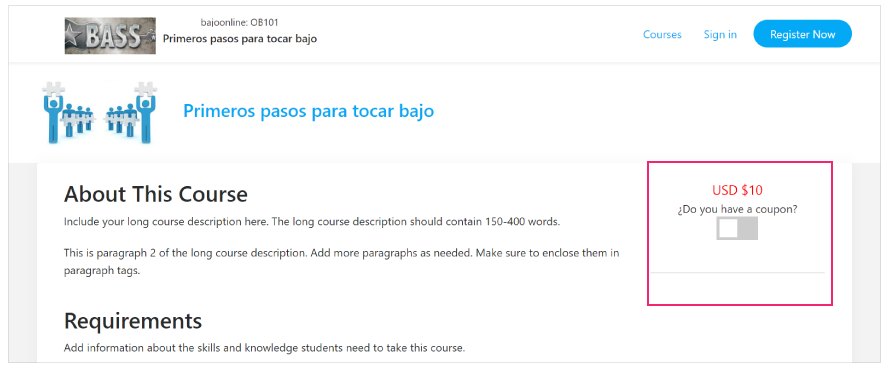
Payment Button#
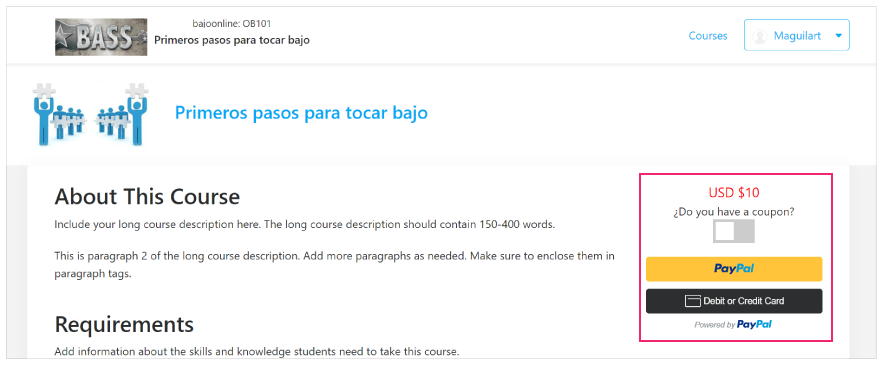
After you have saved your changes, Simple E-commerce will be implemented in your course.
To view it, go to Course Description on your LMS Site.
If you are logged in with your admin user, it will appear as shown in the image.
If you want to see how your learners see it, create a test account on your LMS site, enter the course and view the description.
Please note that enrollment dates must end from the present to the future. If the registration end date has passed, the payment button will not be displayed.
You can find the enrollment dates in STUDIO, within the course > Settings > Schedule & Details > Course Schedule.
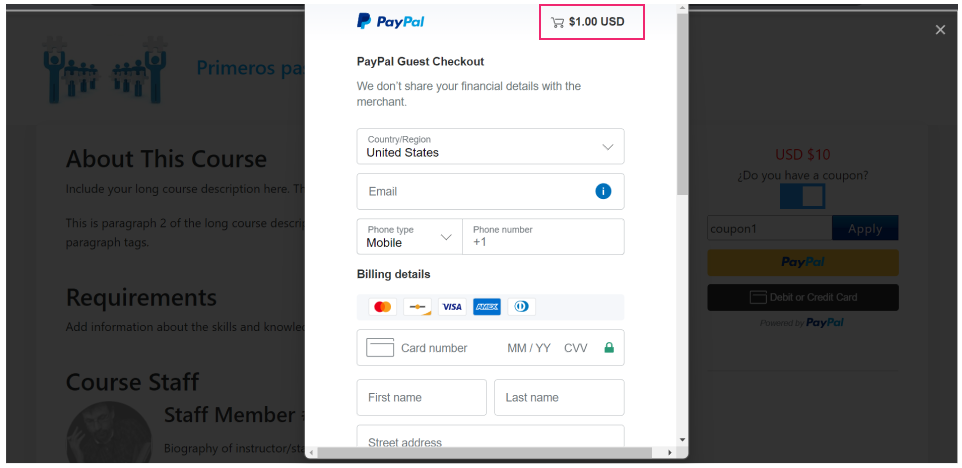
Coupons#
If you want to provide discount coupons to your learners, you need to add the coupon code and the discount to be applied in Step #10 in the Studio section.
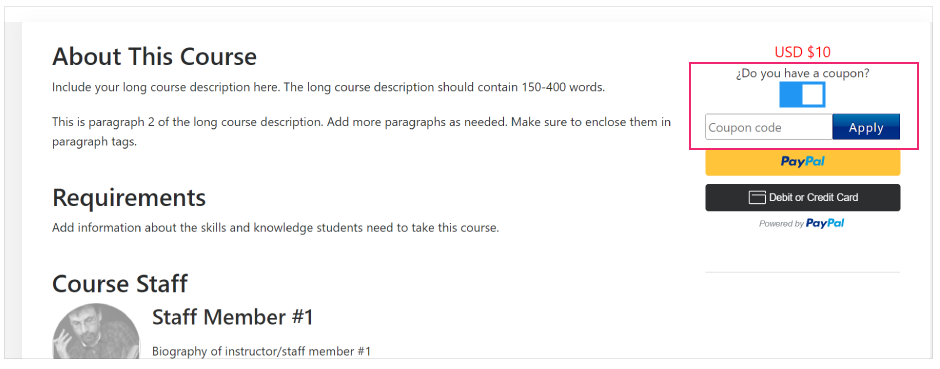
After your learners add the discount coupon and click the “apply” button, a validity message will appear.

Then, when they select the payment method, the discount will be applied. In this case, the card payment option was selected.
If you don’t want to use or want to remove the default coupons, just go to Course Overview and remove the code you added to that section in Step 10.
var course_price = "10";
  var coupons = [
      {
          code: "coupon1", //New value coupon
          discount: "1!",
      },
      {
          code: "coupon2", //Discount value
          discount: "1",
      },
      {
          code: "coupon3", // Percentil discount
          discount: "50%",
      },
  ];
Congratulations! You now have Simple E-commerce set up in your course. If you encounter any problems, please do not hesitate to contact us.

Learn more about Coupons#
The name of the coupon, this is the information that the user must enter at the time of making the purchase to obtain the discount.
The type of discount.
Type of discount#
New value coupon Refers to a change in value over the initial cost. For example, the course has a cost of 10 and when entering the coupon1 the cost will be modified to 1. In this case the discount value should be the new price + ! so it will be in this way: 1!
Discount value Refers to a discount on the original value given in the currency of your paypal system. For example, the course has a cost of 10 and when entering coupon2 the cost will be reduced by 1 and therefore will remain at 9. In this case the discount value should be only the discount value so it will be in this way: 1
Percentil discount Refers to a percentage discount on the initial cost. For example, the course has a cost of 10 and when entering the coupon3 the cost will be reduced by 50%, corresponding to 5 and therefore the final cost will remain at 5. In this case the discount value should be the discount percentage + % so it will be in this way 50%.
Put this example code:
<script>
    var course_price = "10";
    var coupons = [
      {
          code: "coupon1", //New value coupon
          discount: "1!",
      },
     {
         code: "coupon2", //Discount value
          discount: "1",
      },
      {
          code: "coupon3", // Percentil discount
          discount: "50%",
      },
   ];
</script>