What is the Conditional XBlock?
Contents
What is the Conditional XBlock?#
A conditional XBlock controls the content that learners see after a response that they make meets a certain condition. For example, learners who answer “Yes” to a poll question see a different block of text from the learners who answered “No” to the same question. This is an XBlock to show or hide one or more conditional component by a trigger component in the Open edX LMS. Editable within Open edx Studio.
Some of the functions of the Conditional XBlock are:
Branching Scenarios: The module might enable you to create branching scenarios where the content or path a student takes depends on their choices or answers. This is often used in interactive scenarios or simulations.
Prerequisite Control: A conditional module could enforce prerequisites for certain content. For example, a student might need to complete a quiz or module before gaining access to more advanced materials.
Conditional Assessments: The module might be used to create assessments with conditional questions. Depending on a student’s previous answers, the module could present different follow-up questions.
What are the benefits of using the Conditional XBlock?#
Content Display Control: You could use a conditional module to control when and how certain content is displayed. For instance, showing additional resources only if a student is struggling with a specific topic.
Interactive Activities: Interactive activities, like quizzes or assignments, could use a conditional module to provide immediate feedback to students based on their responses.
Custom Learning Paths: In a scenario where students have different learning goals, a conditional module could allow customization of learning paths based on those goals.
How to implement the Conditional XBlock?#
- Step 1:
Go to Studio. Remember, you can access it through the link in your ECC account or by going to studio.edunext.co and signing in with your email and password.
- Step 2:
Open the course where you will add the Conditional XBlock.
- Step 3:
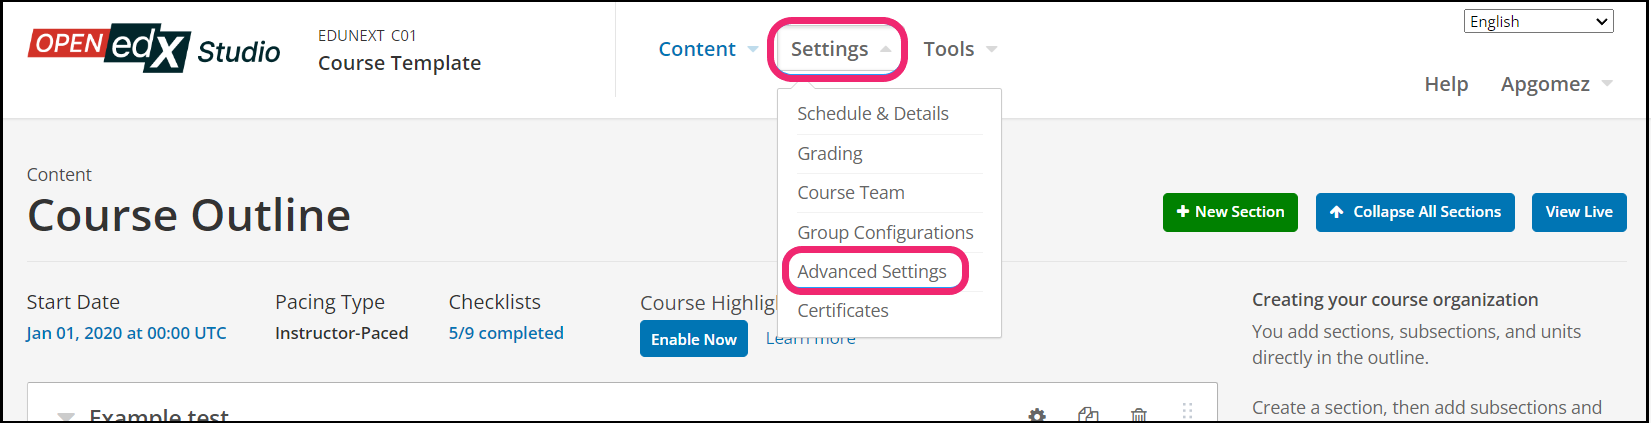
Click on the Settings tab and select the Advanced Settings option.
- Step 4:
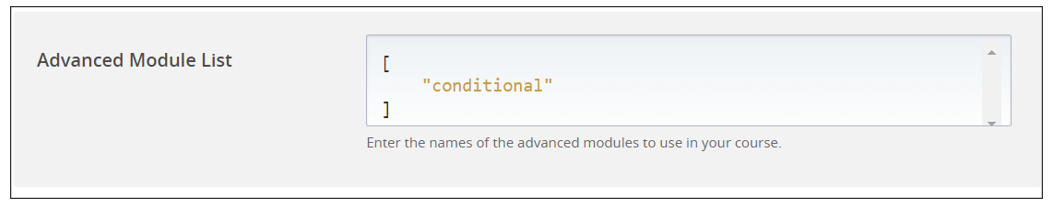
In the section Advanced Module List, add
conditionalbetween the square brackets.[ "conditional" ]
Note
Add the XBlock command with an indented space and without any space before or after quotation marks, as shown in the example above, to avoid execution errors.
- Step 5:
At the button on the screen, click on Save Changes.
- Step 6:
After this, the XBlock should be available, so click the Content tab and select the Outline option to get back to the course content.

- Step 7:
Under Outline, go to the section, then the subsection, and finally to the unit or page where you want to add the Conditional XBlock.
- Step 8:
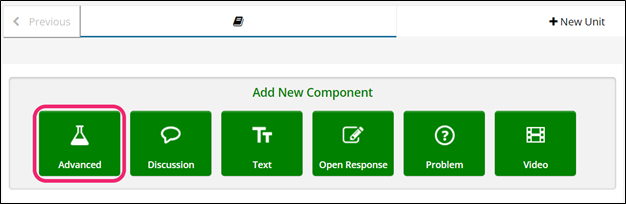
Once you are there, click Advanced Component in the Add New Component bar.
- Step 9:
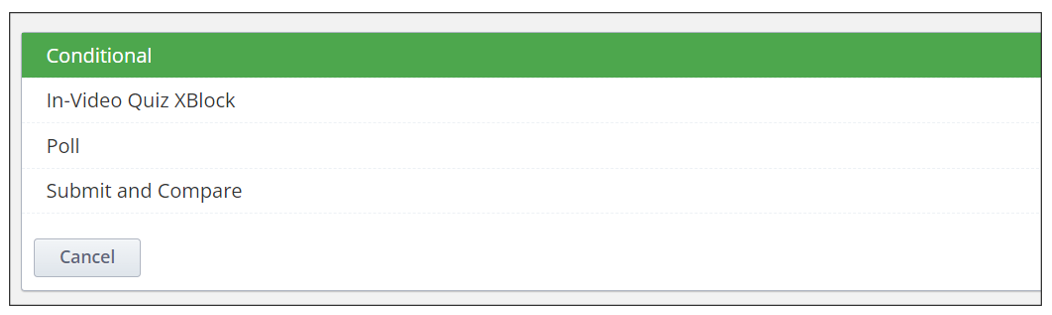
You will see a list of all the advanced components added to your course. Click on Conditional. The system will add the component immediately to the unit.
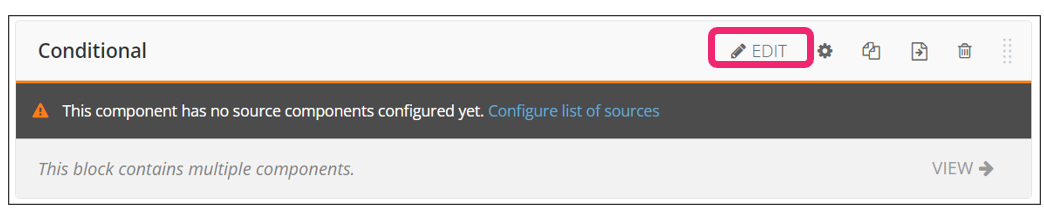
- Step 10:
Click the Edit button on the upper right corner of the new component to add the content details.
- Step 11:
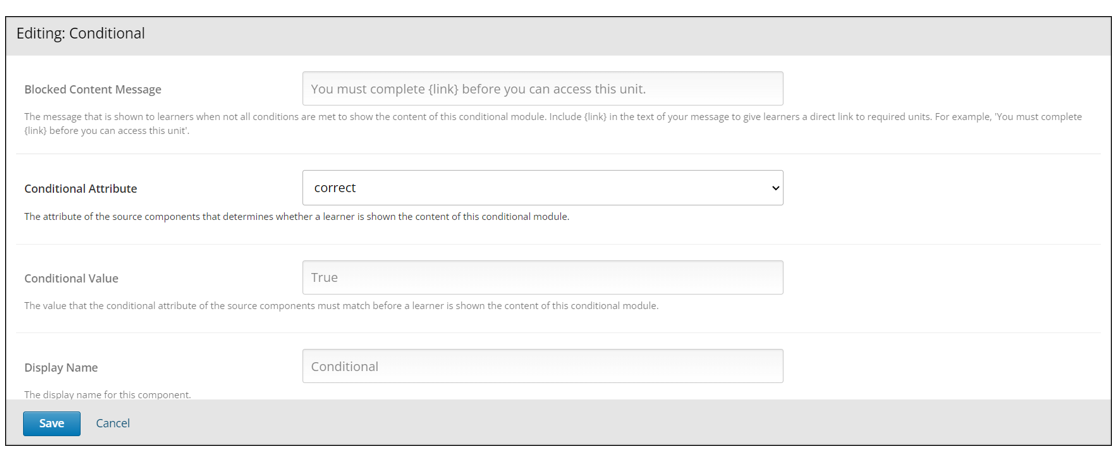
The editor window is going to open. Here you will find several options to set up the XBlock as needed. The principal options that you have to edit are:
Blocked Content Message: The message that is shown to learners when not all conditions are met to show the content of this conditional module. Instructors need to include a link in the text to include a message that it’s going to give learners a direct link to required units. For example, ‘You must complete {link} before you can access this unit.
Conditional Attribute: The value that the conditional attribute of the source components must match before a learner is shown the content of this conditional module. It could be a poll answer, submitted content, attempted, correct, or voted.
Conditional Value: The value that the conditional attribute of the source components must match before a learner is shown the content of this conditional module (true or false).
Display Name: The display name for this component, it shows “conditional” by default, but it can be modified according to the content.
Hide sequence content After Due Date: This module its optional if set, the sequence content is hidden for non-staff users after the due date has passed, it can be true or false.
Is Entrance Exam: Instructors can tag this course module as an Entrance Exam. Note, Entrance Exams must be enabled for this course setting to take effect.
Number of Relative Weeks Due By: In this module, instructors can enter the number of weeks the problems are due by relative to the learner’s enrollment date.
Source Components: Here must be the component location IDs of all source components that are used to determine whether a learner is shown the content of this conditional module. Copy the component location ID of a component from its Settings dialog in Studio.
Step 12:
Make sure to copy the component location ID of a component from its Settings dialog in Studio.
- Step 13:
Finish the configuration of the component and click on the Save button.
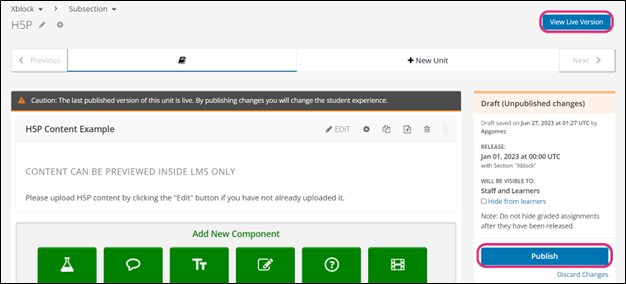
- Step 14:
Publish the unit and check how your new component looks on its final version by clicking the View Live Version button.
You may also visit our demo site where you can find various examples of the use of the Conditional XBlock.