What is Google Calendar XBlock?
Contents
What is Google Calendar XBlock?#
Google Calendar is a free online calendar service provided by Google. It allows users to organize their events, appointments, and reminders in a digital calendar accessible from any internet-connected device..
Some of the functions of the Google Xblock are:
Event Creation: Users can create events with detailed information, such as title, date, time, location, and description.
Invitations and Collaboration: It’s possible to invite other people to events and manage collaboration on shared calendars, making it easy to schedule meetings and events as a team.
Reminders and Notifications: Google Calendar can send reminders and notifications via email, mobile notifications, or pop-up notifications in the browser to ensure important events are not forgotten.
Integration with Gmail and other apps: The calendar seamlessly integrates with Gmail, allowing relevant emails to be easily converted into calendar events with a single click.
What are the benefits of using Google Calendar XBlock?#
Scheduling and Time Management: Google Calendar integration would allow learners to view their course deadlines, assignments, and live events alongside their personal and work commitments in one centralized place. This can help them manage their time more efficiently.
Event Notifications: Learners can receive notifications and reminders from Google Calendar about upcoming course events, helping them stay on track with their learning journey.
Mobile access: Google Calendar is accessible from various devices, including smartphones and tablets, enabling learners to access their course schedules on the go.
Personalization: Learners can customize their Google Calendar settings according to their preferences and set up reminders in a way that suits their learning style.
Please note that the availability and features of any Google Calendar XBlock may vary depending on the specific implementation and the development efforts put into it. It’s always a good idea to check with the edX platform administrators or the institution providing the course for more information about the available integrations and their benefits.
How to implement Google Calendar XBlock?#
- Step 1:
Go to Studio. Remember, you can access it through the link in your ECC account or by going to studio.edunext.co and signing in with your email and password.
- Step 2:
Open the course where you will add the Google Calendar XBlock.
- Step 3:
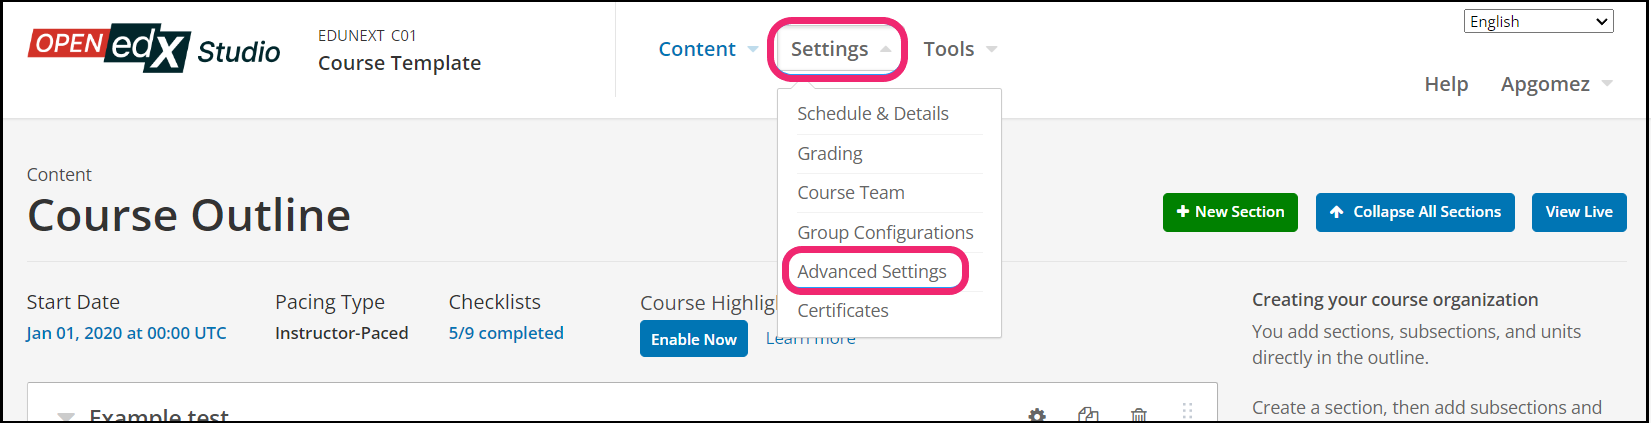
Click on the Settings tab and select the Advanced Settings option.
- Step 4:
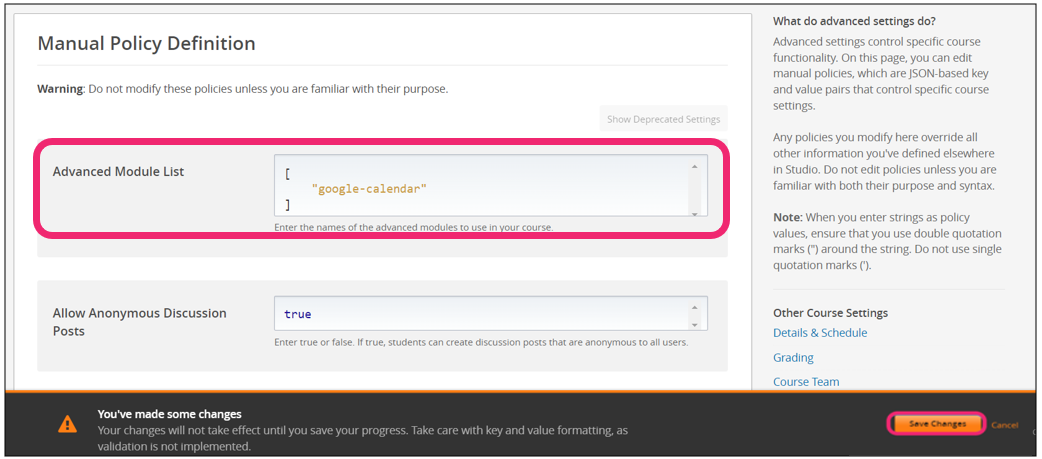
In the section Advanced Module List, add
google-calendarbetween the square brackets.[ "google-calendar" ]
Note
Add the XBlock command with an indented space and without any space before or after quotation marks, as shown in the example above, to avoid execution errors.
- Step 5:
At the button on the screen, click on Save Changes.
- Step 6:
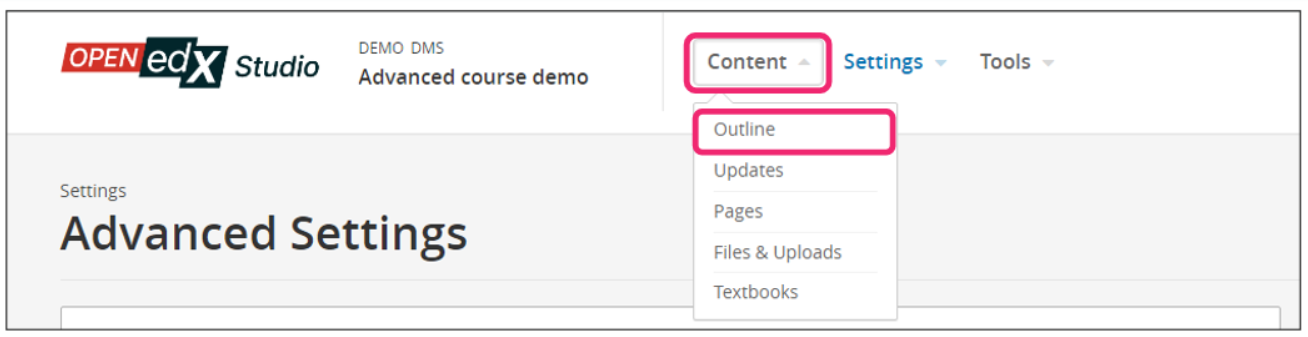
After this, the XBlock should be available, so click the Content tab and select the Outline option to get back to the course content.
- Step 7:
Under Outline, go to the section, then the subsection, and finally to the unit or page where you want to add the Google Calendar XBlock.
- Step 8:
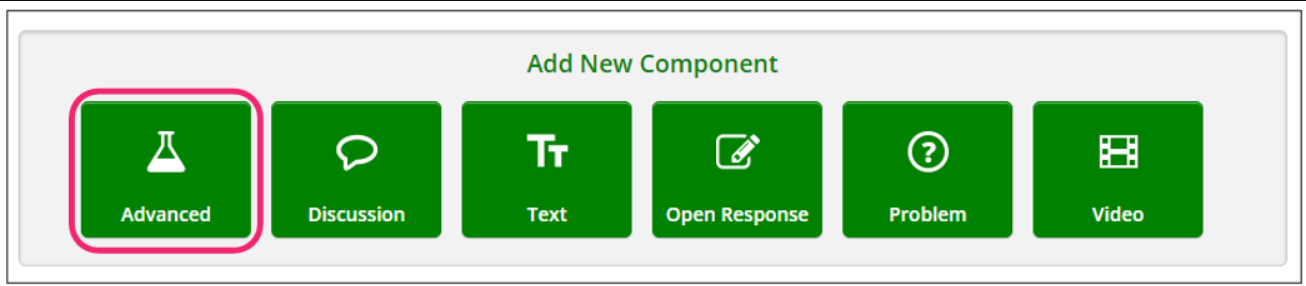
Once you are there, click Advanced Component in the Add New Component bar.
- Step 9:
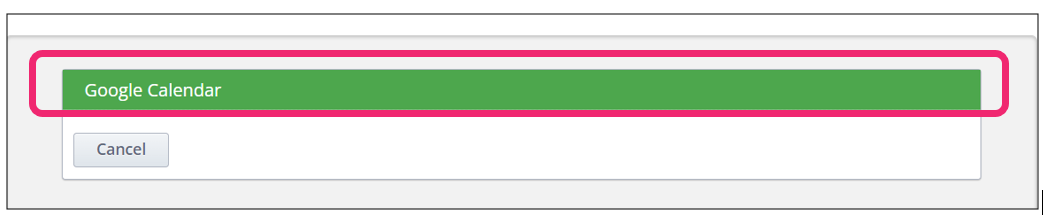
You will see a list of all the advanced components added to your course. Click on Google calendar. The system will add the component immediately to the unit.
- Step 10:
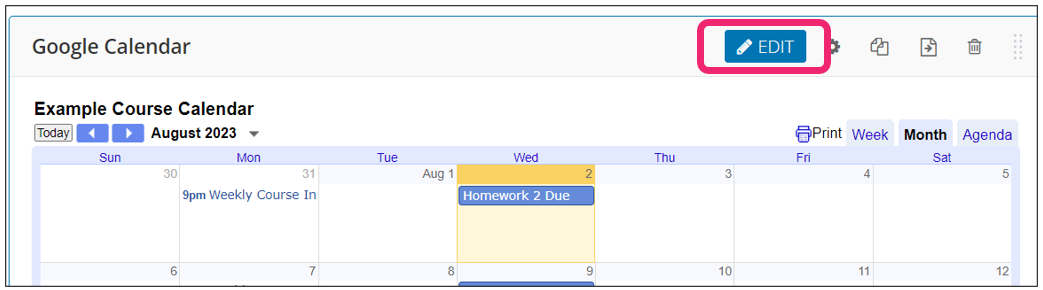
Click the Edit button on the upper right corner of the new component to add the content details.
- Step 11:
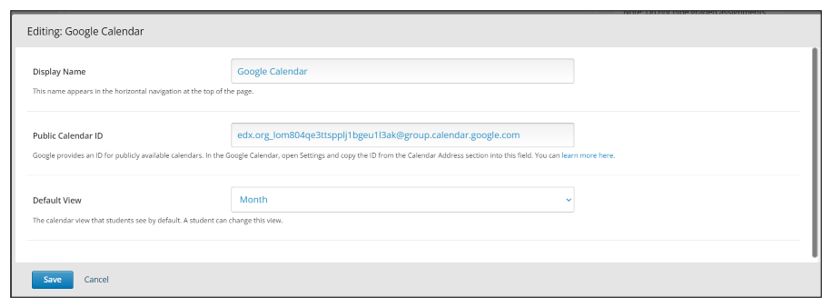
The editor window is going to open. Here you will find several options to set up the XBlock as needed. The principal options that you have to edit are:
Display Name: This is the component name that the students will see while they interact with it. The component name is Google Calendar by default, but you should edit as you want.
Public Calendar ID: Here you need to paste the public calendar ID, the step by step its in the note below.
Default view: Select Month, Week, or Agenda.This is the initial view that your learners have of the calendar. Each learner can change his or her view.
Note
Before you can add a Google Calendar to your course, you must make the Calendar public and obtain its ID. Google Calendar Tool. There you will find the step-by-step to make the calendar public and gather the ID.
- Step 12:
In the Public Calendar ID field, paste the calendar ID you got in the Obtain the Google Calendar ID task
For the Default View field, select Month, Week, or Agenda. This is the initial view that your learners have of the calendar. Each learner can change his or her view.
- Step 13:
Finish the configuration of the component and click on the Save button.
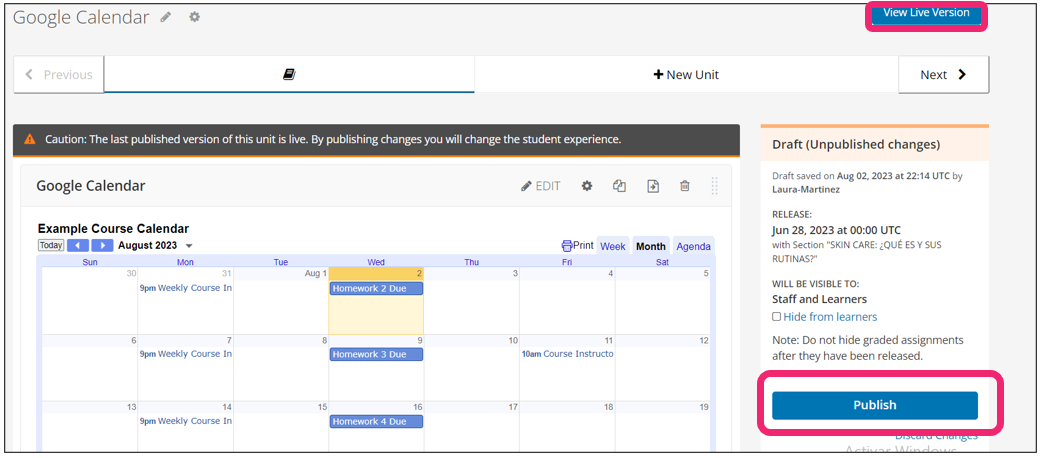
- Step 14:
Publish the unit and check how your new component looks on its final version by clicking the View Live Version button.