What is Google Documents XBlock?
Contents
What is Google Documents XBlock?#
This XBlock helps the Open edX users to add any type of Google document to their course on the platform. Google Documents is a web-based word processing application developed by Google, which supports different documents in the cloud, like docs, slides, sheets, forms, and boards.
Some of the functions of the Google Documents XBlock are:
Use different types of documentation: You can add different content formats to your course, such as presentations or spreadsheets, that you can develop from your Google Drive account and then add to your course in Open edX, which gives you more freedom when creating course materials and managing them.
No need to duplicate content You avoid creating and updating the same content on both platforms using this tool.
Display data tables: Using different Google Documents formats, you can add data tables to your course, an excellent method to visualize information and develop practical skills in your students, like data analysis.
How to implement Google Documents XBlock?#
- Step 1:
Go to Studio. Remember, you can access it through the link in your ECC account or by going to studio.edunext.co and signing in with your email and password.
- Step 2:
Open the course where you will add the Google Documents XBlock.
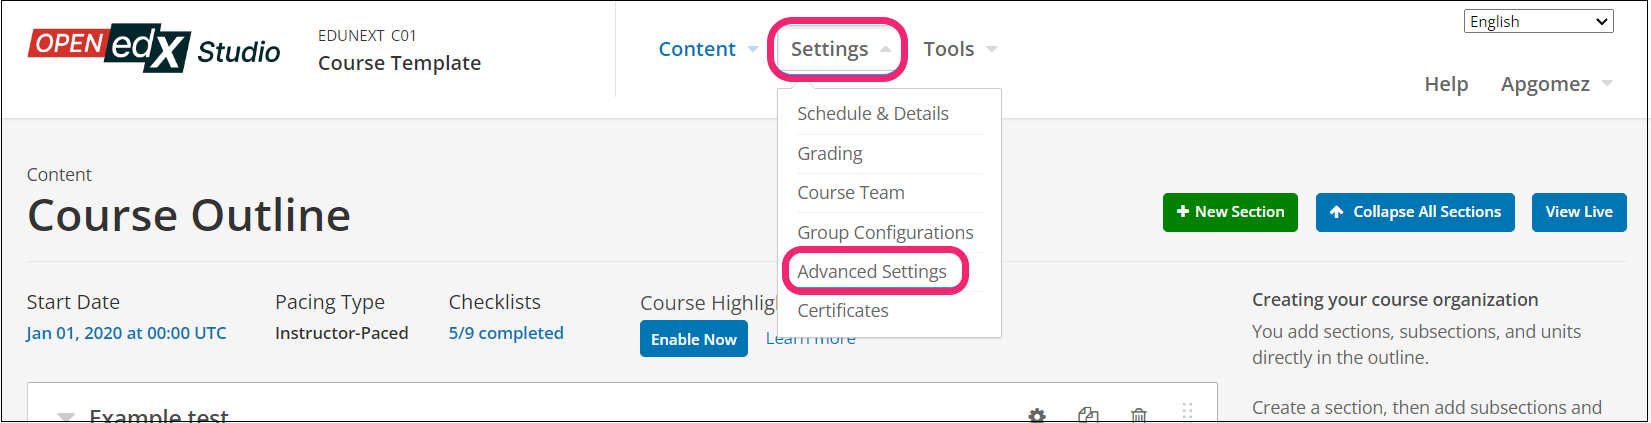
- Step 3:
Click on the Settings tab and select the Advanced Settings option.
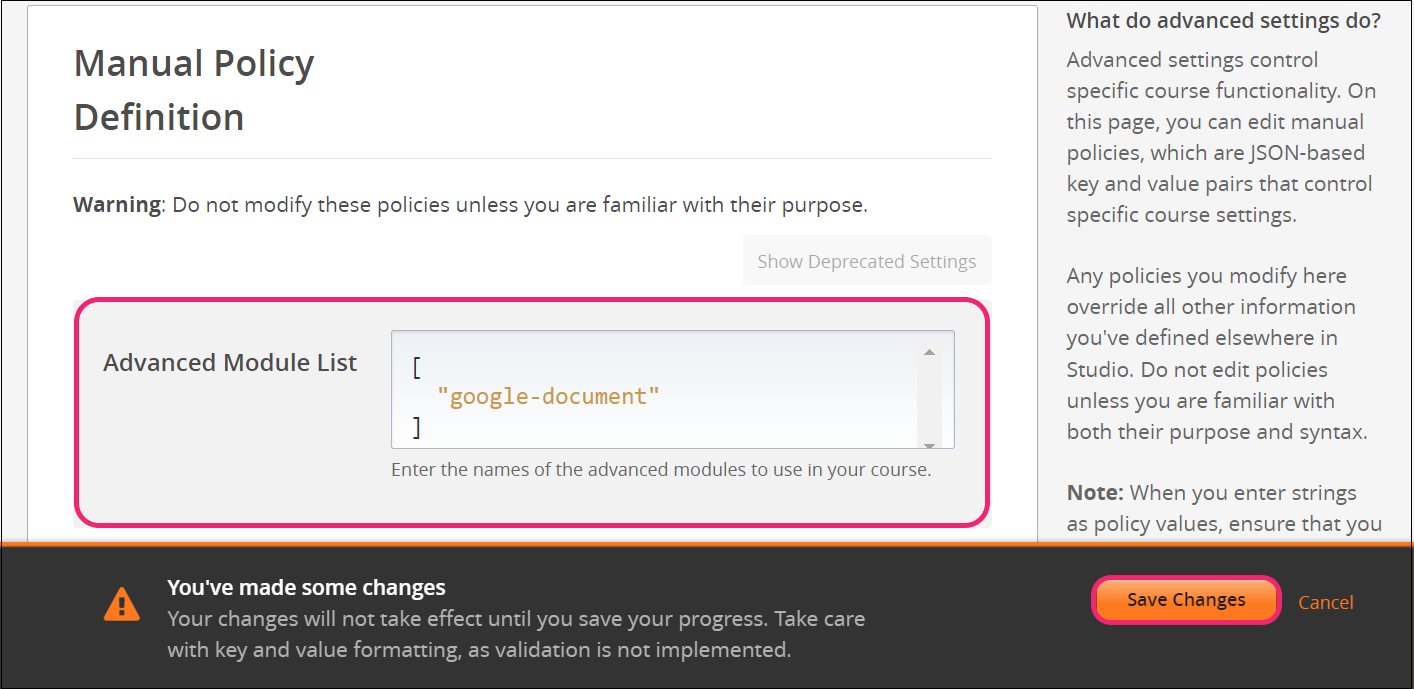
- Step 4:
In the section Advanced Module List, add
google-documentbetween the square brackets.[ "google-document" ]
Note
Add the XBlock command with an indented space and without any space before or after quotation marks, as shown in the example above, to avoid execution errors.
- Step 5:
At the button on the screen, click on Save Changes.
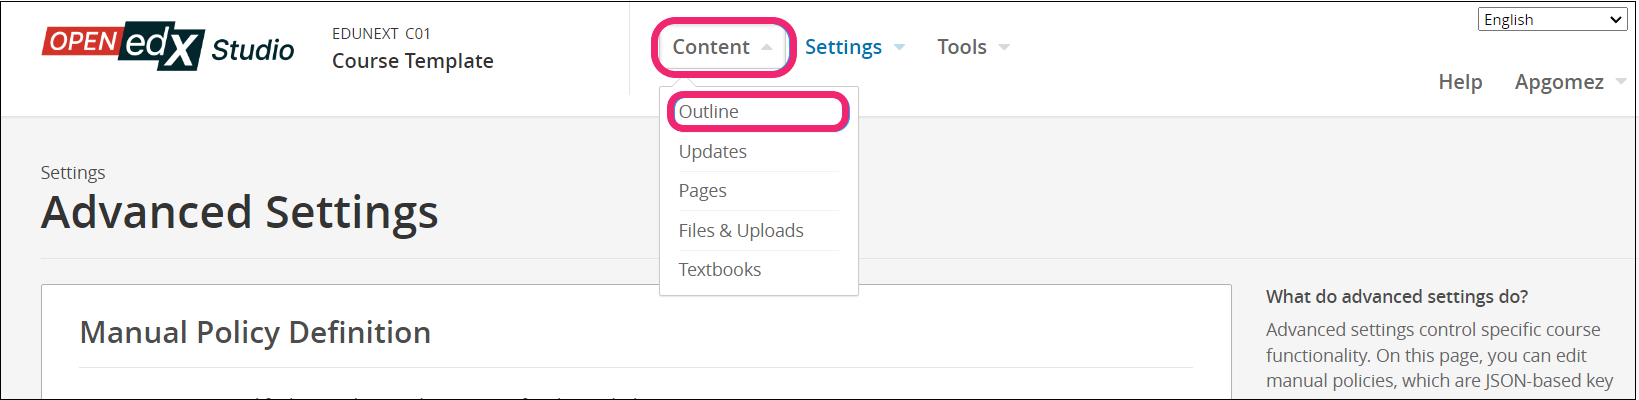
- Step 6:
After this, the Xblock should be available, so click the Content tab and select the Outline option to get back to the course content.
- Step 7:
Under Outline, go to the section, then the subsection, and finally to the unit or page where you want to add the Google documents XBlock.
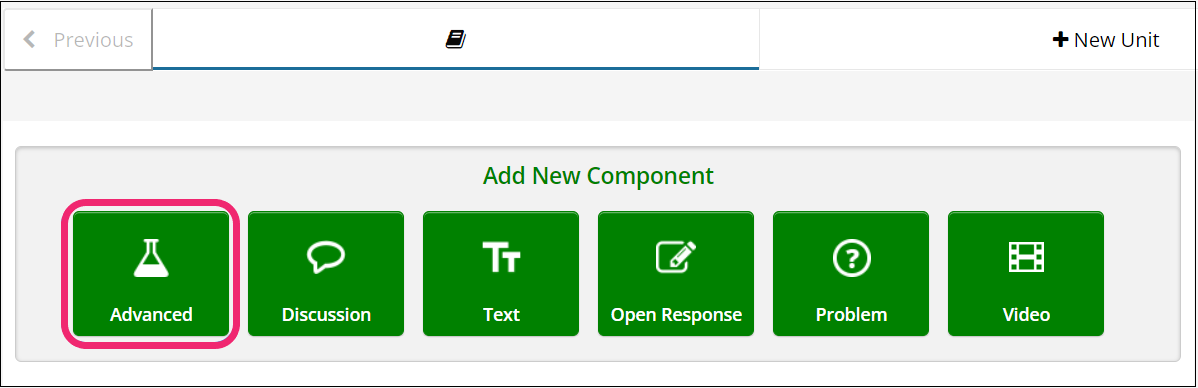
- Step 8:
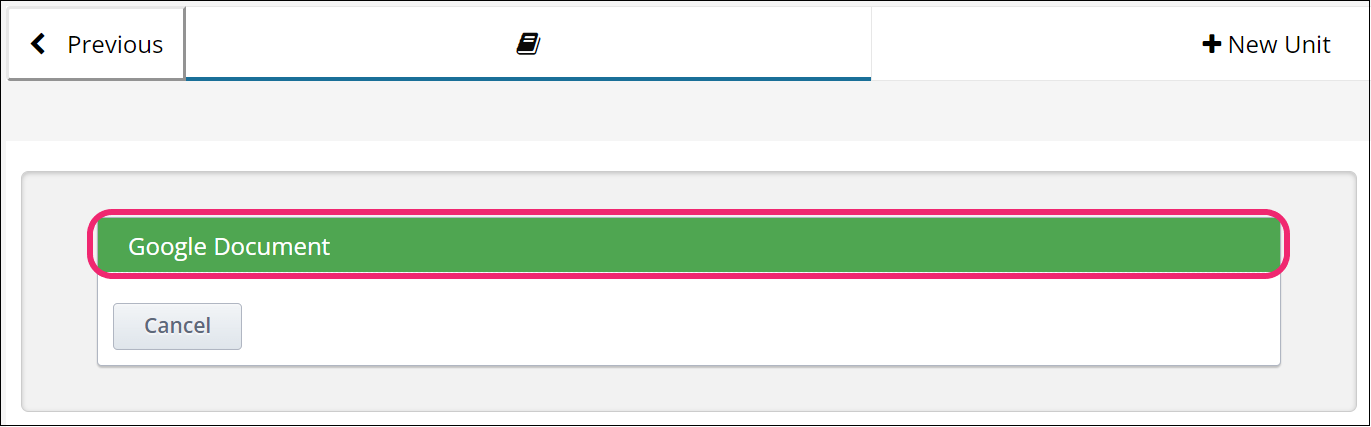
Once you are there, click Advanced Component in the Add New Component bar.
- Step 9:
You will see a list of all the advanced components added to your course. Click on Google Documents. The system will add the component immediately to the unit.
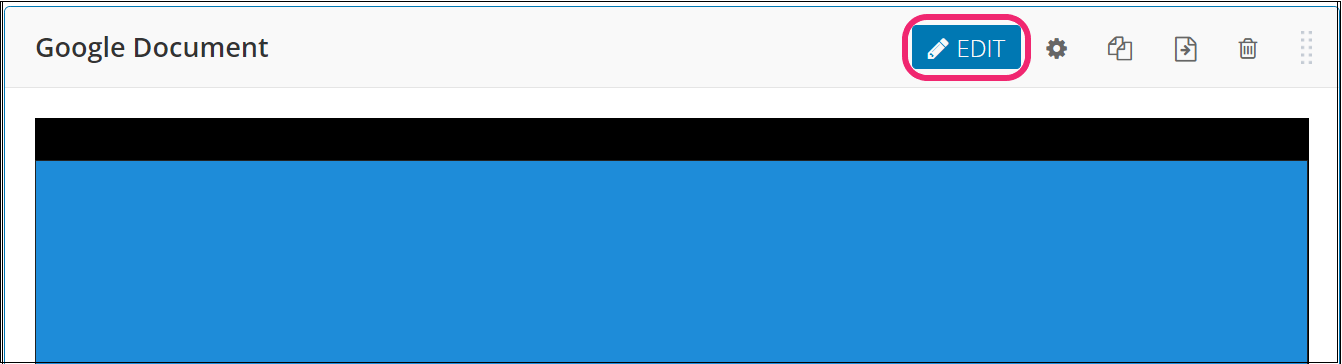
- Step 10:
Click the Edit button on the upper right corner of the new component to add the content details.
- Step 11:
The editor window is going to open. First, change the Display Name that will appear with the component. This modification will help your students to have more context.
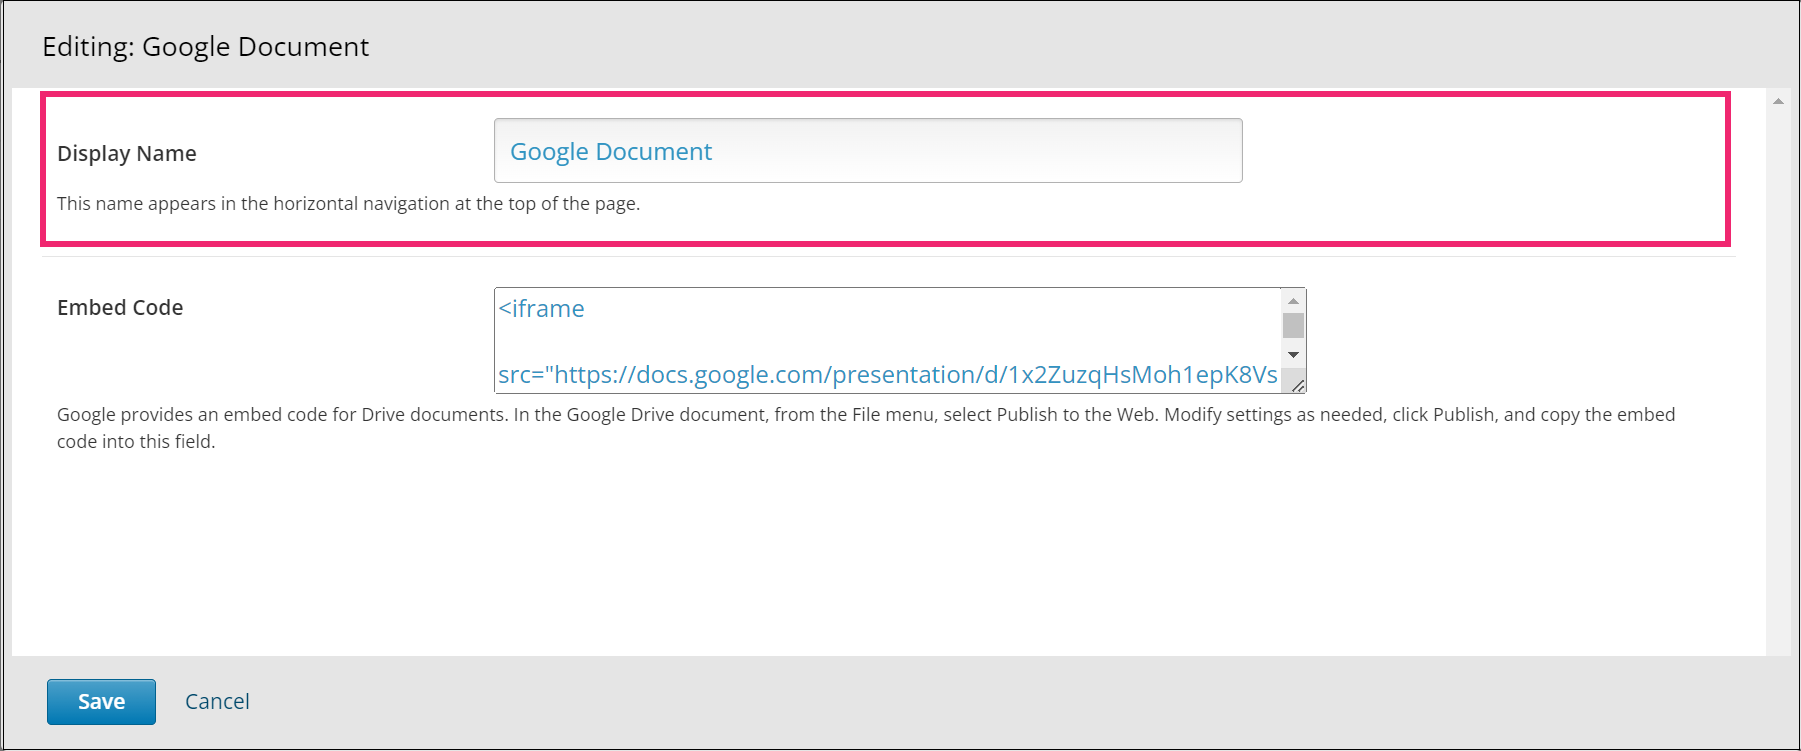
- Step 12:
Now, you need to add the Embed Code of the document. To do this, log in to your Google Drive account and open the document you want to add to the course.
- Step 13:
Once you are in the document, click on the File tab. For this example, we will use a Spreadsheet document, but the steps are the same for any document.
- Step 14:
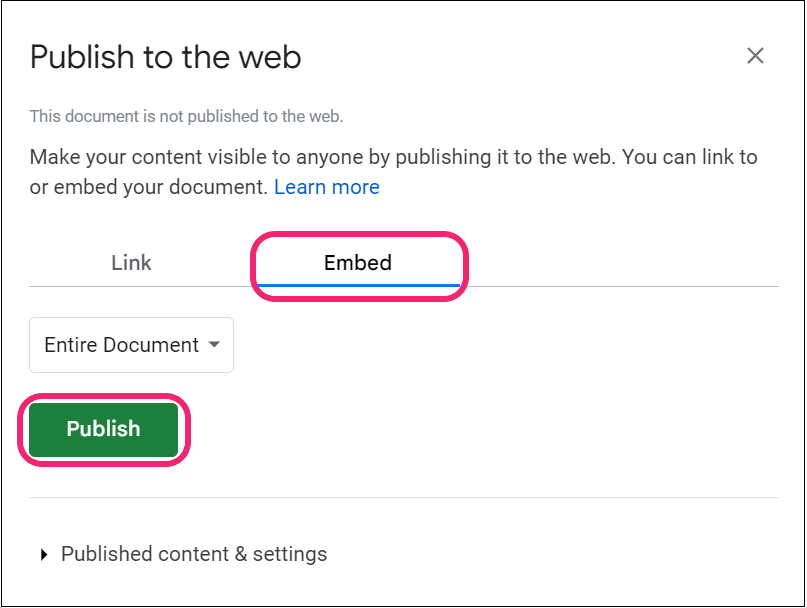
Then, click the Share option and select Publish to Web.
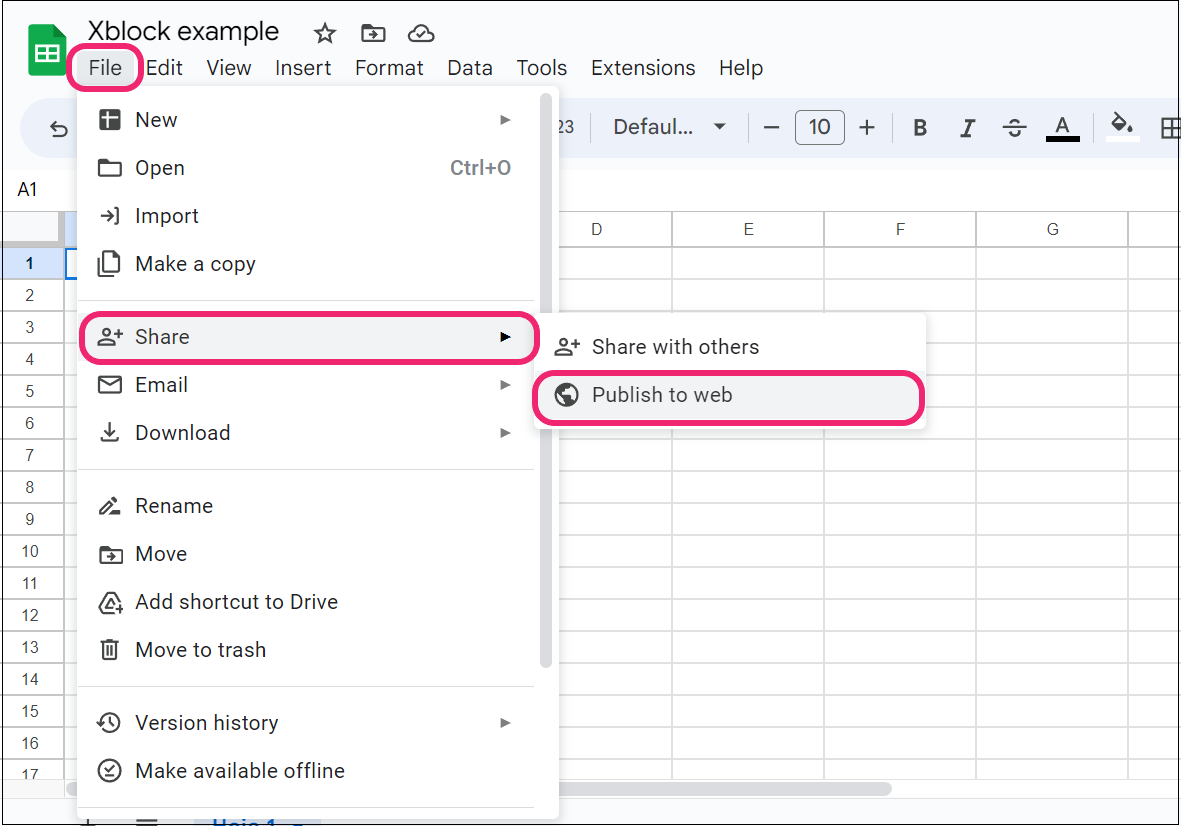
- Step 15:
A window will open where you can adjust the publishing parameters. Depending on the type of document you are working with, you can set different options. However, no matter what settings you make, select the Embed option.
- Step 16:
To finish, click on Publish.
- Step 17:
Google will then create an embed code for you to copy. Select the code and press the Ctrl key + C key to copy it.

- Step 18:
Go back to the editor window and paste the code in the Embed code section.
- Step 19:
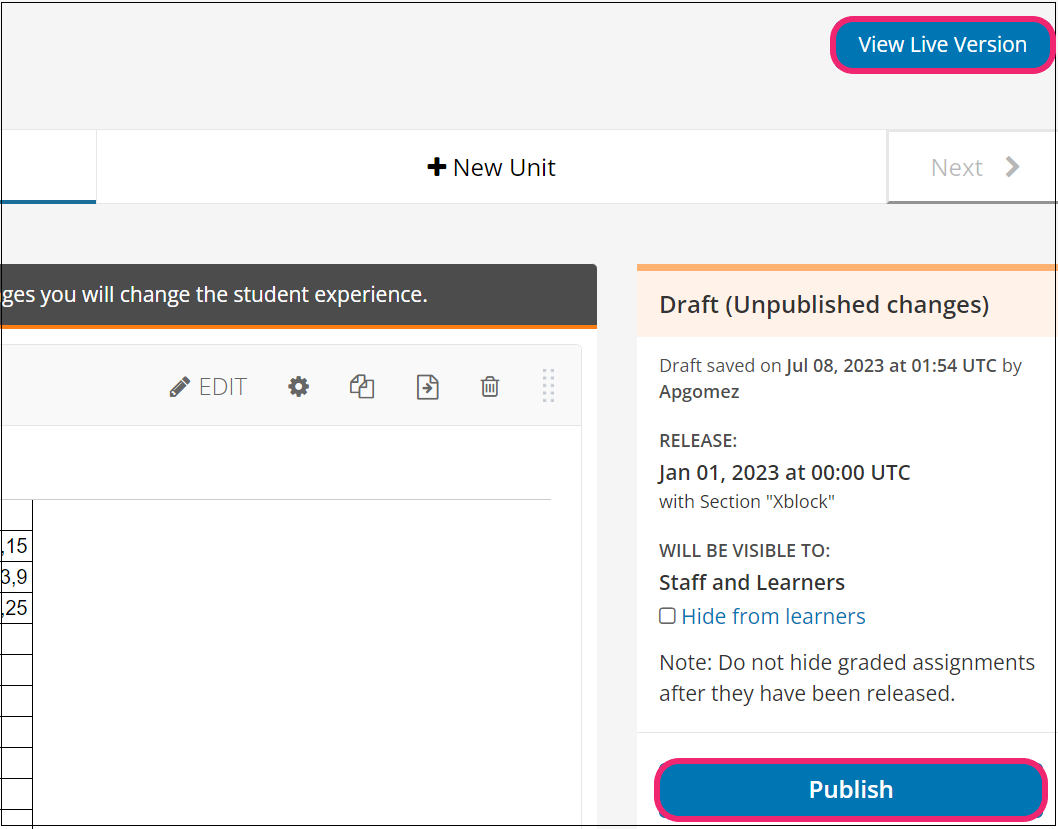
Finish the configuration of the component and click on the Save button.

- Step 20:
Publish the unit and check how your new component looks on its final version by clicking the View Live Version button.
Back to main menu of What is an XBlock?.