What is an LTI component?
Contents
What is an LTI component?#
Learning Tools Interoperability (LTI) facilitates seamless integration of remote learning tools into online courses, spanning interactive applications, digital textbooks, and more. Through LTI’s capabilities, instructors create dynamic and interactive learning environments surpassing traditional materials. This component empowers you to embed external resources like specialized apps, non-PDF textbooks, H5P components, BBB, BG, Blue Button, and Zoom directly into your course. LTI bridges the gap between your course system and remote tools for effortless content integration. Beyond passive delivery, LTI fosters interaction and participation. Some LTI-integrated tools elicit learner responses, enabling real-time engagement evaluated by providers for instant feedback, enhancing the learning process.
What are the benefits of using LTI components?#
Seamless Integration: LTI components allow for effortless integration of remote learning tools within your course, ensuring a smooth experience for both educators and learners.
Diverse Content Inclusion: Through LTI, you can easily incorporate a variety of learning resources such as interactive content, third-party applications, and diverse formats of materials beyond just PDFs.
Flexibility in Grading Systems: LTI components offer the flexibility to link with external grading systems, granting educators the freedom to use preferred evaluation mechanisms while maintaining course coherence.
How to implement version 1.1 and 1.2 of the LTI component?#
Given your understanding of what an LTI component is and its benefits, it is important to note that when you integrate an LTI component into your course, the edX Learning Management System (LMS) functions as the LTI tool consumer, while the external tool or content serves as the LTI tool provider.
Prior to making these materials accessible in your course, make sure to thoroughly review all supplementary materials to ensure their accessibility.
Note
For more information about it, you may also visit Accessibility Best Practices for Developing Course Content
Once you have decided which LTI tool provider implement in your course, you must:
- Step 1:
Go to Studio. Remember, you can access it through the link in your ECC account or by going to studio.edunext.co and signing in with your email and password.
- Step 2:
Open the course where you will add the LTI component.
- Step 3:
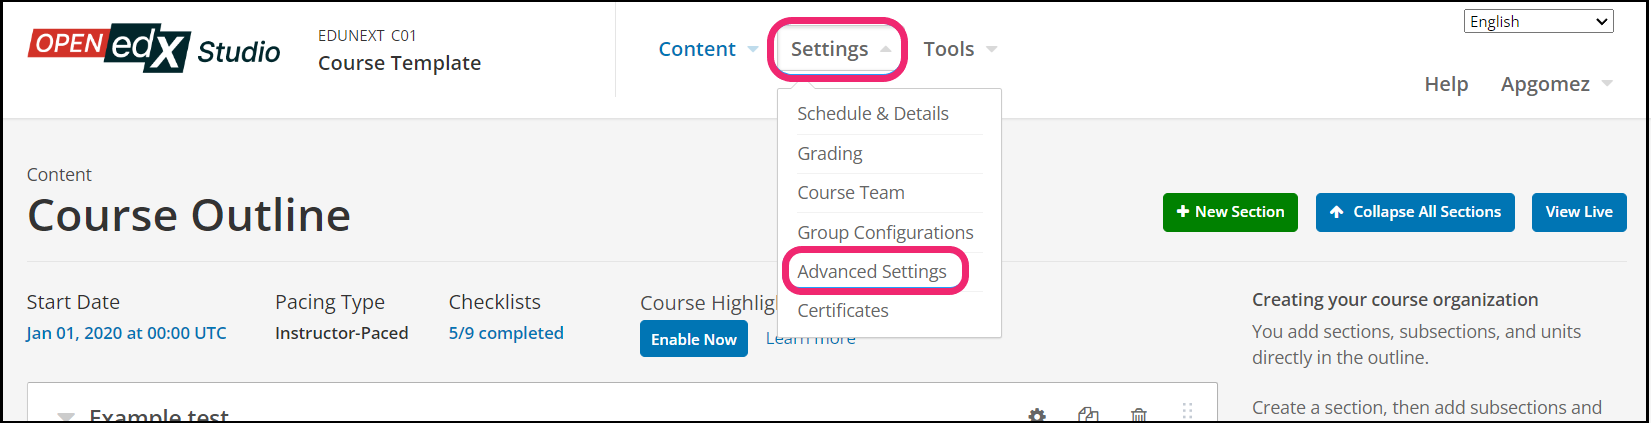
Click on the Settings tab and select the Advanced Settings option.
- Step 4:
In the section Advanced Module List, add
lti_consumerbetween the square brackets.[ "lti_consumer" ]
Note
Add the XBlock command with an indented space and without any space before or after quotation marks, as shown in the example above, to avoid execution errors.
- Step 5:
Obtain LTI Information. Before you create an LTI component from an external LTI provider in a unit, you need the following information to implement it in your course correctly:
The launch URL: (if the LTI component requires a student response that will be graded). You obtain the launch URL from the LTI provider. The launch URL is the URL that Studio sends to the external LTI provider so that the provider can send back students’ grades.
The LTI Passports policy key: This policy key has three parts: an LTI ID, a client key, and a client secret.
The LTI ID: This is a value that you create to refer to the external LTI provider. You should create an LTI ID that you can remember easily. The LTI ID can contain uppercase and lowercase alphanumeric characters, as well as underscore characters (_). It can be any length. For example, you may create an LTI ID that is as simple as test_lti_id, or your LTI ID may be a string of numbers and letters such as id_21441 or book_lti_provider_from_new_york.
The client key: This value is a sequence of characters that you obtain from the LTI provider. The client key is used for authentication and can contain any number of characters. For example, your client key may be b289378-f88d-2929-ctools.school.edu.
The client secret: This value is a sequence of characters that you obtain from the LTI provider. The client secret is used for authentication and can contain any number of characters. For example, your client secret can be something as simple as secret, or it may be a string of numbers and letters such as 23746387264 or yt4984yr8.
To create the LTI Passports policy key, combine the LTI ID, client key, and client secret in the following format (make sure to include the colons):
[
  "lti_id:client_key:client_secret"
]
For example, an LTI Passports policy key may resemble any of the following:
[
  "test_lti_id:b289378-f88d-2929-ctools.school.edu:secret"
]
[
  "id_21441:b289378-f88d-2929-ctools.school.edu:23746387264"
]
[
  "book_lti_provider_from_new_york:b289378-f88d-2929-ctools.company.com:yt4984yr8"
]
- Step 6:
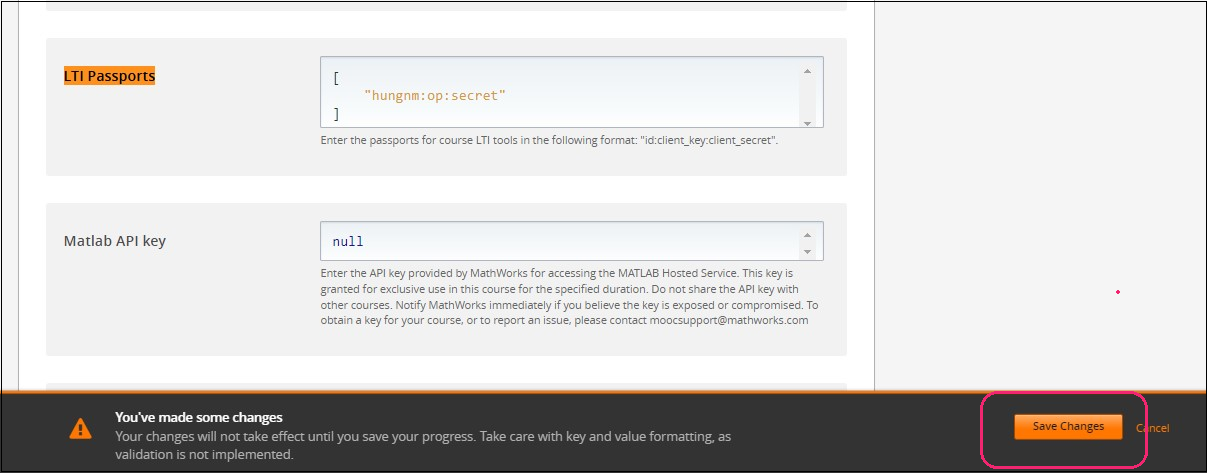
After you have created the LTI Passports policy key using the information gathered from the LTI provider, you must scroll down on the same Advanced Settings page and locate the section labeled LTI Passports. Here, you will need to insert the LTI Passports policy key between the square brackets.
For example:
[
  "lti_id:client_key:client_secret"
]
Note
If you have multiple LTI providers, separate the values for each LTI Passports policy key with a comma. Make sure to surround each entry with quotation marks. You can follow this example:
[
  "hungnm:op:secret", "id_21441:b289378-f88d-2929-ctools.school.edu:23746387264"
]
- Step 7:
At the button on the screen, click on Save Changes.
- Step 8:
After this, the Xblock should be available, so click the Content tab and select the Outline option to get back to the course content.

- Step 9:
Under Outline, go to the section, then the subsection, and finally to the unit or page where you want to add the LTI component.
- Step 11:
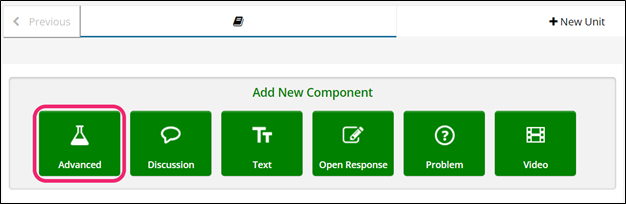
Once you are there, click Advanced Component in the Add New Component bar.
- Step 12:
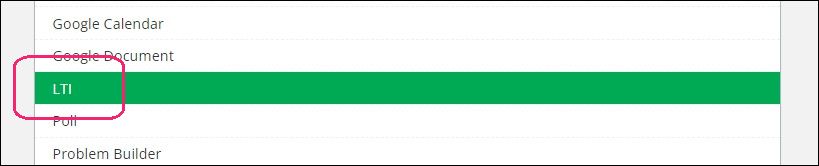
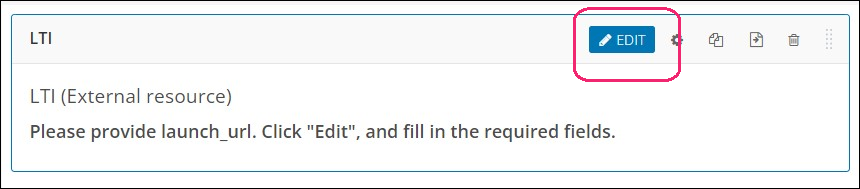
You will see a list of all the advanced components added to your course. Click on LTI. The system will add the component immediately to the unit.
- Step 13:
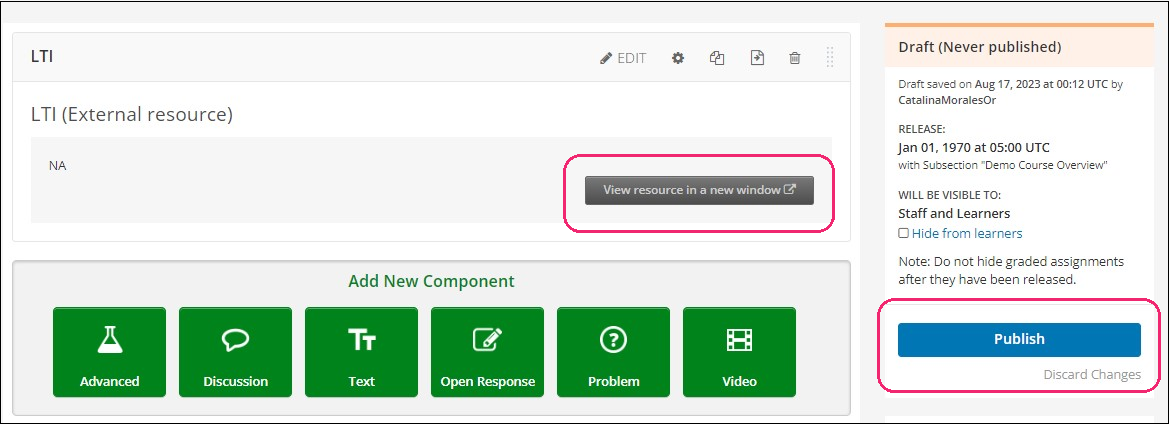
Click the Edit button on the upper right corner of the new component to add the content details.
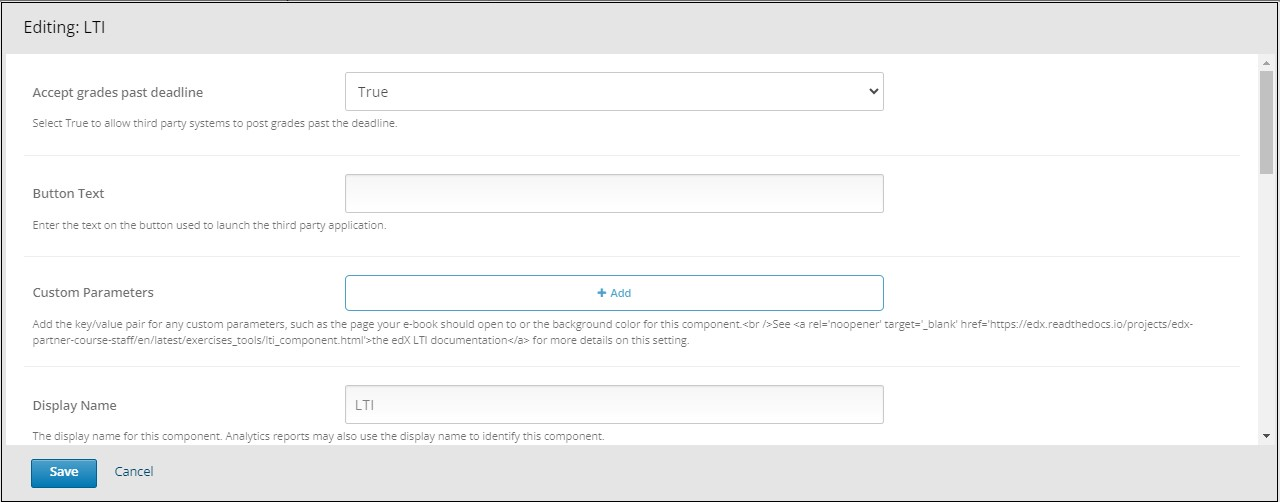
- Step 14:
The editor window is going to open. Here you will find several options to set up the XBlock as needed. The principal options that you must edit are:
Accept grades past deadline: Specifies whether third party systems are allowed to post grades past the deadline. By default, this value is set to True.
Button Text: Enter a custom label for the button that launches the third-party LTI application.
Custom Parameters: Enables you to add one or more custom parameters. For example, if you added an e-book, you could set a custom parameter that opens the e-book to a specific page. You could also use a custom parameter to set the background color of the LTI component. Every custom parameter has a key and a value.
Display Name: Specifies the name of the component. This name appears above the component and in the course ribbon at the top of the page in the courseware. Unique, descriptive display names help you identify problems quickly and accurately for analysis.
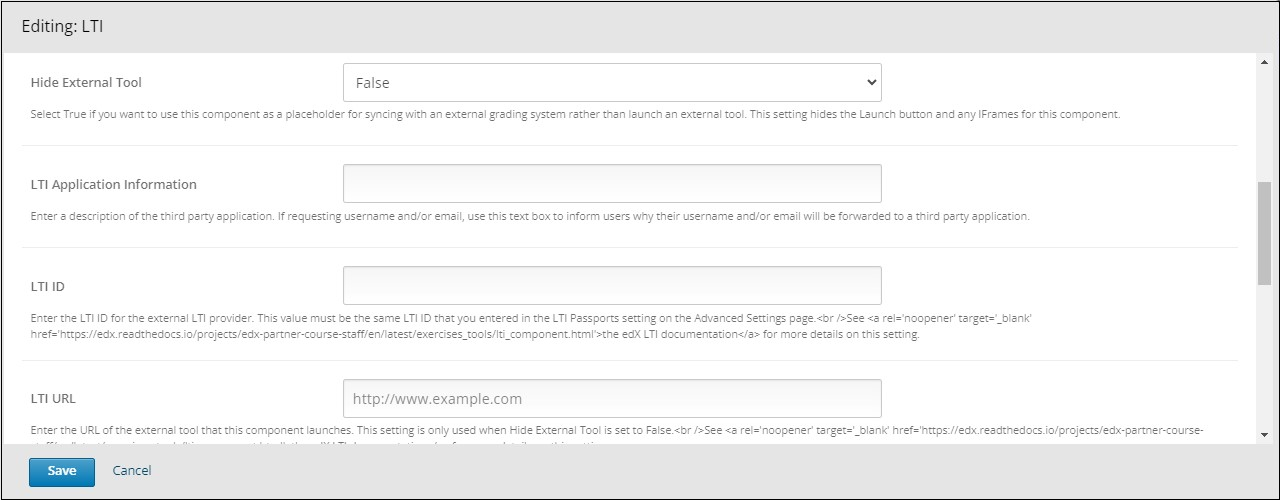
Hide External Tool: Indicates whether you want to launch an external tool or to use this component as a placeholder for syncing with an external grading system. If you set the value to True, Studio hides the Launch button and any IFrames for this component. By default, this value is set to False.
LTI Application Information: Enter a description of the third party application. If requesting username and/or email, use this text box to inform users why their username and/or email will be forwarded to a third-party application.
LTI ID: Specifies the LTI ID for the external LTI provider. This value must be the same LTI ID that you entered on the Advanced Settings page.
LTI URL: Specifies the URL of the external tool that this component launches. This setting is applicable when Hide External Tool is set to False.
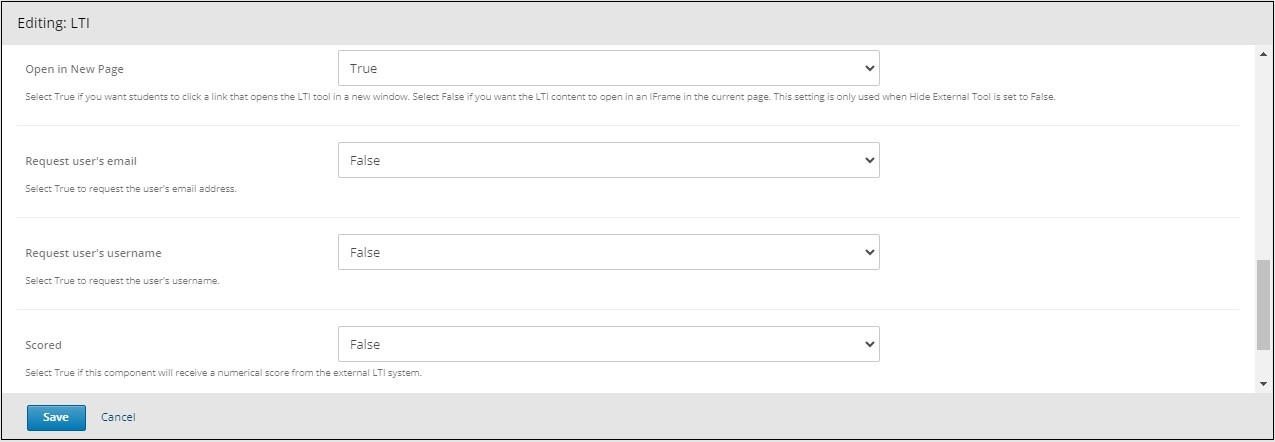
Open in New Page: Specify whether the problem opens in a new page. If you set this value to True, the student clicks a link that opens the LTI content in a new window. If you set this value to False, the LTI content opens in an IFrame in the current page. This setting is applicable when Hide External Tool is set to False.
Request user’s email: If Open in New Page is set to True, you can also request user information. Set this value to True to request the user’s email address.
Request user’s username: If Open in New Page is set to True, you can also request user information. Set this value to True to request the user’s username.
Scored: Indicates whether the LTI component receives a numerical score from the external LTI system. By default, this value is set to False.
Weight: Specifies the number of points possible for the problem. By default, if an external LTI provider grades the problem, the problem is worth 1 point, and a student’s score can be any value between 0 and 1. This setting is applicable when Scored is set to True.
- Step 13:
Finish the configuration of the component and click on the Save button.
- Step 14:
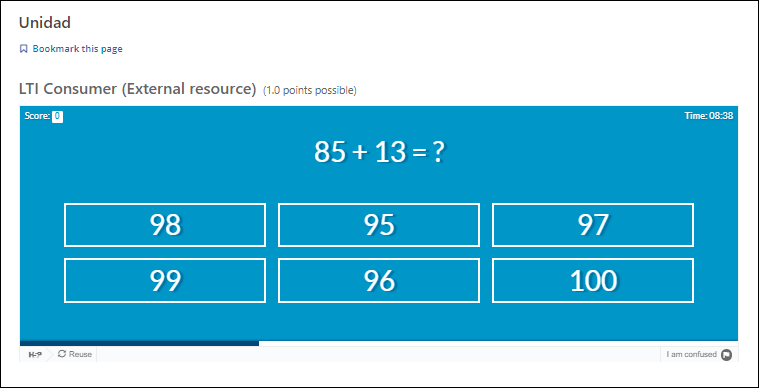
Publish the unit and check how your new component looks on its final version by clicking the View Live Version button.
How to implement version 1.3 of the LTI component?#
Once you have decided which LTI tool provider to implement in your course, you must:
- Step 1:
Go to Studio. Remember, you can access it through the link in your ECC account or by going to studio.edunext.co and signing in with your email and password.
- Step 2:
Open the course where you will add the LTI component.
- Step 3:
Click on the Settings tab and select the Advanced Settings option.
- Step 4:
In the section Advanced Module List, add
lti_consumerbetween the square brackets.[ "lti_consumer" ]
Note
Add the XBlock command with an indented space and without any space before or after quotation marks, as shown in the example above, to avoid execution errors.
- Step 5:
After this, you should find the Xblock available, so click the Content tab and select the Outline option to get back to the course content.
- Step 6:
Under Outline, go to the section, then the subsection, and finally to the unit or page where you want to add the LTI component.
- Step 7:
Once you are there, click Advanced Component in the Add New Component bar.
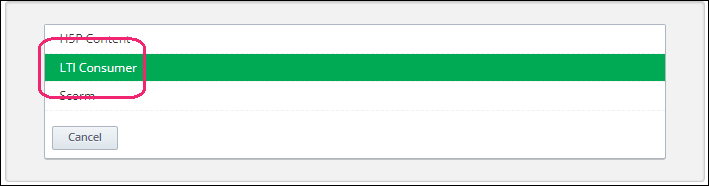
- Step 8:
You will see a list of all the advanced components added to your course. Click on LTI Consumer to add the component immediately to the unit.
- Step 9:
Click the Edit button on the upper right corner of the new component to add the content details.
- Step 10:
Visit the page of the component you have chosen and gather the following information needed to configure the LTI XBlock:
External Link
Login URL
Redirect URL
Keyset URL
- Step 11:
Fill out the settings of the component in Studio with the LTI XBlock information gathered in the last step:
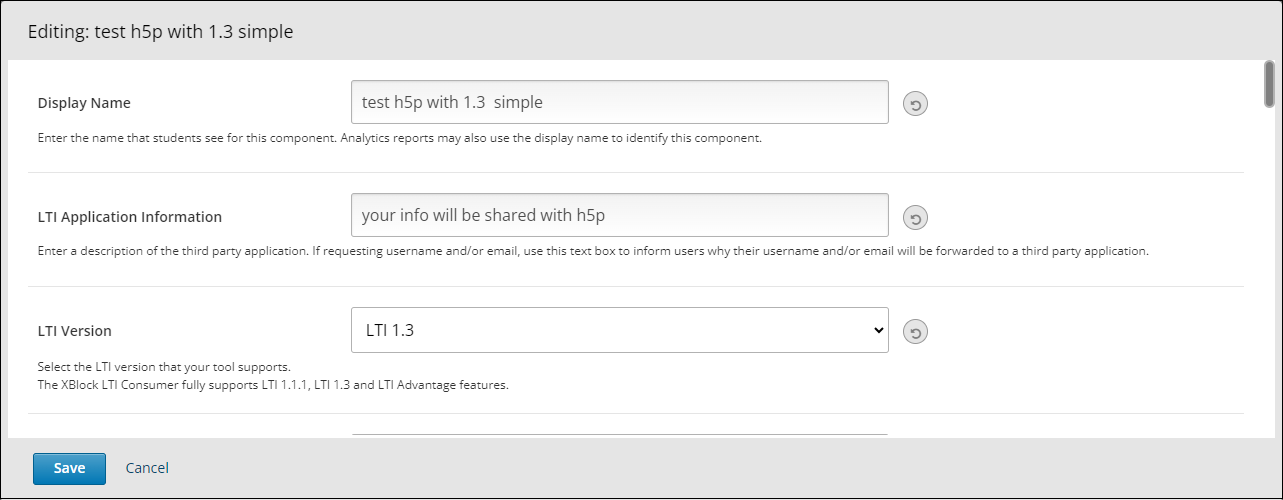
Display Name: Enter the name that students see for this component. Analytics reports may also use the display name to identify this component.
LTI Application Information: Enter a description of the third-party application. If requesting a username and/or email, use this text box to inform users why their username and/or email will be forwarded to a third-party application.
LTI Version: LTI 1.3

Tool Launch URL: External Link obtained earlier.
Tool Initiate Login URL: Login URL obtained earlier.
Tool Public Key Mode: Keyset URL obtained earlier.
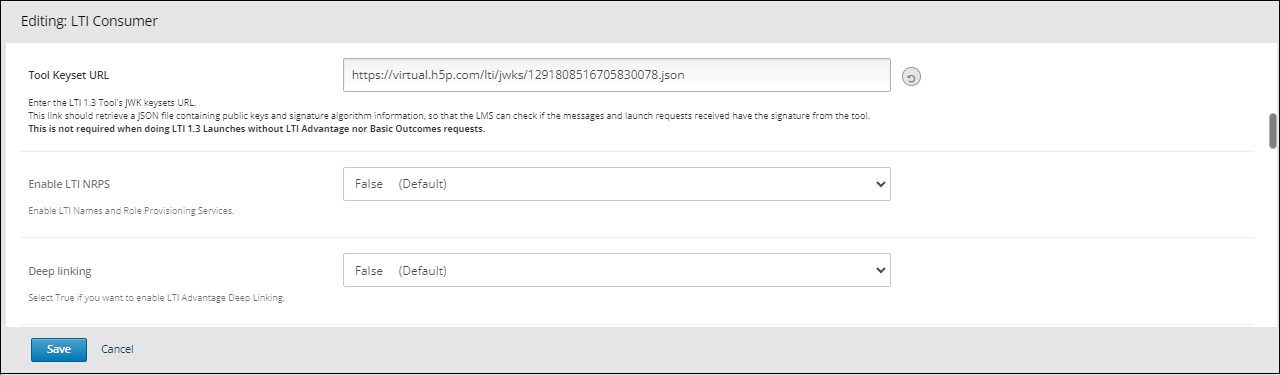
Tool Keyset URL: Enter the LTI 1.3 Tool’s JWK keysets URL. This link should retrieve a JSON file containing public keys and signature algorithm information so that the LMS can check if the messages and launch requests received have the signature from the tool. This is not required when doing LTI 1.3 Launches without LTI Advantage or Basic Outcomes requests.
Enable LTI NRPS: Enable LTI Names and Role Provisioning Services.
Deep linking: Select True if you want to enable LTI Advantage Deep Linking.
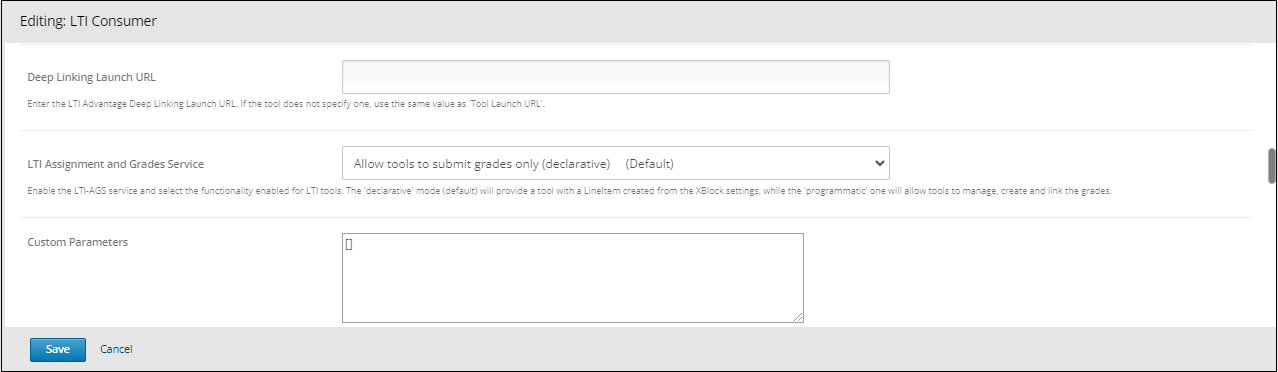
Deep Linking Launch URL: Enter the LTI Advantage Deep Linking Launch URL. If the tool does not specify one, use the same value as ‘Tool Launch URL’.
LTI Assignment and Grades Service: Enable the LTI-AGS service and select the functionality enabled for LTI tools. The ‘declarative’ mode (default) will provide a tool with a LineItem created from the XBlock settings, while the ‘programmatic’ one will allow tools to manage, create, and link the grades.
Custom Parameters: Add the key/value pair for any custom parameters, such as the page your e-book should open to or the background color for this component. Ex. [“page=1”, “color=white”].
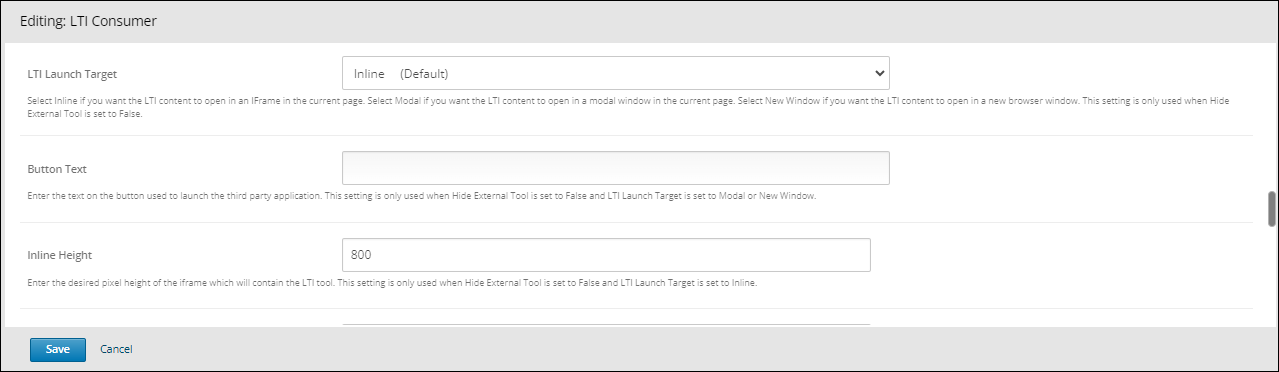
LTI Launch Target: Select Inline if you want the LTI content to open in an IFrame on the current page. Select Modal if you want the LTI content to open in a modal window on the current page. Select New Window if you want the LTI content to open in a new browser window. This setting is only used when the Hide External Tool is set to False.
Button Text: Enter the text on the button used to launch the third-party application. This setting is only used when Hide External Tool is set to False and LTI Launch Target is set to Modal or New Window.
Inline Height: Enter the desired pixel height of the iframe which will contain the LTI tool. This setting is only used when Hide External Tool is set to False and LTI Launch Target is set to Inline.
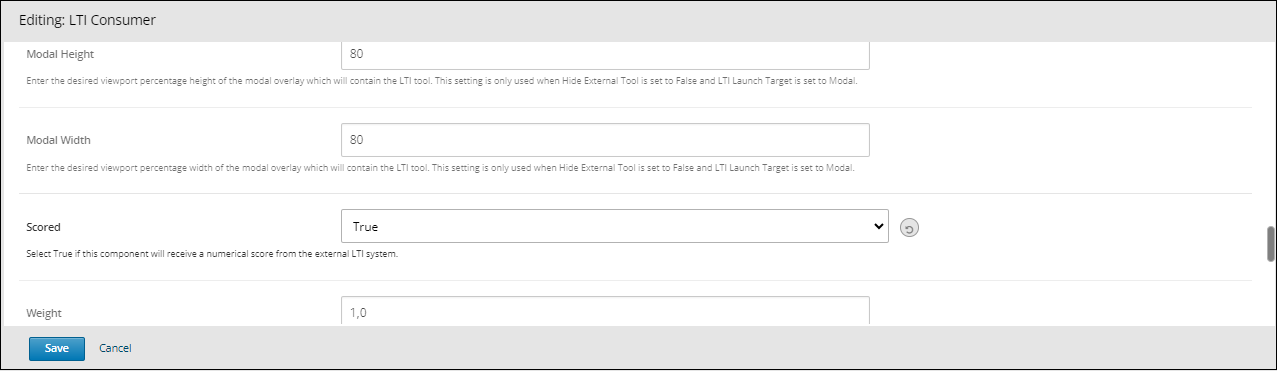
Modal Height: Enter the desired viewport percentage height of the modal overlay which will contain the LTI tool. This setting is only used when Hide External Tool is set to False and LTI Launch Target is set to Modal.
Modal Width: Enter the desired viewport percentage width of the modal overlay which will contain the LTI tool. This setting is only used when Hide External Tool is set to False and LTI Launch Target is set to Modal.
Scored: Select True if this component will receive a numerical score from the external LTI system.
Weight: Enter the number of points possible for this component. The default value is 1.0. This setting is only used when Scored is set to True.
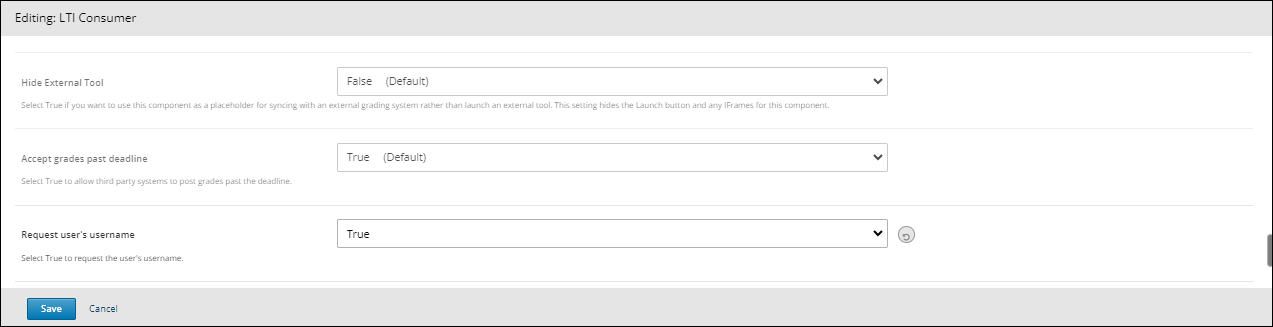
Hide External Tool: Select True if you want to use this component as a placeholder for syncing with an external grading system rather than launch an external tool. This setting hides the Launch button and any IFrames for this component.
Accept grades past deadline: Select True to allow third-party systems to post grades past the deadline.
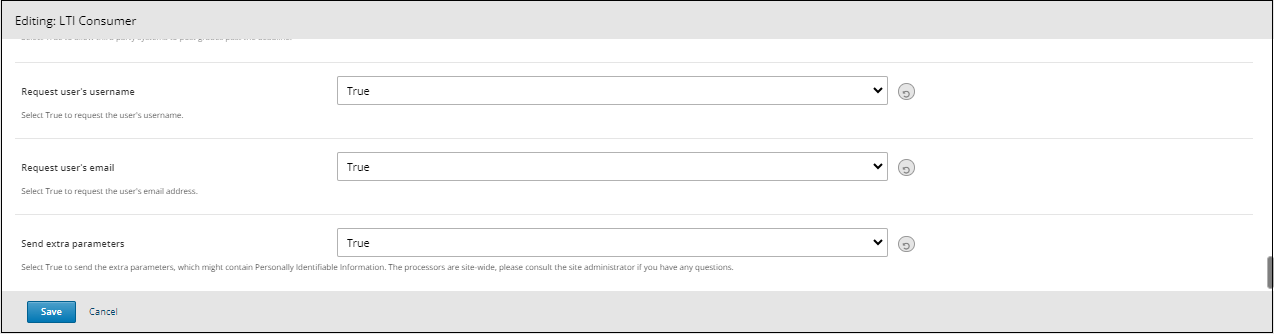
Request user’s username: Select True to request the user’s username.
Request user’s email: Select True to request the user’s email address.
Send extra parameters: Select True to send the extra parameters, which might contain Personally Identifiable Information. The processors are site-wide, please consult the site administrator if you have any questions.
Note
Remember these configurations are based on an example, feel free to customize the settings according to your specific requirements.
- Step 12:
Once you have completed filling out the information, click on the Save button.
- Step 13:
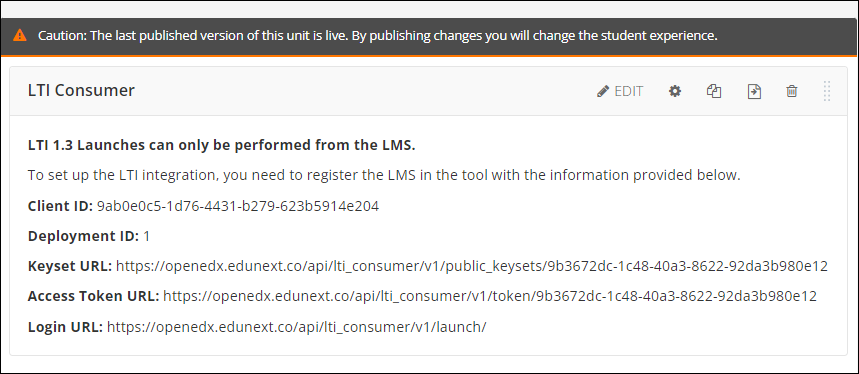
After saving the changes, the LTI consumer component in Studio will show specific information that you need to use on the chosen component page.:
Client ID
Deployment ID
Keyset URL
Access Token URL
Login URL
Note
The openedx domain (openedx.edunext.co) must be replaced with your domain in each setting.
- Step 14:
With the information obtained from the LTI Studio, complete the component details, and save all changes, then go back to Studio, and click on “publish”.
You may also visit our demo site where you can find various examples of the use of the LTI component.