Manage Learner Enrollment Options through Cards
Contents
Manage Learner Enrollment Options through Cards#
Overview#
It is possible that some organizations require the use of programs, but with a variation that allows learners to select the courses they want to see and not automatically enroll them in the courses that are preset in the program, eduNEXT created a variation of its multi-course programs, modifying the way in which learners register in the courses belonging to the program.
The original focus of the programs was to allow learners to enroll in multiple courses in a single operation automatically, but due to some needs that some of our customers perceived, it is possible that this approach does not fully fit the solution of those requirements. Therefore, an alternative way of using the programs was implemented. If you want to know the traditional way in which programs work you can visit the :doc:`Multi-Course Programs Article <../prepare_test_launch_courses/multi-course-programs>`.
In this new approach, the learner will have access to a unit within his model course (if you want to know more about what is a model course you can refer to the article about multi-course programs) that will allow him to visualize in an optimal way the information about the courses that are available in the program, such information will be displayed in the form of cards and will contain information such as course title, short description of the course, course description, course image, and additionally, a button that will allow the learner to enroll in the course of his choice.
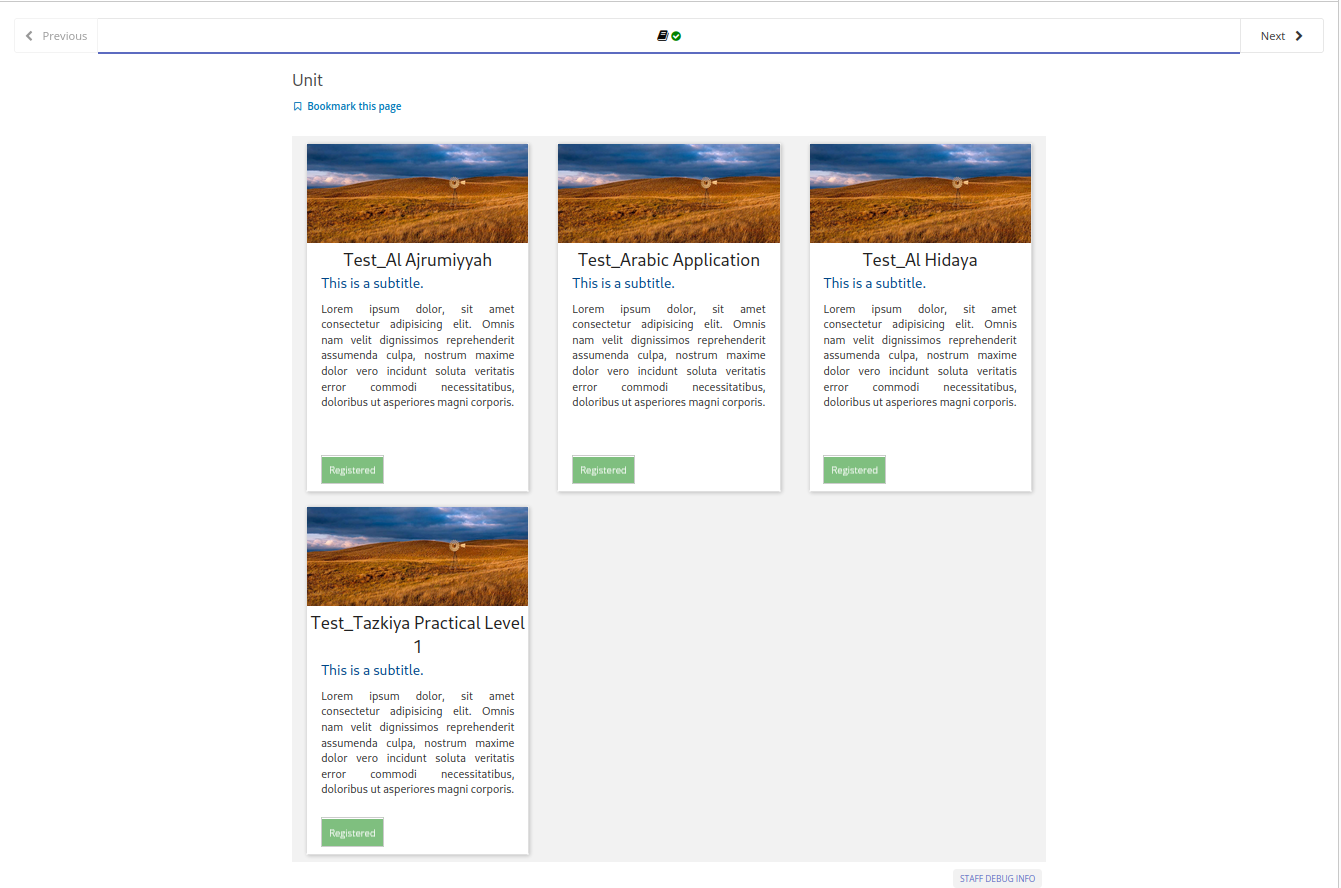
figure 1. Multi-course programs cards.#
Configuring Multi-course Programs with the New Approach#
Although the way to configure this new version of the programs is quite similar to that of traditional programs, its configuration will be done step by step, to clear up any questions that may appear at the time of doing it.
The following are the steps necessary to perform the configuration of multi-course programs with the cards approach:
You must create your model course and the courses that will belong to the program. It is not mandatory to have all the courses that will belong to the program but it is important to create at least one to perform the different functional tests.
Then, in the model course, a subsection must be created for each of the courses that will belong to the program. These subsections will represent each of the courses that belong to the program. Additionally, a unit must be added that will house a staff graded points component. This element will be in charge of notifying the grade of the course that belongs to the program to the model course.

figure 2. Staff graded points component.#
Note
The following is an outline of a model course in which we have two subsections representing two courses belonging to the program.
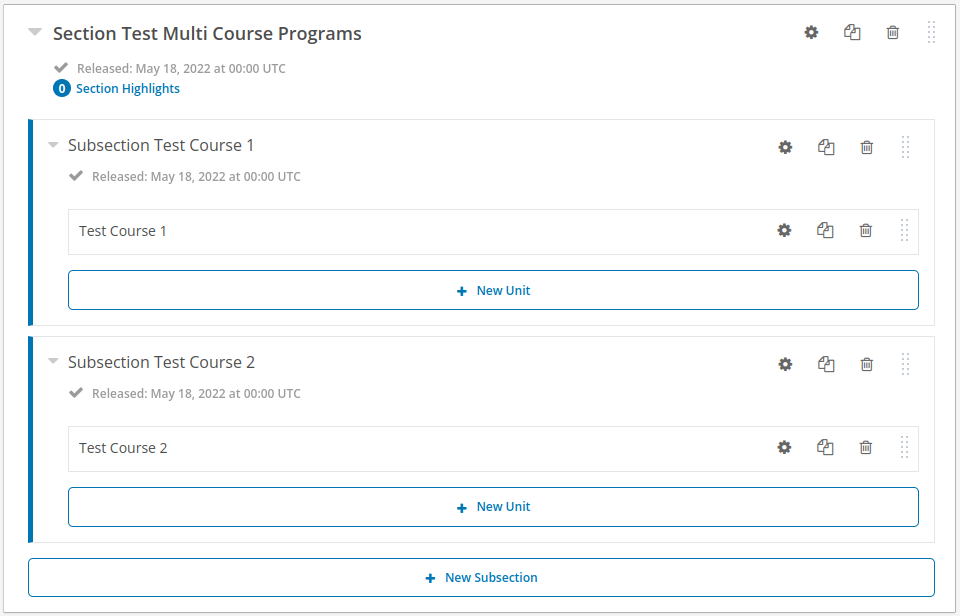
figure 3. Outline model course.#
After having the course outline configured, you must configure the grading policy for each of the subsections that represent the courses of the program. Additionally, you must also configure the certificates of each of the courses belonging to the program because, at the moment, the mechanism to transmit the grades of the courses belonging to the program to the model course is done when the learner requests his certificate. For this reason, it is necessary to have these two elements configured. The information about how to configure the grading policy can be found in the following article Grading policy Article and the information about how to configure the certificates in your course in this Certificate Article.
Go to Studio, to each of the courses belonging to the program, enter the
advanced configuration, look for the section calledOther Course Settingsand enter the following configuration (this step must be done for each of the courses belonging to the program). You should replace course-id with the ID of your model course and block-id with the ID of the staff graded point component that represents the course that is being configured.{ "EDNX_TRIGGER_GRADES_ASSIGNMENT": { "block_id": "block-id", "program_id": "course-id", "exact_score": true } }
Note
To consult the ID of the staff graded component, it is necessary to go to the course model and open the unit, as this is where the staff graded component that represents the course to which we are making the configuration is (it is important to clarify that the user that performs this procedure must be staff in the course). In this component, you will find a button called staff debug info, you must click on this button, which will open a modal in which you can visualize the id of the component (this will be the ID that is replaced in block-id).
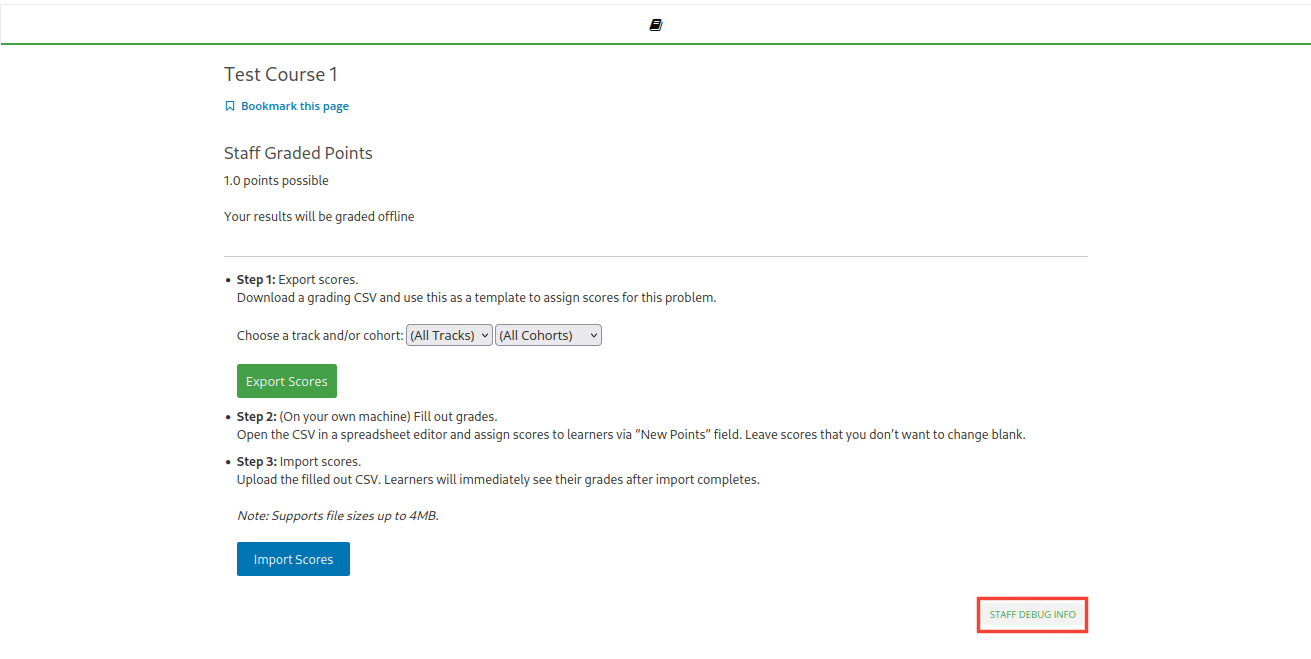
figure 4. Staff debug info button.#
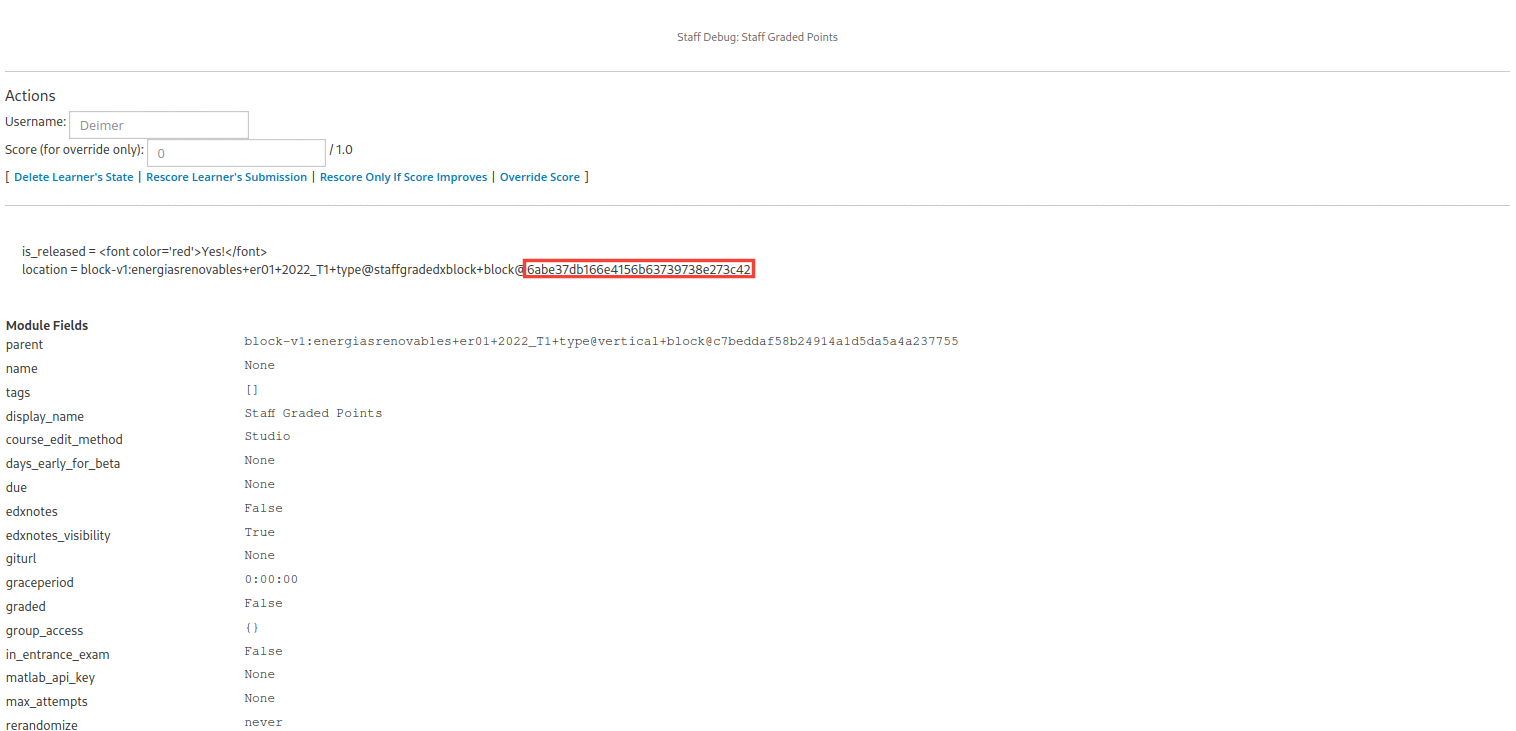
figure 5. staff graded points ID.#
Setting Up the Cards#
Once the courses that belong to the program have been correctly configured, the cards that will allow the enrollment of the electives in the model course must be added.
You must create a subsection or section where you want students to enter to select their electives.
A unit must be created and within this unit a raw html element must be added, which will be in charge of executing the script that will generate the cards.
The following code must be added in the raw html component created previously, this script has a variable called
window.configwhich must be changed every time a new configuration of our cards is required. Next, we will explain in more depth what each one of the settings means and how it must be modified.<script> window.config = { "courses": [ { "name": "course-name", "course_id": "course-id", "subtitle": "short-course-description ", "description": "Lorem ipsum dolor, sit amet consectetur adipisicing elit. Omnis nam velit dignissimos reprehenderit assumenda culpa, nostrum maxime dolor vero incidunt soluta veritatis error commodi necessitatibus, doloribus ut asperiores magni corporis.", "image": "course-image" }, ], "max_allowed_courses": 3, "control": 10, "time_control_ms": 1000, "hook_url": "webhook-url" }; </script> <script type="text/javascript" src="https://edunextpublic.s3.us-west-2.amazonaws.com/edxsites/sd-files/program-buttons.js"></script> <link rel="stylesheet" type="text/css" href="https://edunextpublic.s3.us-west-2.amazonaws.com/edxsites/sd-files/program-buttons-style.css"> <div id="root"></div>
courses: It is an array in which we must add a json object for each one of the courses that belong to the program, each entity representing each one of the courses has the following options:name: Name of the course.course_id: Course id of the course.subtitle: A short message or short description of the course.description: A description of the course (it is recommended not to be too long so as not to affect the aesthetics of the cards).image: An image that represents the course.
max_allowed_courses: Limits the number of courses in which a student can enroll.control: Number of times the script will retry the student’s enrollment when the enrollment is unsuccessful.time_control_ms: Time it will take between each of the attempts.hook_url: This url must be configured by support team.
After setting up these configurations, it is necessary to contact the Support Team to finish the configuration.