What is In-video Quiz XBlock?
Contents
What is In-video Quiz XBlock?#
In-video Quiz XBlock is an interactive video content that includes elements such as quizzes, polls, annotations, and other interactive elements. This type of content allows viewers to engage with the video by answering questions or interacting with the content in various ways.
Some of the functions of the In-video Quiz XBlock are:
Question Types: The tool should offer various question types, such as multiple-choice, true/false, short answer, and more. This variety allows you to tailor the quiz to the content and learning objectives.
Timestamped Questions: You can attach quiz questions to specific timestamps in the video. When viewers reach those points in the video, the corresponding quiz question appears for them to answer.
Instant Feedback: After answering a question, viewers should receive immediate feedback on whether their response was correct or not. This helps with active learning and comprehension.
What are the benefits of using In-video Quiz XBlock?#
Engagement: Interactive quizzes within videos can capture learners’ attention and make the learning experience more engaging. The active participation required to answer questions keeps learners involved and focused on the content.
Active Learning: In-video quizzes encourage active learning by prompting learners to think critically about the material presented in the video. This helps with information retention and comprehension.
Assessment: Quizzes allow educators to assess learners’ understanding of the material in real time. This can help identify areas where learners are struggling and adapt teaching strategies accordingly.
How to implement In-video Quiz XBlock?#
- Step 1:
Go to Studio. Remember, you can access it through the link in your ECC account or by going to studio.edunext.co and signing in with your email and password.
- Step 2:
Open the course where you will add the In-video Quiz XBlock.
- Step 3:
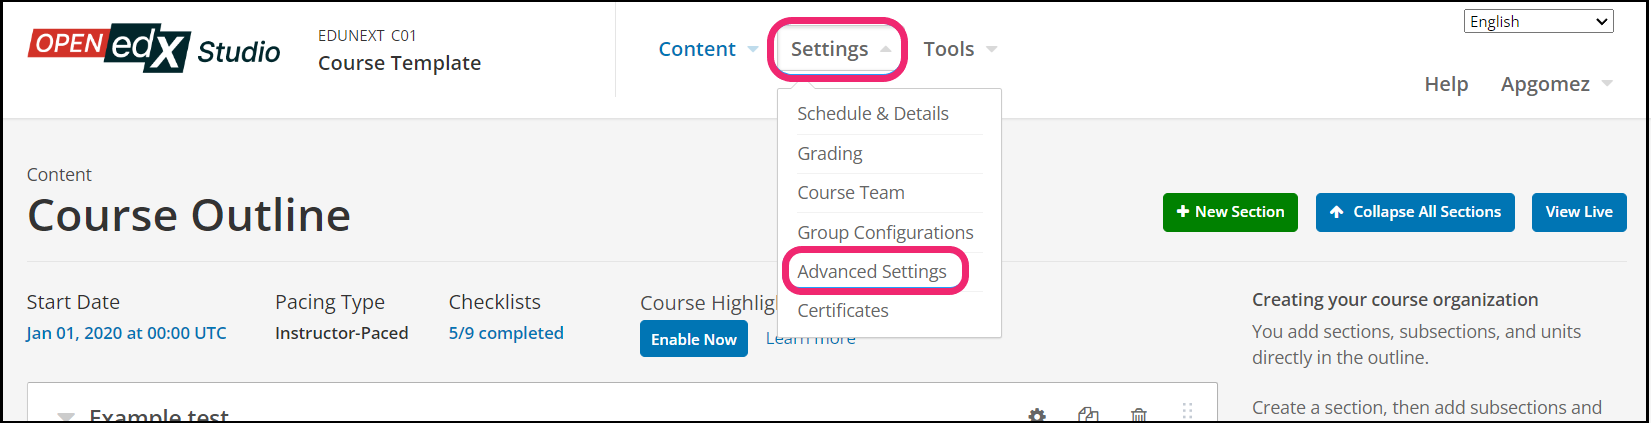
Click on the Settings tab and select the Advanced Settings option.
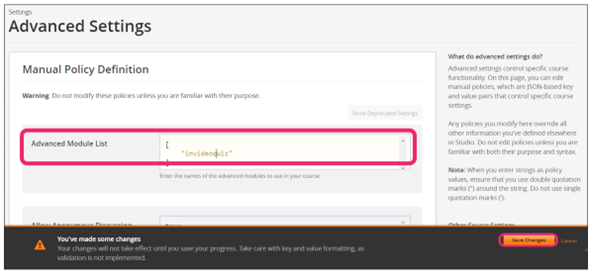
- Step 4:
In the section Advanced Module List, add
invideoquizbetween the square brackets.[ "invideoquiz" ]
Note
Add the XBlock command without spaces and without any spaces before or after the quotation marks, as shown in the example above, to avoid execution errors.
- Step 5:
At the button on the screen, click on Save Changes.
- Step 6:
After this, the XBlock should be available, so click the Content tab and select the Outline option to get back to the course content.

- Step 7:
Under Outline, go to the section, then the subsection, and finally to the unit or page where you want to add the In-video Quiz XBlock.
- Step 8:
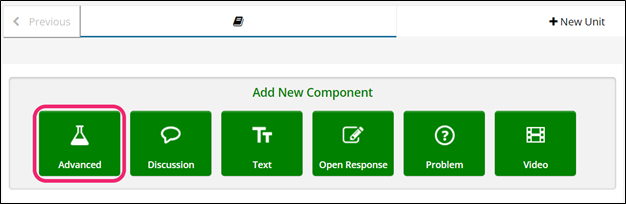
Once you are there, click Advanced Component in the Add New Component bar.
- Step 9:
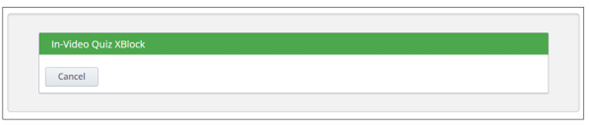
You will see a list of all the advanced components added to your course. Click on In-video Quiz. The system will add the component immediately to the unit.
- Step 10:
Click the Edit button on the upper right corner of the new component to add the content details.

- Step 11:
The editor window is going to open. Here you will find several options to set up the XBlock as needed. The principal options that you have to edit are:
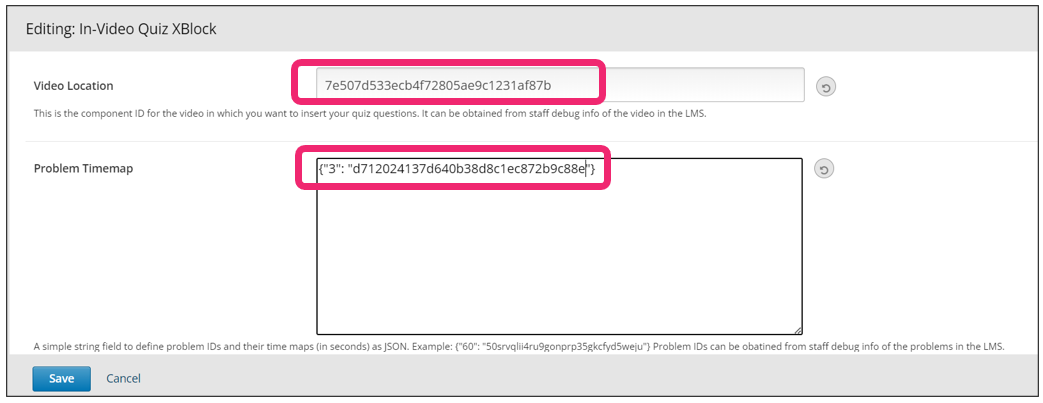
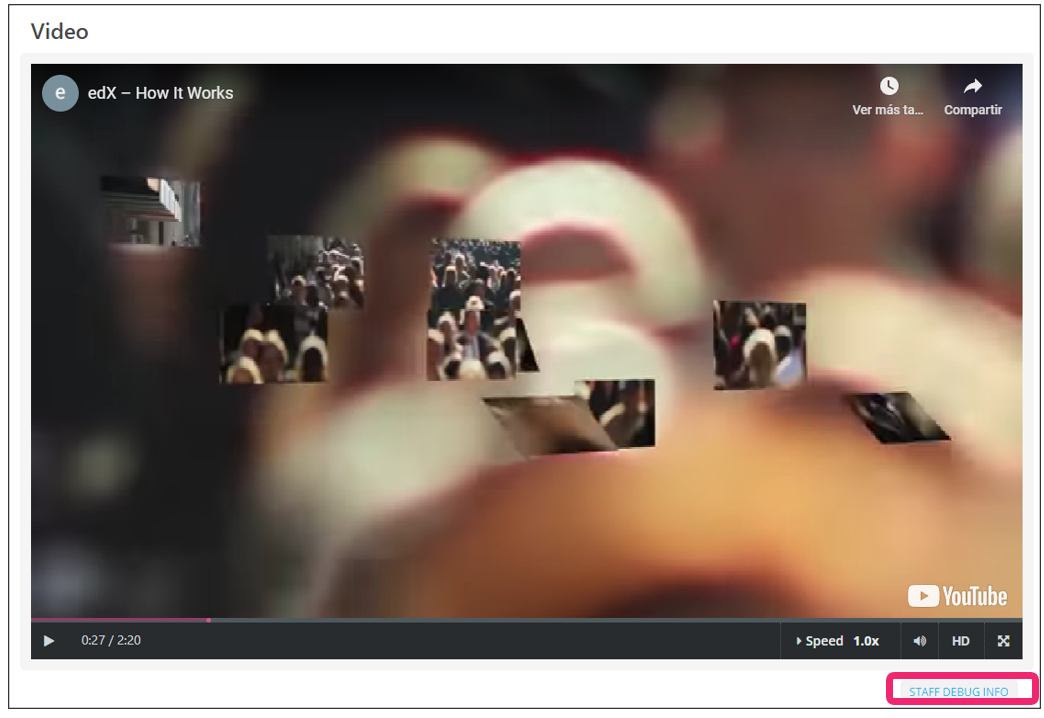
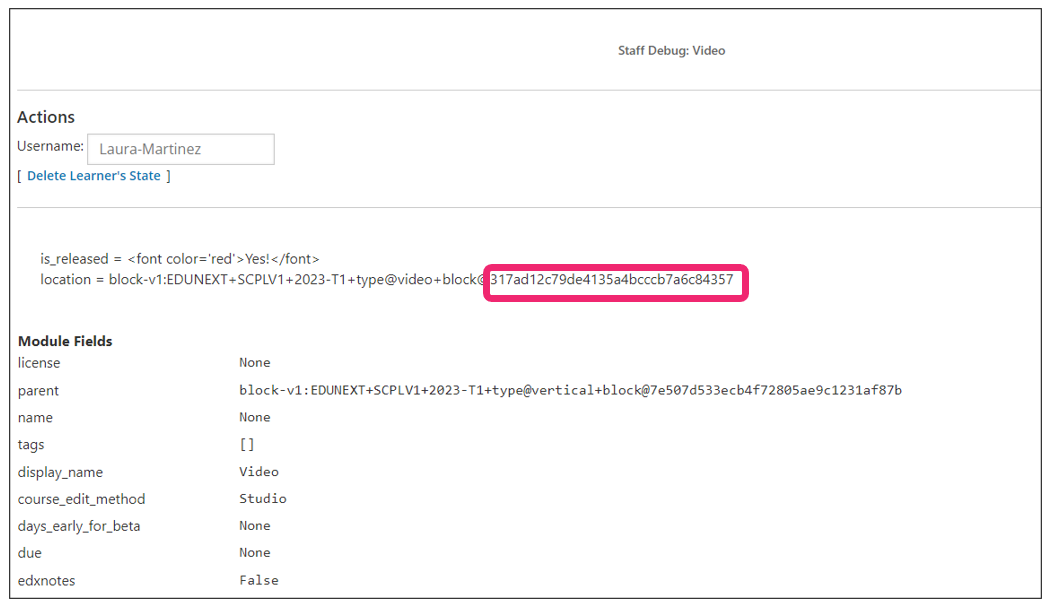
Video Location: This is the component ID for the video in which you want to insert your quiz questions. It can be obtained from staff debug info of the video in the LMS.
Problem Time Map: Now you have to add the problem map that you want to appear in the video as well as the time (in seconds) after which you want the problem to fade in.
Note
Make sure to keep the format of how you specify the time and ID:
[
  "Time in seconds": "problem ID"
]
Note
Keep in mind that the video ID and the problem ID must be the ones that are displayed on staff debug info in the LMS.
- Step 12:
A simple string field to define problem IDs and their time maps (in seconds) as JSON, for example:
[
  "60": "50srvqlii4ru9gonprp35gkcfyd5weju"
]
Note
To successfully add this component, you must first add the video and the question separately, for more information, you can consult the tutorial video,.
- Step 13:
Finish the configuration of the component and click on the Save button.
- Step 14:
Publish the unit and check how your new component looks on its final version by clicking the View Live Version button.

You may also visit our demo site where you can find various examples of the use of the In-video Quiz XBlock.