What is H5P XBlock?
Contents
What is H5P XBlock?#
H5P is a popular open-source framework that allows you to create various types of interactive content, such as quizzes, presentations, videos, games, and more. It provides a user-friendly interface for authoring content and generates embeddable HTML5 code that can be easily integrated into your courses in Open edX using an XBlock.
Some of the functions of the H5P Xblock are:
Create interactive content: You can create interactive content to engage your students.
Share content: H5P XBlock content is easy to share with other users. It lets you collaborate on projects and share your work.
Embed content: It lets you easily embed different content types in your course.
Track usage: This tool will help you track how your users interact with the content and how they use it to have the analytics and make necessary improvements or changes.
What are the benefits of using H5P XBlock?#
Increased engagement: This tool can lead to increased student participation and learning outcomes due to the type of content. Because it is more interactive than traditional content, it can hold students’ attention longer.
Reduced costs: By using the H5P XBlock to insert different types of content from various sources, such as applications or web pages, among others, you can save resources by not having to generate that material from scratch. Always check the copyright and terms of use of each piece of content you add to your course.
Personalization: You can personalize all the content you embed using the H5P XBlock to meet the needs of your students or customers.
How to implement H5P XBlock?#
- Step 1:
Go to Studio. Remember, you can access it through the link in your ECC account or by going to studio.edunext.co and signing in with your email and password.
- Step 2:
Open the course where you will add the H5P XBlock.
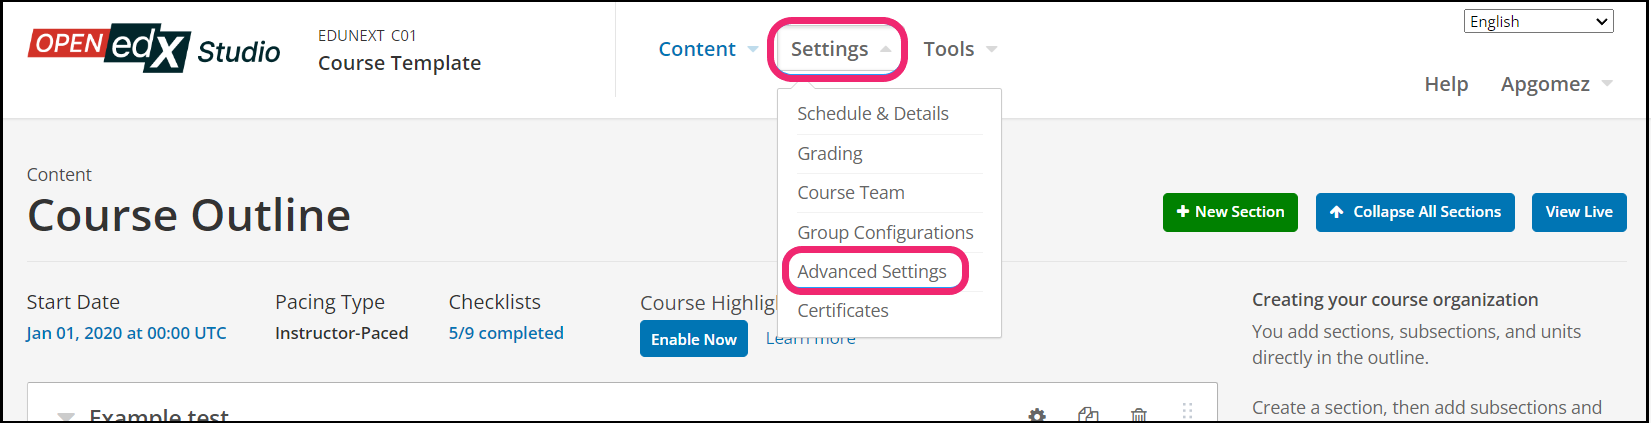
- Step 3:
Click on the Settings tab and select the Advanced Settings option.
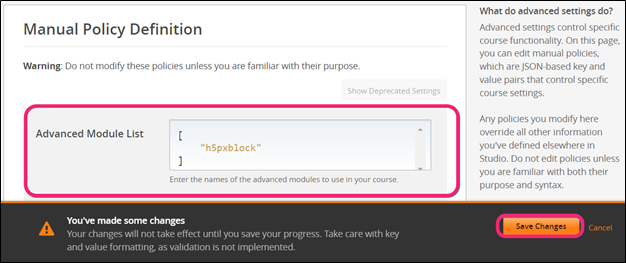
- Step 4:
In the section Advanced Module List, add
h5pxblockbetween the square brackets.[ "h5pxblock" ]
Note
Add the XBlock command with an indented space and without any space before or after quotation marks, as shown in the example above, to avoid execution errors.
- Step 5:
At the button on the screen, click on Save Changes.
- Step 6:
After this, the Xblock should be available, so click the Content tab and select the Outline option to get back to the course content.

- Step 7:
Under Outline, go to the section, then the subsection, and finally to the unit or page where you want to add the H5P XBlock.
- Step 8:
Once you are there, click Advanced Component in the Add New Component bar.
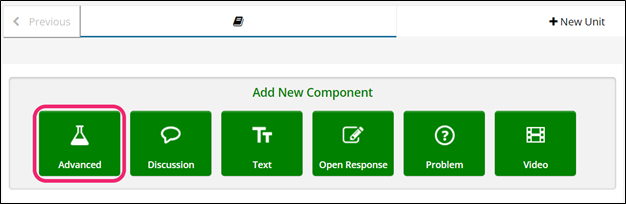
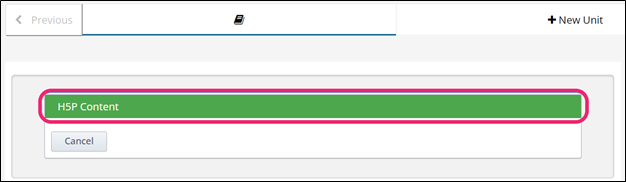
- Step 9:
You will see a list of all the advanced components added to your course. Click on H5P Content. The system will add the component immediately to the unit.
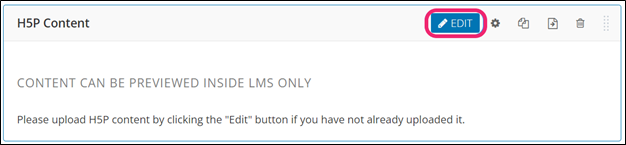
- Step 10:
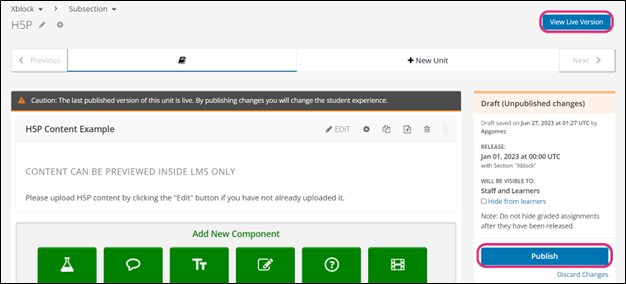
Click the Edit button on the upper right corner of the new component to add the content details.
- Step 11:
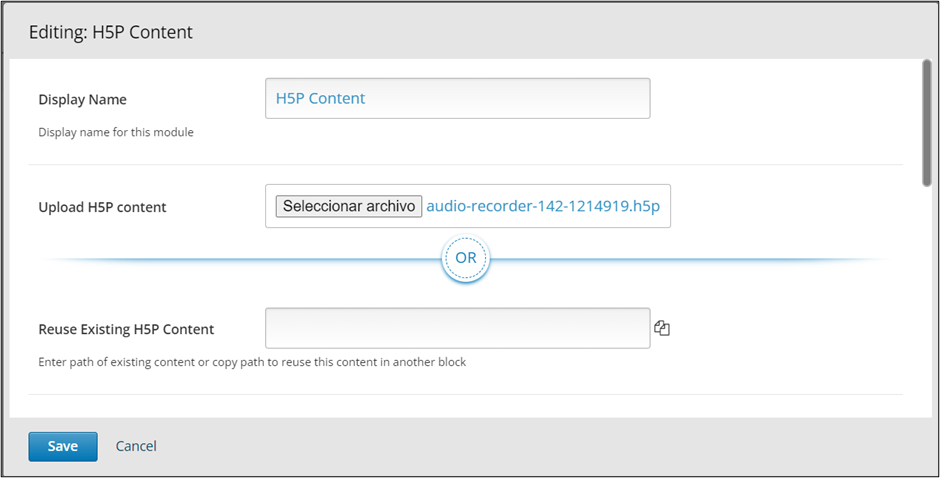
The editor window is going to open. Here you will find several options to set up the XBlock as needed. The principal options that you have to edit are:
Display Name: This is the component name that the students will see while they interact with it. The component name is H5P Content by default, but you should edit as you want.
Upload H5P Content: You can upload a .h5p file with the content you want to add to the course. On the H5P website, you will find several examples of the content you can create, and you also may download examples that you may want to use.
Reuse Existing H5P Content: Here, you can add the path to the content you want to reuse.
Note
To create your own H5P content, you can create an account on the H5P official site. There you will find the step-by-step to create the content that you want.
- Step 12:
If you use the Reuse Existing H5P Content option, copy the path to the content embedded in the black space.
If you use the Upload H5P Content option, click the Choose File button. In your computer’s file explorer, search for the file you want to upload, select it and click the Open button. The system will upload the file to the platform immediately.
- Step 13:
Finish the configuration of the component and click on the Save button.
- Step 14:
Publish the unit and check how your new component looks on its final version by clicking the View Live Version button.